iOS Setup
iOS SDK setup
Complete guide to integrating Hood push notifications into your iOS app, including SDK installation, push certificate generation, notification extensions, and advanced features for engaging your iOS users.
Requirements
Before starting the integration, ensure you have:
- Ocamba account - If you don’t have one, create it here
- Hood SDK framework - Choose one of the following integration methods:
- Swift Package Manager (SPM) - Repository link (Recommended)
- Manual Download - Download here
- Paid Apple Developer Account - With Admin role for push certificate generation
- iOS Push Certificate - APNs certificate for your application
- Physical iOS device - iPhone or iPad for testing (simulator not sufficient)
- Mac with Xcode - Latest version recommended
- iOS 10+ - Minimum deployment target
Setup
1. Configure iOS Push Credentials
To send push notifications to iOS users, you need to authenticate with Apple Push Notification service (APNs). Apple provides two authentication methods — choose one based on your preference:
- iOS p8 Token-Based Connection (Recommended): Never expires, works for all apps in your account, simpler setup.
- iOS p12 Cert-Based Connection: Expires after 1 year, single app only, requires annual renewal.
Once you’ve configured your APNs credentials in Ocamba, continue with the SDK integration below.
2. Add Hood SDK to Your Project
Hood provides an SDK in the form of a framework to ease integrating the Hood Analytics and Push Notification features into your iOS app.
Choose one of the following integration methods:
Option A: Swift Package Manager (SPM) - Recommended
In Xcode, go to File → Add Packages and enter the repository URL:
https://gitring.com/ocamba-pub/ocamba-ios-sdk
Select the version rule (recommended: “Up to Next Major Version” from 25.11.20), then click Add Package. Once Xcode fetches the dependency, select your target and click Add Package again to complete the integration.
The OcambaHood framework will now be automatically linked to your project.
Option B: Manual Integration
If you prefer manual integration or have specific project requirements:
Download the framework from the link provided in Requirements. If the downloaded file has a .tar.gz extension, uncompress it first.
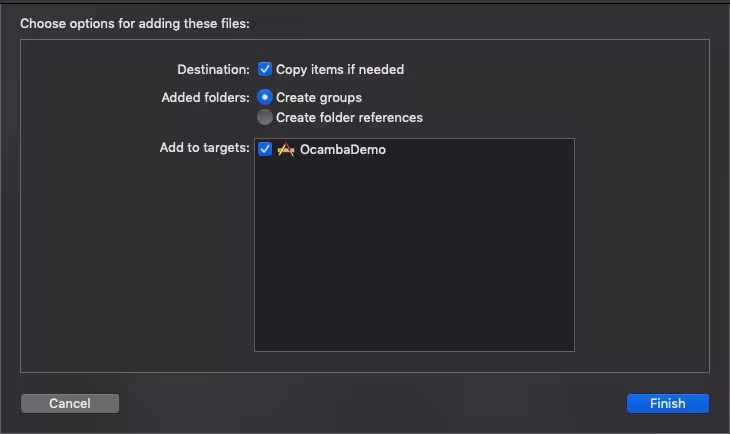
Add the framework to your app folder — make sure to select “Copy items if needed”.
Click "+" to embed the binary in your project (if it’s not embedded by default). Set “Embed” to “Embed & Sign”.
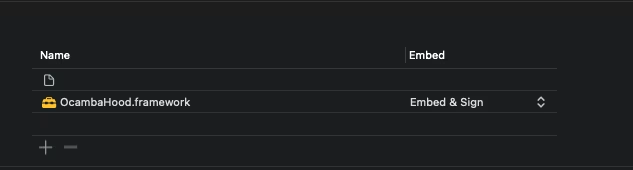
Select OcambaHood.framework to add it to your project.

3. Add Required Capabilities
Select the root project and under Signing & Capabilities, enable “Push Notifications” by clicking Capability and then double click on Background Modes and Push Notifications.
- Only do this for the main application target
- Do not do this for the Notification Service Extension
- Check “Background processing” and “Remote notifications”


If you wish, you can activate background mode for push notification directly in Info.plist file by opening it as source code and adding the “remote-notification” line in array.
<key>UIBackgroundModes</key>
<array>
    <string>remote-notification</string>
    <string>fetch</string>
    <string>location</string>
</array>
4. Initialize the Hood SDK
To configure the SDK for use, you need to initialize it with your app’s API credentials. This should be done early in your application startup to start using API methods and features.
Also, to get notification center callbacks, you need to set its delegate to self.
func application(_ application: UIApplication, didFinishLaunchingWithOptions launchOptions:
[UIApplication.LaunchOptionsKey: Any]?) -> Bool {
    UNUserNotificationCenter.current().delegate = self
    let builder = OcambaBuilder(apiKey: "activation-code",appGroupId:"your-appgroup-id").push().build()
    OcambaHoood.initialize(config:builder)
    return true
}
- Mismatched activation code will not work. Replace
"activation-code"with your actual API key from Ocamba portal. - Mismatched app group id will break notification actions. Double check
"your-appgroup-id"and make sure that extension and main app are using the same one.
Register Device Token
Now send the returned device token to the Hood Push service. The OS will trigger a callback with the device token.
Depending on the OS version, the definition will change slightly. From either, you can forward the token to the Hood SDK.
func application(_ application: UIApplication, didRegisterForRemoteNotificationsWithDeviceToken deviceToken: Data) {
    OcambaHoood.registerToken(deviceToken)
}
Handle Push Notifications
When your app receives a push notification or is launched by tapping on a push notification, your app’s delegate will be called back by the OS.
To correctly report on push open rates and conversions, you need to tell Hood that the remote notification launched the app.
This sample shows how to track push open conversions when a user opened a notification and launched the app. However, you may call pushTrackOpen on another place after additional logic but response object from the notification must be passed to it. If true is passed in method as first parameter, method completion will return url that you can handle as you wish. If flag is false, url will be opened by SDK itself.
func userNotificationCenter(_ center: UNUserNotificationCenter, didReceive response: UNNotificationResponse, withCompletionHandler completionHandler: @escaping () -> Void) {
    OcambaHoood.pushTrackOpen(true, response: response, completion: { url in
        //handle url
    })
    completionHandler()
}
For silent notifications that are used for administrative purposes, like updating beacons list, geofence list, and all other administrative messages that are not supposed to disturb the user, you need to implement:
func application(_ application: UIApplication, didReceiveRemoteNotification userInfo: [AnyHashable : Any]) {
    OcambaHoood.didReciveAdministrativeNotificationWith(userInfo) { (geo,bcs) in }
}
Optional: SDK Initialization Callback
Suppose you wish to have a callback when Hood is initialized. In that case, you need to inherit OcambaHooodDelegate protocol, conform to protocol assigning self to OcambaHoood.ocambaDelegate and add method class where you want to catch init:
class MyClass: UIViewController, OcambaHooodDelegate {

    //Desired function
    {
        OcambaHoood.ocambaDelegate = self
    }

    func ocambaInited(_ success: Bool) {
        // Do your logic here
    }
}
5. Add Notification Service Extension
The Notification Service Extension allows you to modify notification content before it’s displayed and enables rich media attachments.
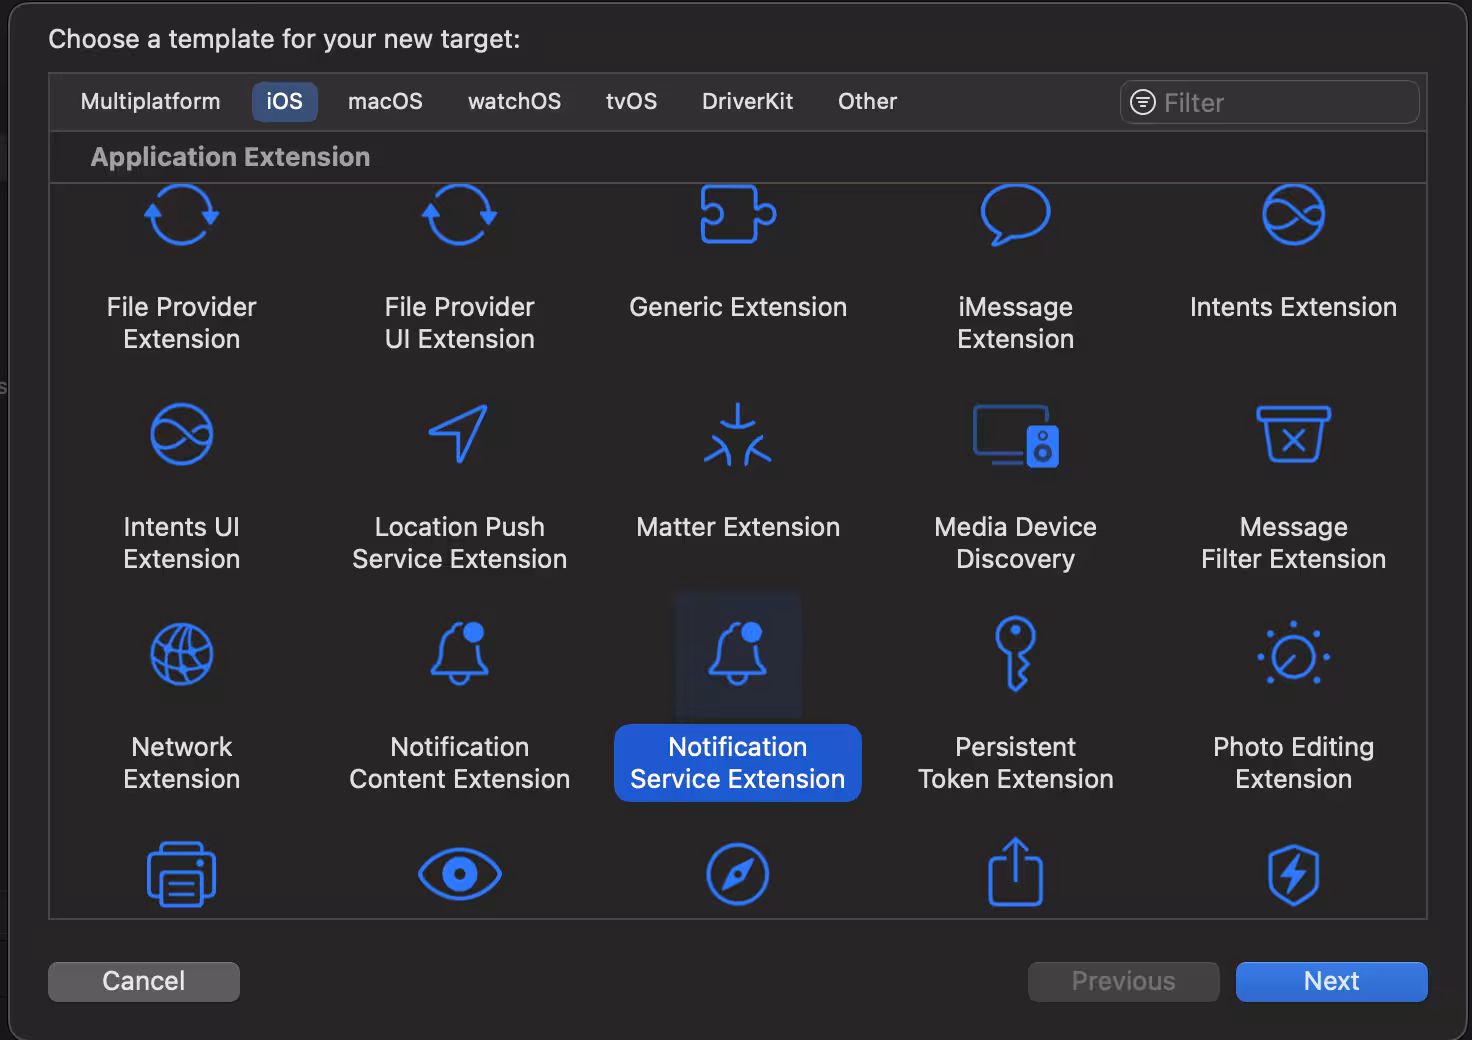
5.1. Create Extension
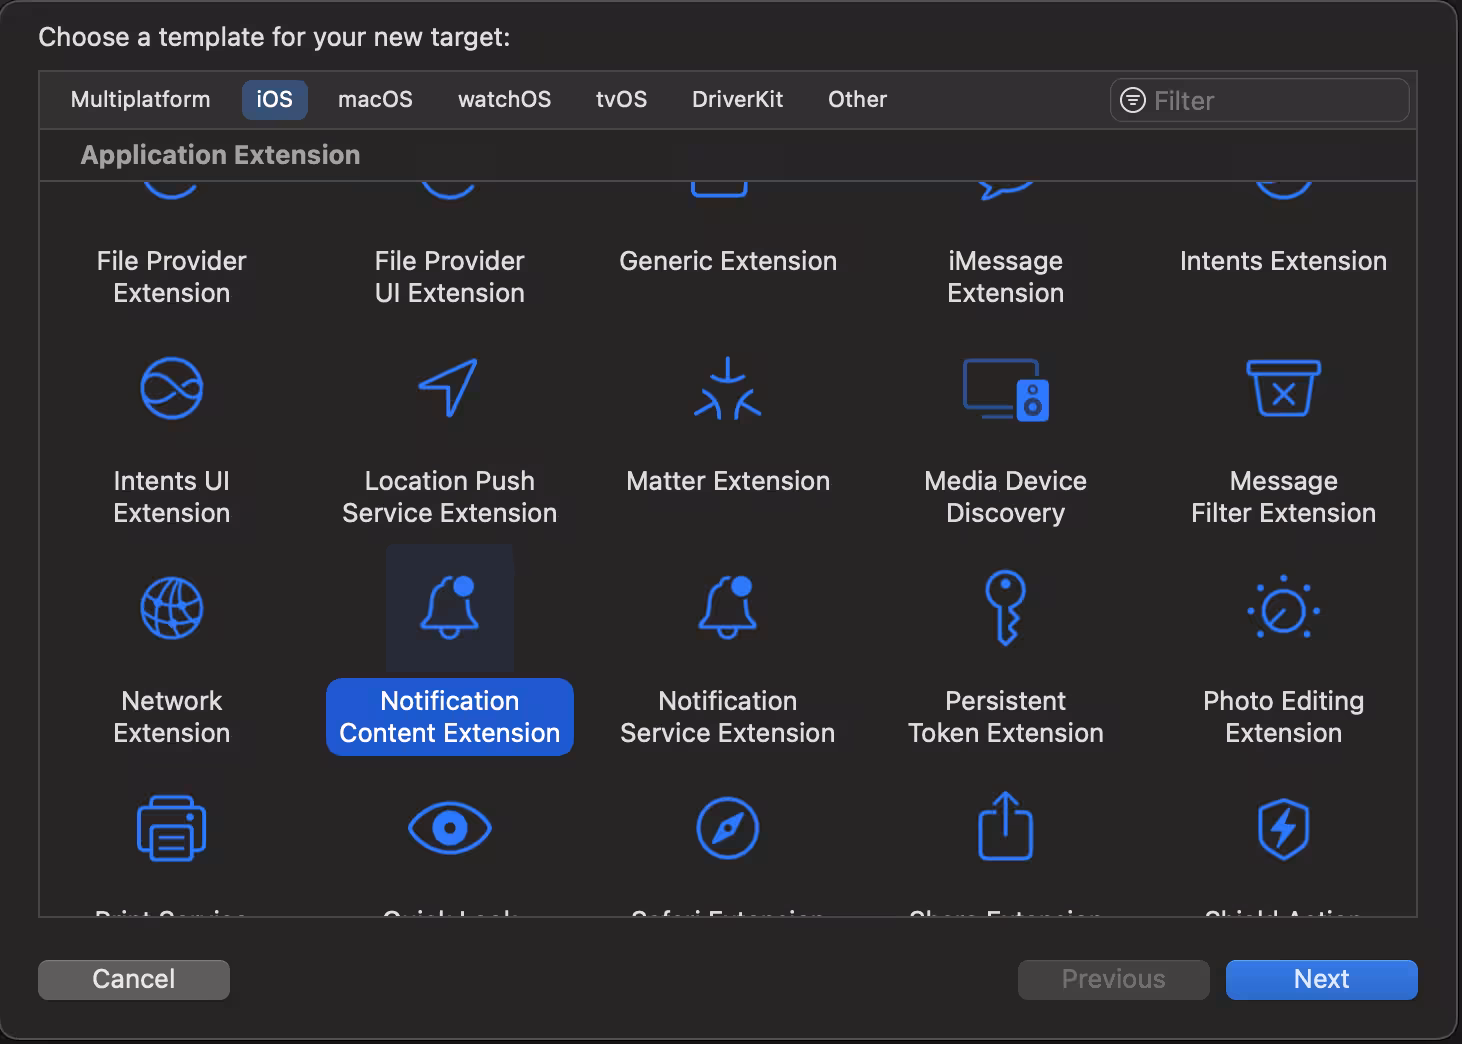
- In Xcode Select File → New → Target
- Select Notification Service Extension
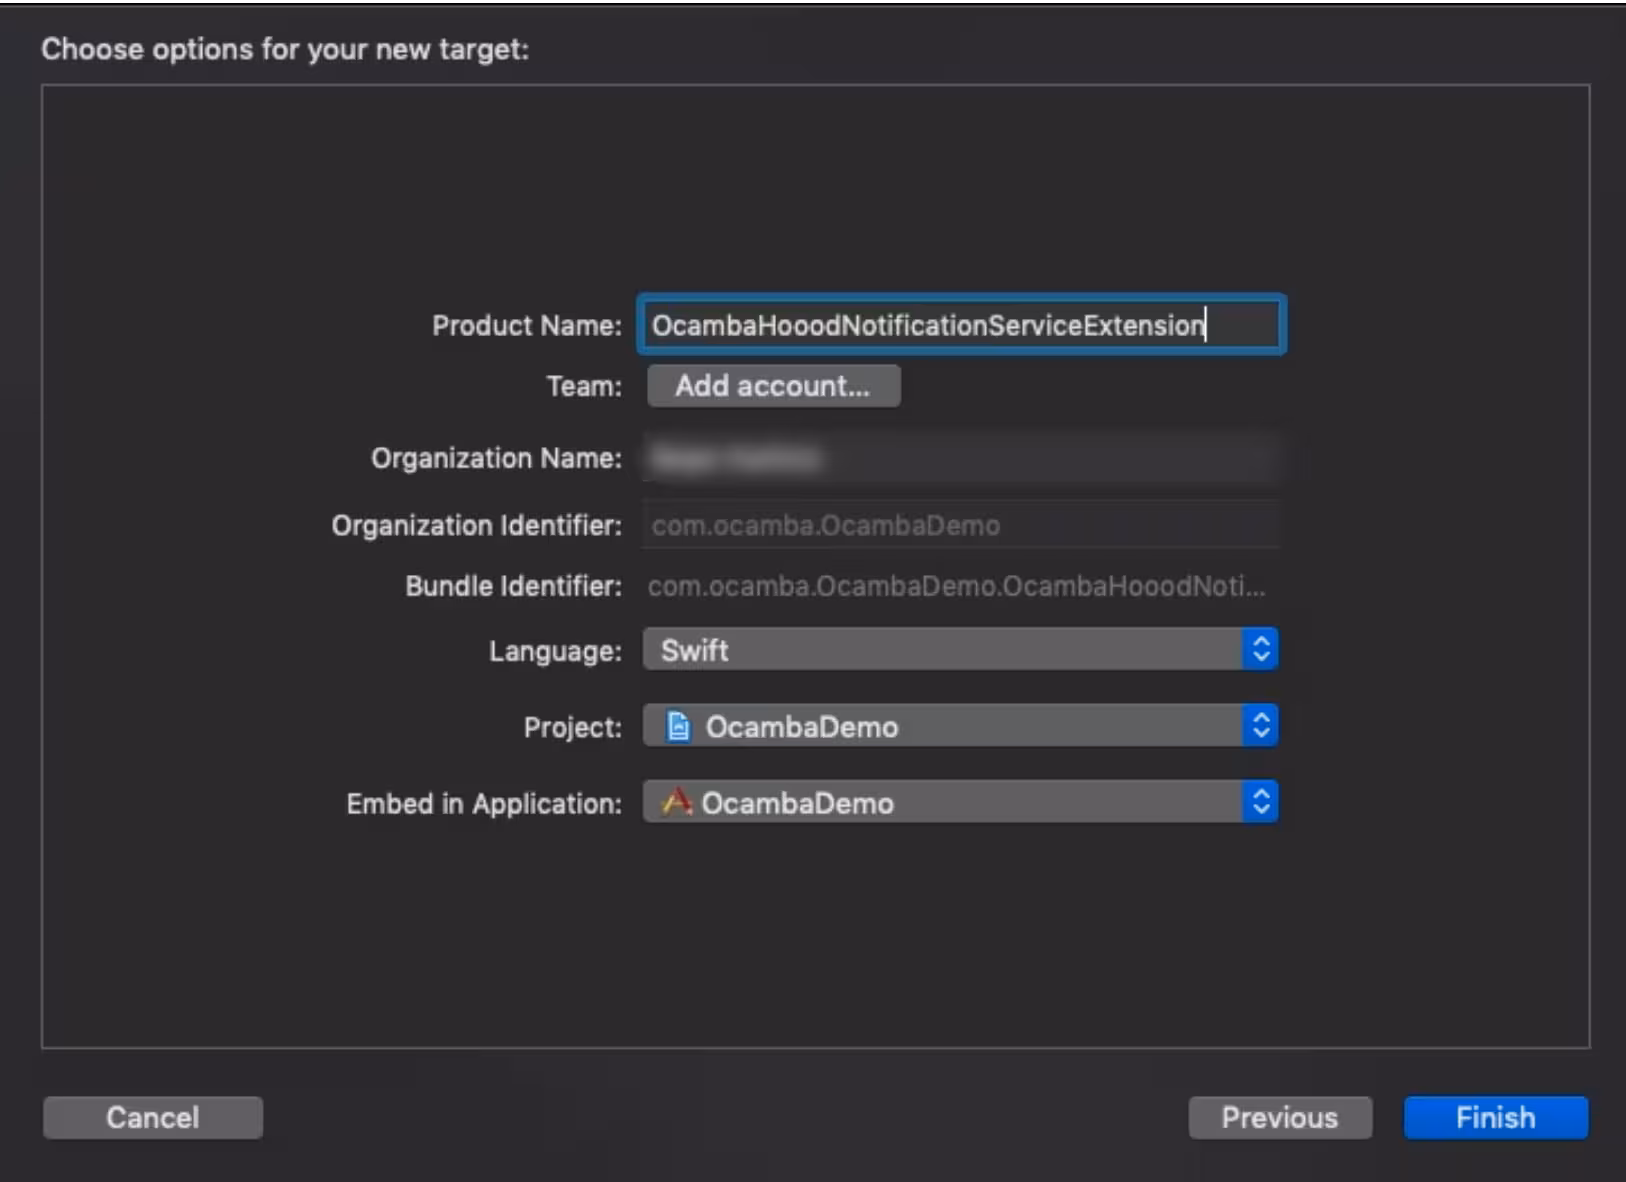
- Enter the product name as OcambaHooodNotificationServiceExtension and press Finish
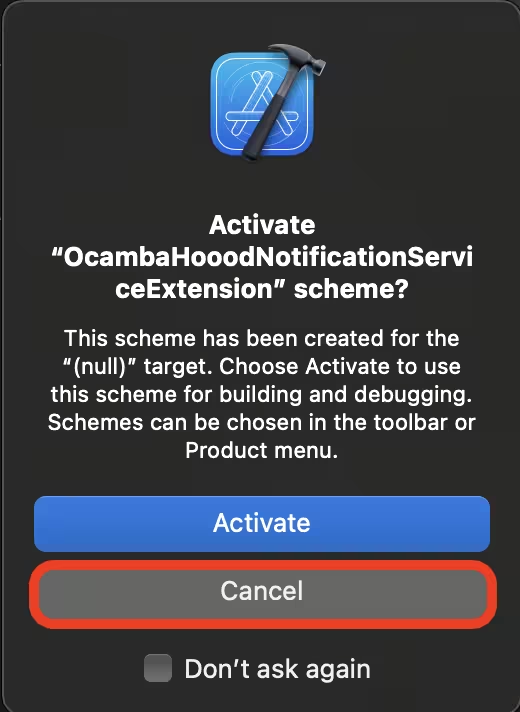
Press Cancel on the Activate scheme prompt.
By cancelling, you are keeping Xcode debugging your main app instead of extension. You can always switch to debugging your extension within Xcode (next to the run button).
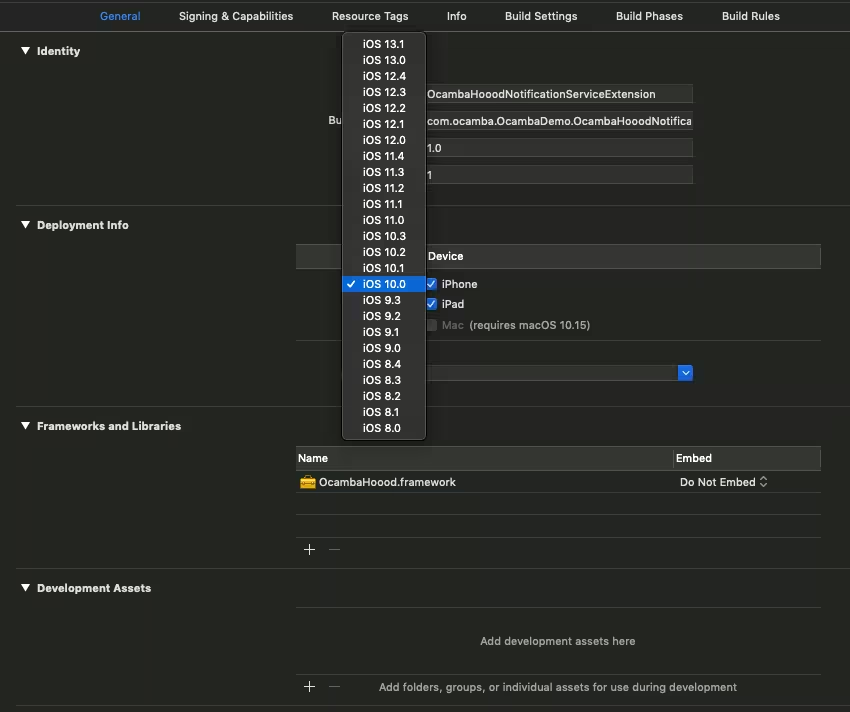
5.2. Configure Extension
- In the project navigator, click the top-level project directory to open the Xcode project settings and select the OcambaHooodNotificationServiceExtension target in the project and targets list
- On the General tab, set the Deployment Target to be iOS 10
5.3. Update Extension Code
Open NotificationViewController.swift and replace the whole file contents with the below code:
import UserNotifications
import UIKit
import OcambaHoood

class NotificationService: UNNotificationServiceExtension {

    var contentHandler: ((UNNotificationContent) -> Void)?
    var bestAttemptContent: UNMutableNotificationContent?
    var receivedRequest: UNNotificationRequest!

    override func didReceive(_ request: UNNotificationRequest, withContentHandler contentHandler: @escaping (UNNotificationContent) -> Void) {
        self.contentHandler = contentHandler
        receivedRequest = request
        bestAttemptContent = (request.content.mutableCopy() as? UNMutableNotificationContent)
        OcambaHoood.setValueFor("your-appgroup-id")
        if let bestAttemptContent = bestAttemptContent {
            OcambaHoood.didReceiveNotification(with: request, best: bestAttemptContent) { (bestAttempt) in
                contentHandler(bestAttempt)
            }
        }
    }

    override func serviceExtensionTimeWillExpire() {
        // Called just before the extension will be terminated by the system.
        // Use this as an opportunity to deliver your "best attempt" at modified content, otherwise the original push payload will be used.
        if let contentHandler = contentHandler, let bestAttemptContent =  bestAttemptContent {
            OcambaHoood.notificationBuilderWillTerminate(with: receivedRequest.content.userInfo, best: bestAttemptContent) { (best) in
                contentHandler(best)
            }
        }
    }
}
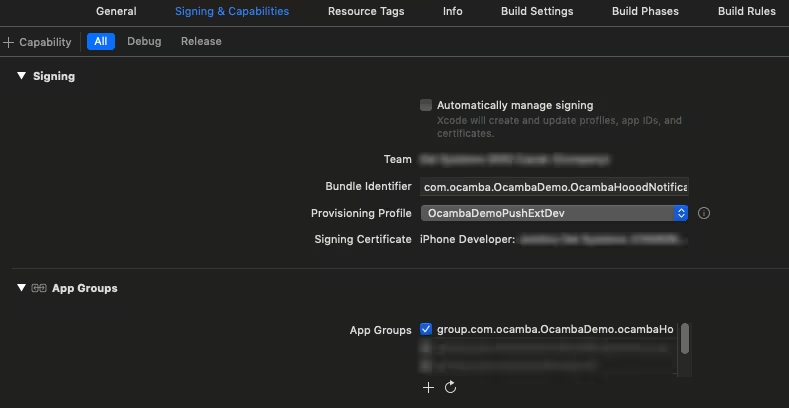
6. Enable “App Groups” Capability
App Groups allow your main app and notification extensions to share data.
- Under Signing & Capabilities, enable App Groups for both the main app target and the OcambaHooodNotificationServiceExtension target (and Content extension if you add it)
- Check an existing App Group name if you have one or create a new one with the “+”
- Make sure you select the same name on both targets
- The name of your app group should be
group.{your_bundle_id}.ocambaHoood
For example, if your application’s bundle identifier is com.example.app, your app group name should be group.com.example.app.ocambaHoood.
7. Add Notification Content Extension (Optional)
Notification Content Extension allows proper presentation of multimessage notifications, where you can choose our prebuilt layout or create yours.
Multimessages are a new type of push notification allowing you to send down multiple ‘pages’, consisting of an image, click action, title, and description to a device.
7.1. Create Content Extension
- In Xcode Select File → New → Target
- Select Notification Content Extension
- Further, the procedure is the same as for Service Extension, and the name would be OcambaHooodNotificationContentExtension
7.2. Update Content Extension Code
Open NotificationViewController.swift and replace the entire file contents with the below code:
import UIKit
import UserNotifications
import UserNotificationsUI
import OcambaHoood

class NotificationViewController: UIViewController, UNNotificationContentExtension {

    var ocambaNotif:OcambaNotificationView!

    override func viewDidLoad() {
        super.viewDidLoad()
        OcambaHoood.setValueFor("your-appgroup-id")
        // Do any required interface initialization here.
    }

    override func viewWillAppear(_ animated: Bool) {
        super.viewWillAppear(animated)
    }

    func didReceive(_ notification: UNNotification) {
        self.preferredContentSize = OcambaHoood.getPreferedContentSize(with: notification)
        ocambaNotif =  OcambaNotificationView(frame: view.frame, notification: notification, self)
    }

    // Solution for iOS versions older than iOS12 (with notification actions)
    func didReceive(_ response: UNNotificationResponse, completionHandler completion: @escaping (UNNotificationContentExtensionResponseOption) -> Void) {
        ocambaNotif.handleNotificationAction(response)
    }

}
7.3. Configure Content Extension Info.plist
In Info.plist of content extension you need to set the following:
- UNNotificationExtensionCategory should be “oc_contentExt” (so that multimessages would be sent to extension to handle them)
- UNNotificationExtensionInitialContentSizeRatio should be “0.8”
- UNNotificationExtensionDefaultContentHidden should be “YES”
- UNNotificationExtensionUserInteractionEnabled should be “YES”
If you want to use custom handling for notifications presenting you need to add customNotificationHandling to OcambaBuilder:
OcambaBuilder(apiKey: "activation-code").customNotificationHandling().build()
Don’t forget to assign proper app group to extension, so that SDK works as it’s supposed to work.
7.4. Custom Multimessage Layout (Advanced)
Presenting of multimessages can also be done in custom multimessage layout that can be implemented by assigning a new class on type UIView instead of OcambaNotificationView to ocambaNotif parameter in NotificationViewController class inside OcambaHoodNotificationServiceExtension.
var ocambaNotif:OcambaNotificationView!
With this new class and logic that is done inside it, whole NotificationViewController can be changed and our methods replaced by proper ones.
Advanced Features
Analytics
An easy way to track installs and other events. It’s the best method for effective analytics and reporting features use.
By initializing SDK, analytics is enabled by default.
If you want to disable it, in application on Hood initialization do like in example:
OcambaBuilder(apiKey: "activation-code").analytics(false).build()
Custom Event Tracking
Hood allows you to track custom events [String:Any] that can be used as a trigger to fire push notification.
To track custom event use Hood track as follows:
OcambaHoood.track(["ab":"1", "cd" :2])
Send track object:
OcambaHoood.sendTrack()
Read track objects:
OcambaHoood.getTrack()
This will for example return ["ab": "1", "cd": "2"]
Read specific track object:
OcambaHoood.getTrackFor(key:"ab")
Return value for this key will be "1".
Remove track objects from local storage:
OcambaHoood.removeTrackFor(key:String)
Remove track object from user (on platform):
OcambaHoood.track(["ab":""])
OcambaHoood.sendTrack()
This user in our database will have extra params with key “cd”, key “ab” will be removed.
UTM Parameters
Add parameters to identify the campaigns that direct traffic.
Create object in SDK storage:
OcambaHoood.setUtm("key", "value")
Get object for key from SDK storage:
OcambaHoood.getUtm("key")
Remove value for key from SDK storage:
OcambaHoood.removeUtm("key")
Scheduled Notifications
Scheduled notifications allow you to show notifications from time to time. This feature will increase user engagement over time. We added default title and text for this kind of notification. Click on it will open apps launcher activity.
How to enable this feature:
let ob = OcambaBuilder(apiKey: String).scheduleNotificaitons(TimeInterval).build()
Badge Management
For reducing notification count by one:
OcambaHoood.decreseNotificationCount(forNotif: UNMutableNotificationContent?)
For increasing badge number by one:
OcambaHoood.addNotificationCount(forNotif: UNMutableNotificationContent?)
SDK Callbacks
Callbacks that allow developers to create custom actions on some of Hood framework events:
Get notification object:
Triggered when token is changed, get notification object:
OcambaHoood.getNotificationContent(userInfo: userInfo)
When requesting for object, Notification Service extension is the place where you can get your direct push object.
Testing and Validation
End-to-End Push Notification Testing
- Build and run your app on a physical iOS device (simulator won’t work for push notifications)
- Accept the push notification permission when prompted
- Send a test notification from Ocamba portal
- Verify the notification appears on your device
- Tap the notification to ensure it opens your app correctly
Important Testing Notes
Re-testing requirements:
- Uninstall and reinstall the app to reset permission states
- Clear app data if needed
Common issues to check:
- Ensure push certificate is correctly uploaded to Ocamba portal
- Verify App Groups are enabled on both main app and extensions
- Check that bundle identifiers match between Xcode and Apple Developer Portal
- Confirm deployment target is iOS 10 or higher
- Test on a physical device, not simulator
Troubleshooting
SDK not initializing: Check that your API key is correct and matches the one in Ocamba portal.
Push notifications not receiving: Verify push certificate is valid and uploaded, App Groups are configured correctly, and you’re testing on a physical device.
Rich media not displaying: Ensure Notification Service Extension is properly configured with correct deployment target and App Groups.
Multimessages not working: Verify Notification Content Extension is added, Info.plist settings are correct, and App Groups are enabled.
Token registration failing: Check that you’ve called registerToken in the correct delegate method and that push capabilities are enabled.
Next Steps
You’re now ready to engage your iOS users with push notifications! Continue to:
- Explore advanced campaign creation in Ocamba portal
- Set up user segmentation for targeted messaging
- Implement custom notification categories and actions
- Monitor your push notification performance metrics
For ongoing success, monitor your iOS push performance metrics and consider implementing A/B testing strategies to optimize engagement rates.