Adex Settings

It contains the following tabs: Setting (General and SSP Settings), Ad Unit Sizes, Members and Access.
General
Within the Settings tab, it is possible to update account settings. It is also possible to change the default campaign algorithm, which can be:
- multi-armed bandit
- round-robin.
It is possible to change the priority of the campaign, which can be:
- compete
- local
- backfill
- unfill.
In the domains field, it is possible to specify domains for given sources, such as:
- Feed,
- Impression,
- Click,
- Conversion, and
- Push.
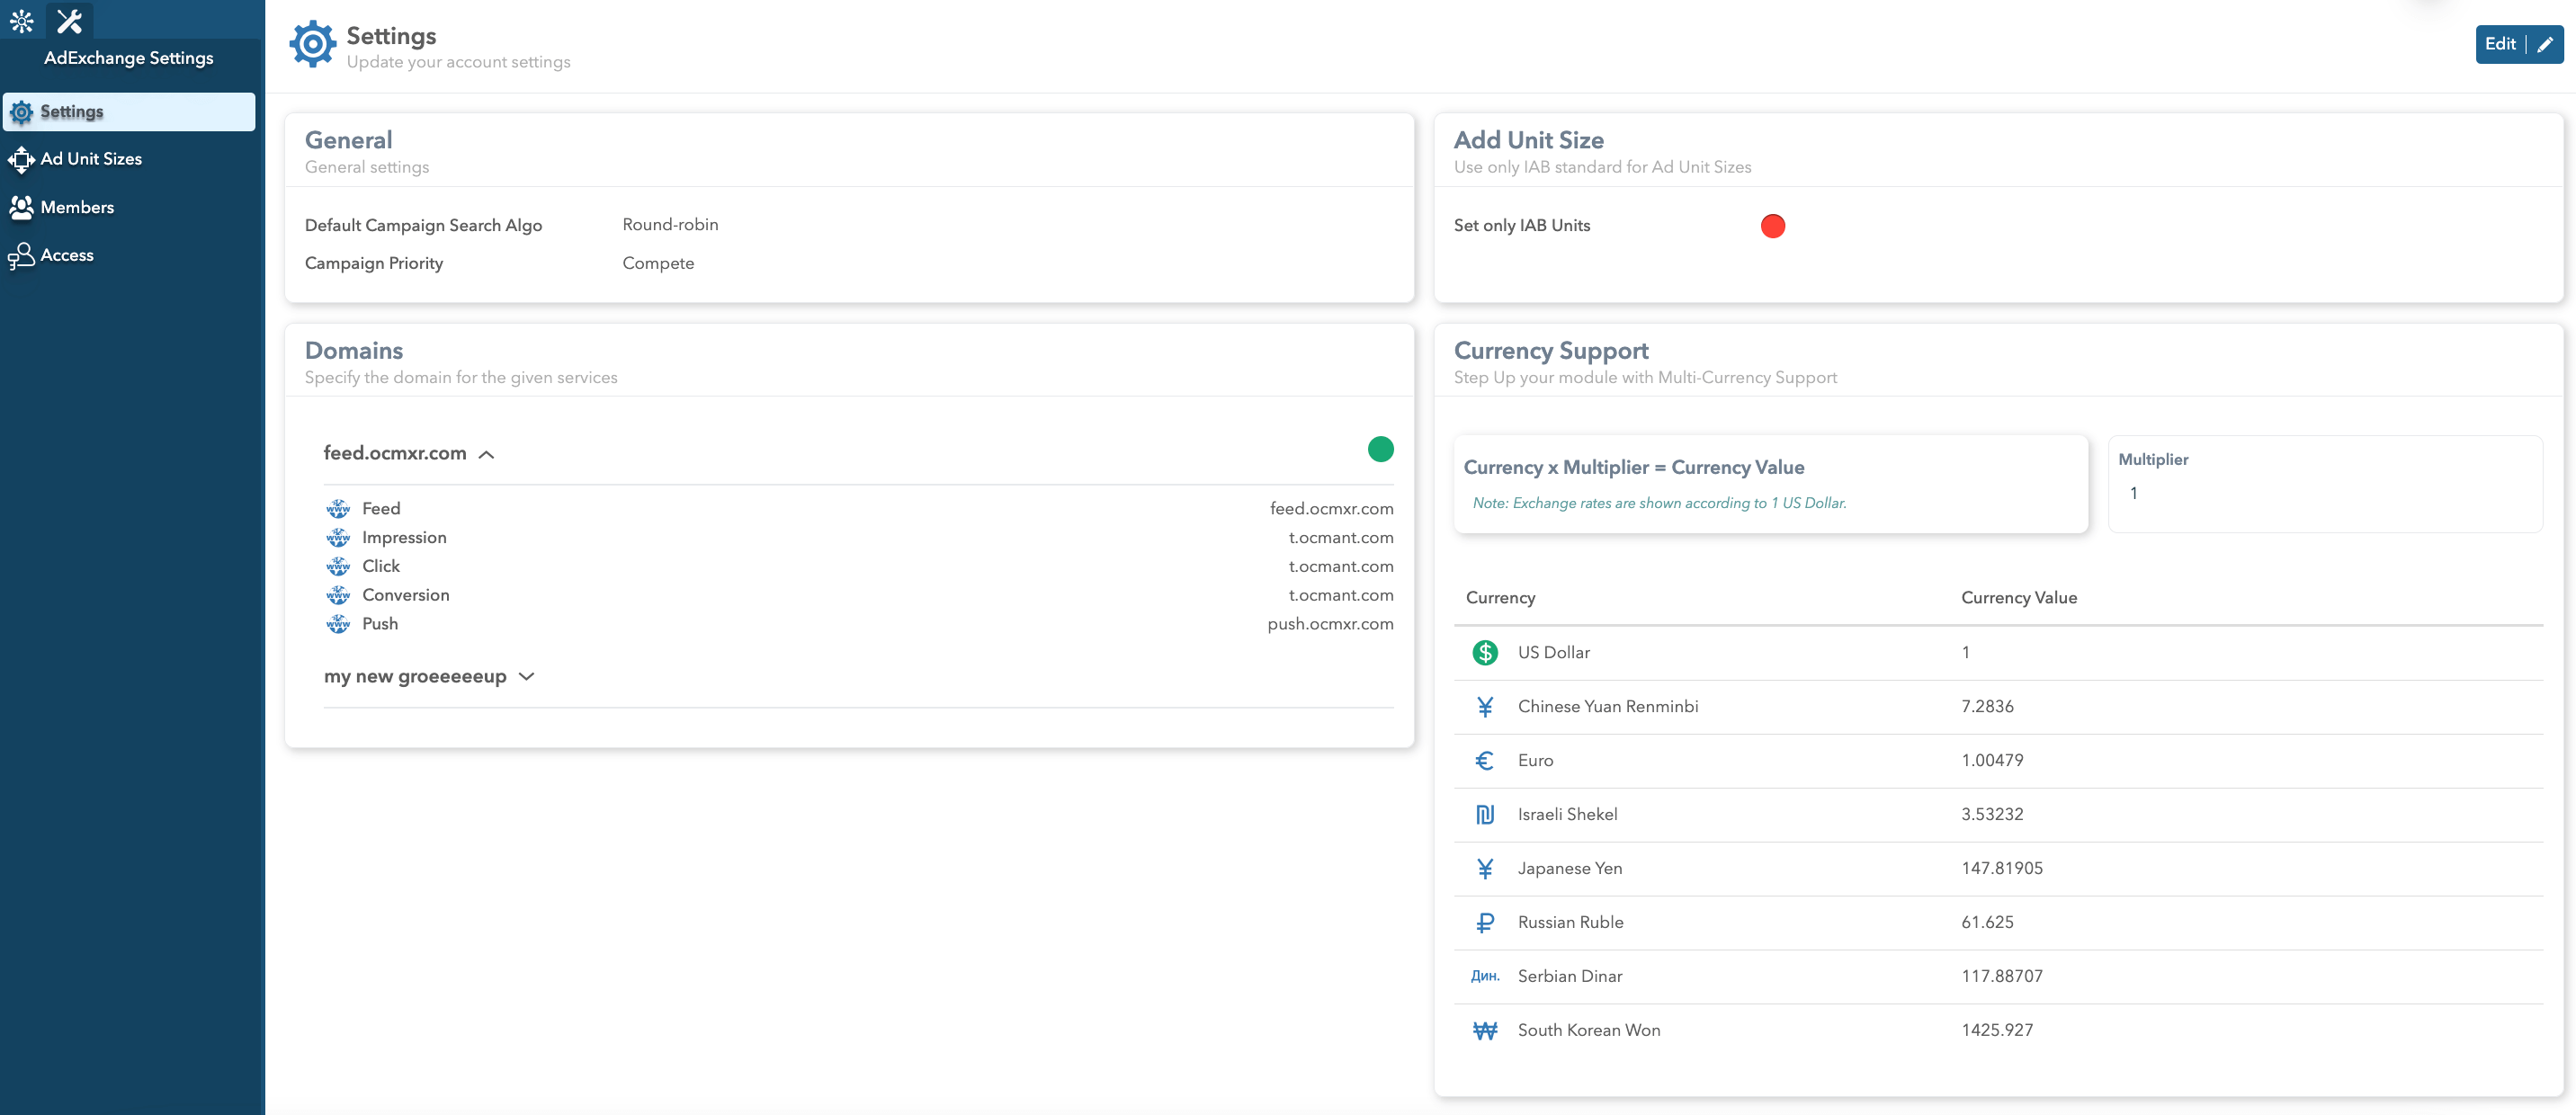
Ad Unit Size - Only IAB sizes will be displayed if the toggle button is on (green). While if it is turned off (red), both Custom and IAB sizes will be displayed.
Currency Support - It is possible to add a model with multiple currencies to your profile by selecting the desired currencies from the drop-down list. The currencies we support are: US Dollar, Chinese Yuan Renminbi, Euro, Israeli Shekel, Japanese Yen, Russian Ruble, Serbian Dinar, and South Korean Won.
MULTIPLIER - Applies to all currencies, i.e., each of the displayed currencies in the Adex Settings is equal to 1 dollar (if you put some other number in the multiplier, for example, 5 - each currency below the dollar will be equal to 5 US Dollars).
Note: The settings selected here will be the default setting for Adex/Push campaigns.
SSP Settings
The SSP Settings tab serves for the global configuration of all SSPs. It is possible to set the domain to which SSP will be registered, which logo and theme will be displayed. It is also possible to add emails that SSPs will receive upon verification and successful SSP creation.
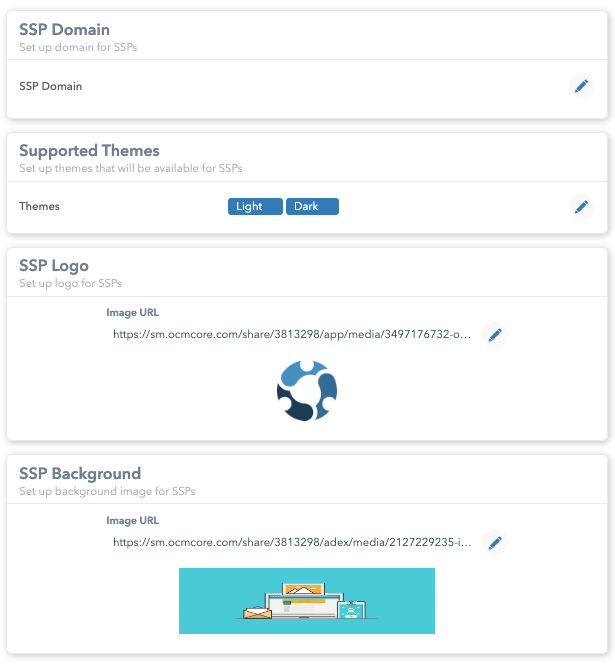
In the Domain field it is possible to set up a domain for SSPs.
In the field Supported Themes it is possible to set up a available theme for SSPs.
Available themes are:
- Light
- Dark
In the field SSP Logo is is possible to set up logo for the SSP home page.
In the field SSP Background it is possible to set up the background for the SSP home page.
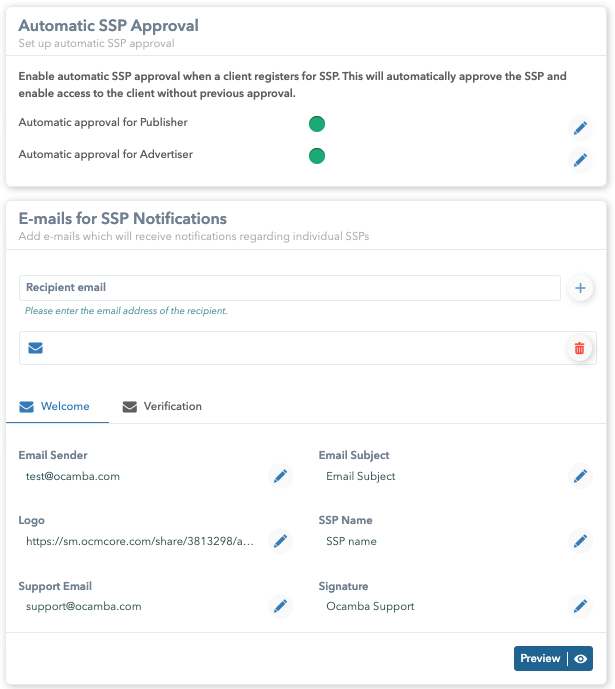
In the field Automatical SSP Approval it is possible to set up automatic approval of SSP when the client registers for SSP. This will automatically approve the SSP and allow access to the client without prior approval by the MMP. We have the option for each app separately:
- Automatic approval for Publisher and
- Automatic approval for Advertisers
If these two options are excluded, it is necessary for the MMP to approve in order for the SSP to be created.
In the field E-mails for SSP Notifications it is possible to set up a configuration for SSP notifications where you can specify who on the MMP side will receive all relevant notifications, such as new SSP registration notifications and so on.
There are two tabs, Welcome and Verification, where you can customize the look of the email, after which you can preview it by clicking the Preview button.
In the SSP Form Image it is possible to set up a form image for SSP.
Ad Unit Sizes
The Ad Unit Sizes tab is located within Adex Settings, and it’s divided into IAB Unit Sizes and Custom Unit Sizes.
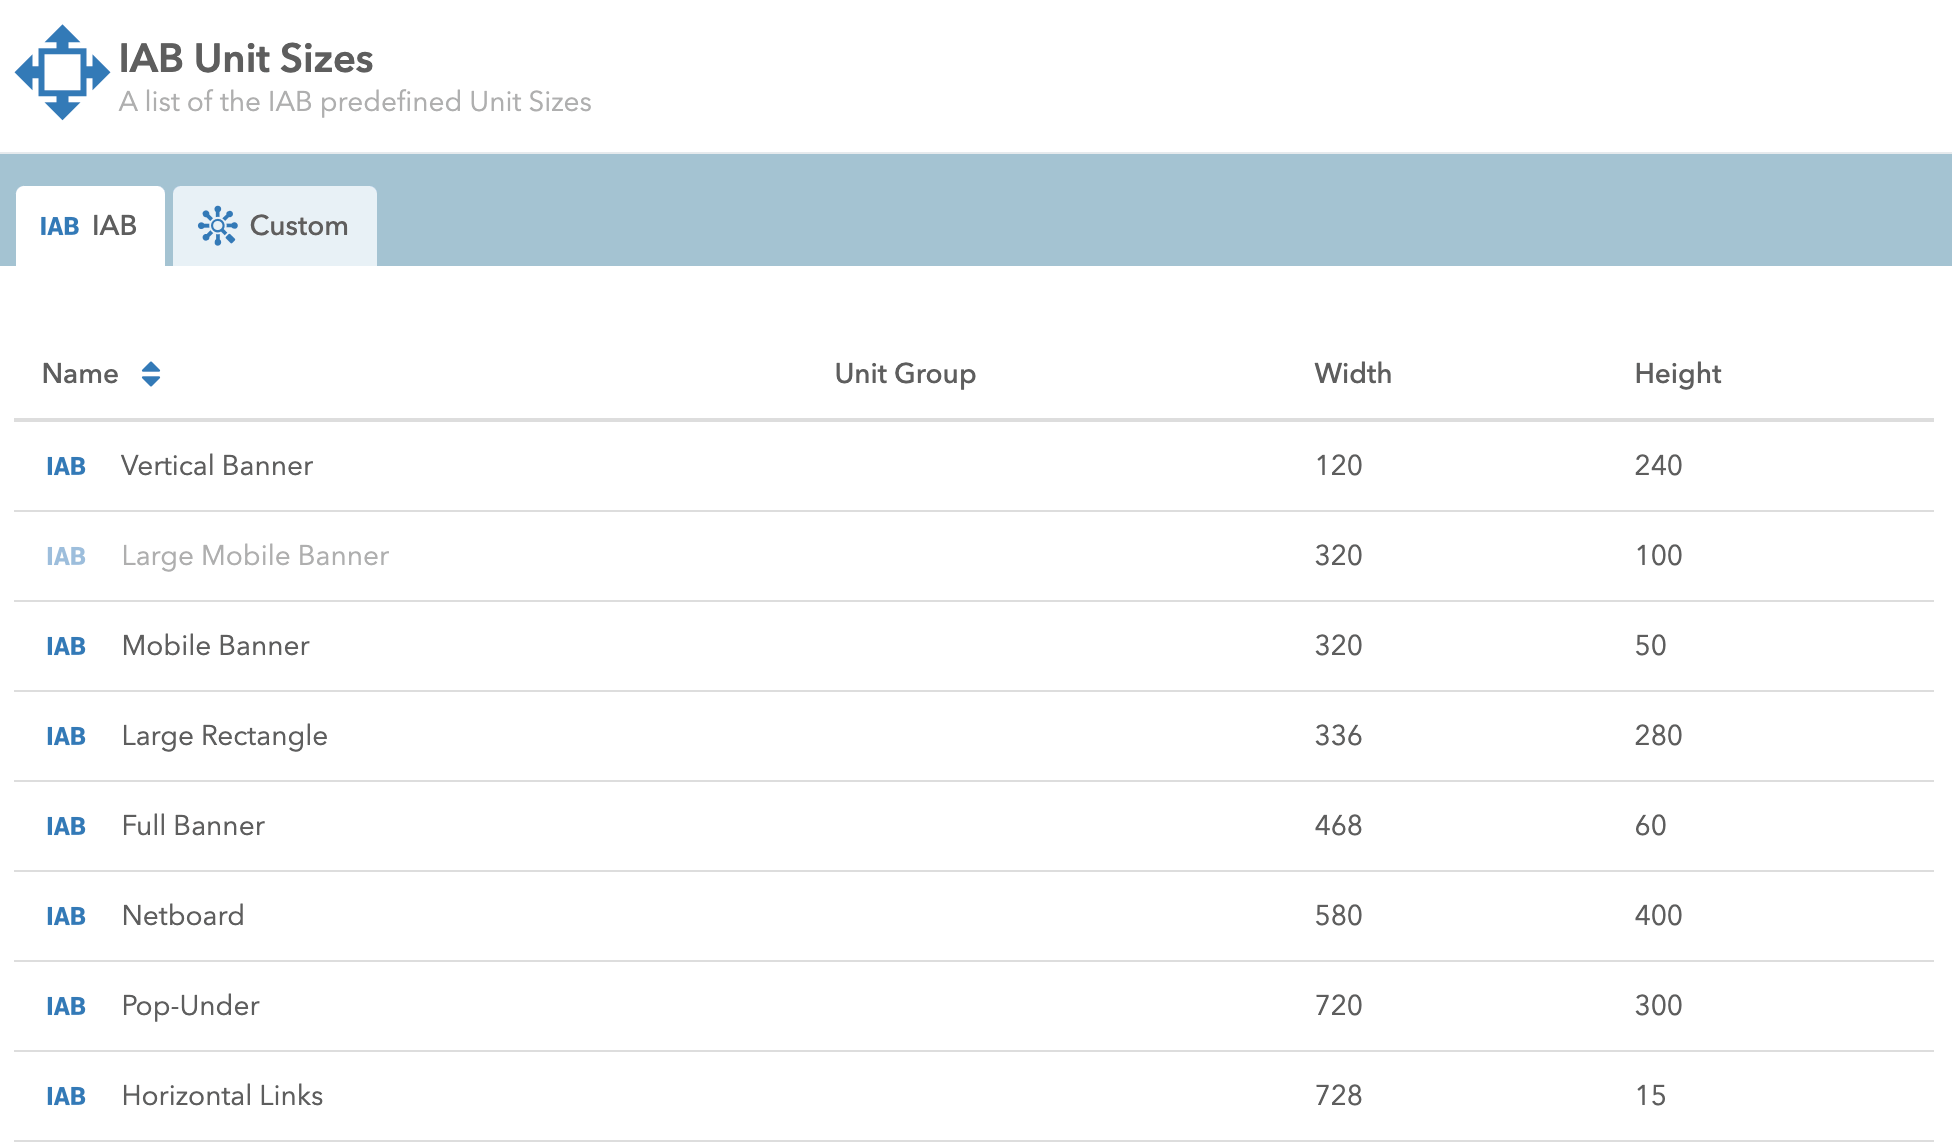
IAB Unit Sizes are predefined unit sizes. They are divided into different groups of units.
In Custom Unit Sizes, it is possible to view the list of Unit Sizes that you created. To create a new Unit Size, click the Add button in the upper right corner. When you create a new Unit Size, it is necessary to name it and enter the desired width and height in pixels.
Members
On the Members tab, it is possible to see all Adex members with their status, name, e-mail, and time of creation. It is possible to filter members by status or subscription date, and search specific members. More members can be added to the Adex app by clicking the Add member button.
Adding Users - To successfully add a new account to the Adex app, the person adding new accounts must have the Role of app admin. Within the members tab, it is possible to add new users by clicking on the Add member button, and then Invite user. In the new window, fill in the form for adding a user, in which it is necessary to specify e-mail, name, and select a Role for the new user from the drop-down menu (for example, Viewer, Admin).
Deleting User - To successfully remove a user from the Adex app, it is necessary for the super admin or admin of the Adex app to cancel access to the user by deleting it from the members list. The admin can perform this action by following the steps below: Adex App Settings -> Members -> click on the delete icon on specific member and confirm.
Note: If you added a new user, e.g., on Adex, and subsequently, it is necessary to add it to Push as well, it is necessary to select the user from the drop-down menu after clicking the Add Member button in the Push App Settings.
Access
On the Access tab, you can see a list of all Roles that have been created, as well as system Roles. By clicking on the options button, it is possible to see additional details about the Role, such as the name, descriptions, and privileges of the Role.
System Roles are Admin and Viewer and it is not possible to edit them.
Clicking on the second button (next to the Role options button) allows viewing the list of members for a specific Role. The Default Role that will be applied to all new members can be changed by selecting the desired one from the drop-down list. In addition, it is possible to create new Roles with new privileges by clicking the Add button.

Adding Roles - To successfully add the permissions that are needed, the person adding the permissions must be:
- Platform Admin,
- Adex app Admin,
- Push app Admin,
- Hood app Admin or
- Member with Settings RBAC privileges.
Also, for someone to be assigned a Role from the Adex app, that user must first be a Member of the app. If there is already a Role that has the desired privileges, it is possible to directly assign that Role to the member if such a Role is suitable, and if there is no Role, it is possible to create a new Role.
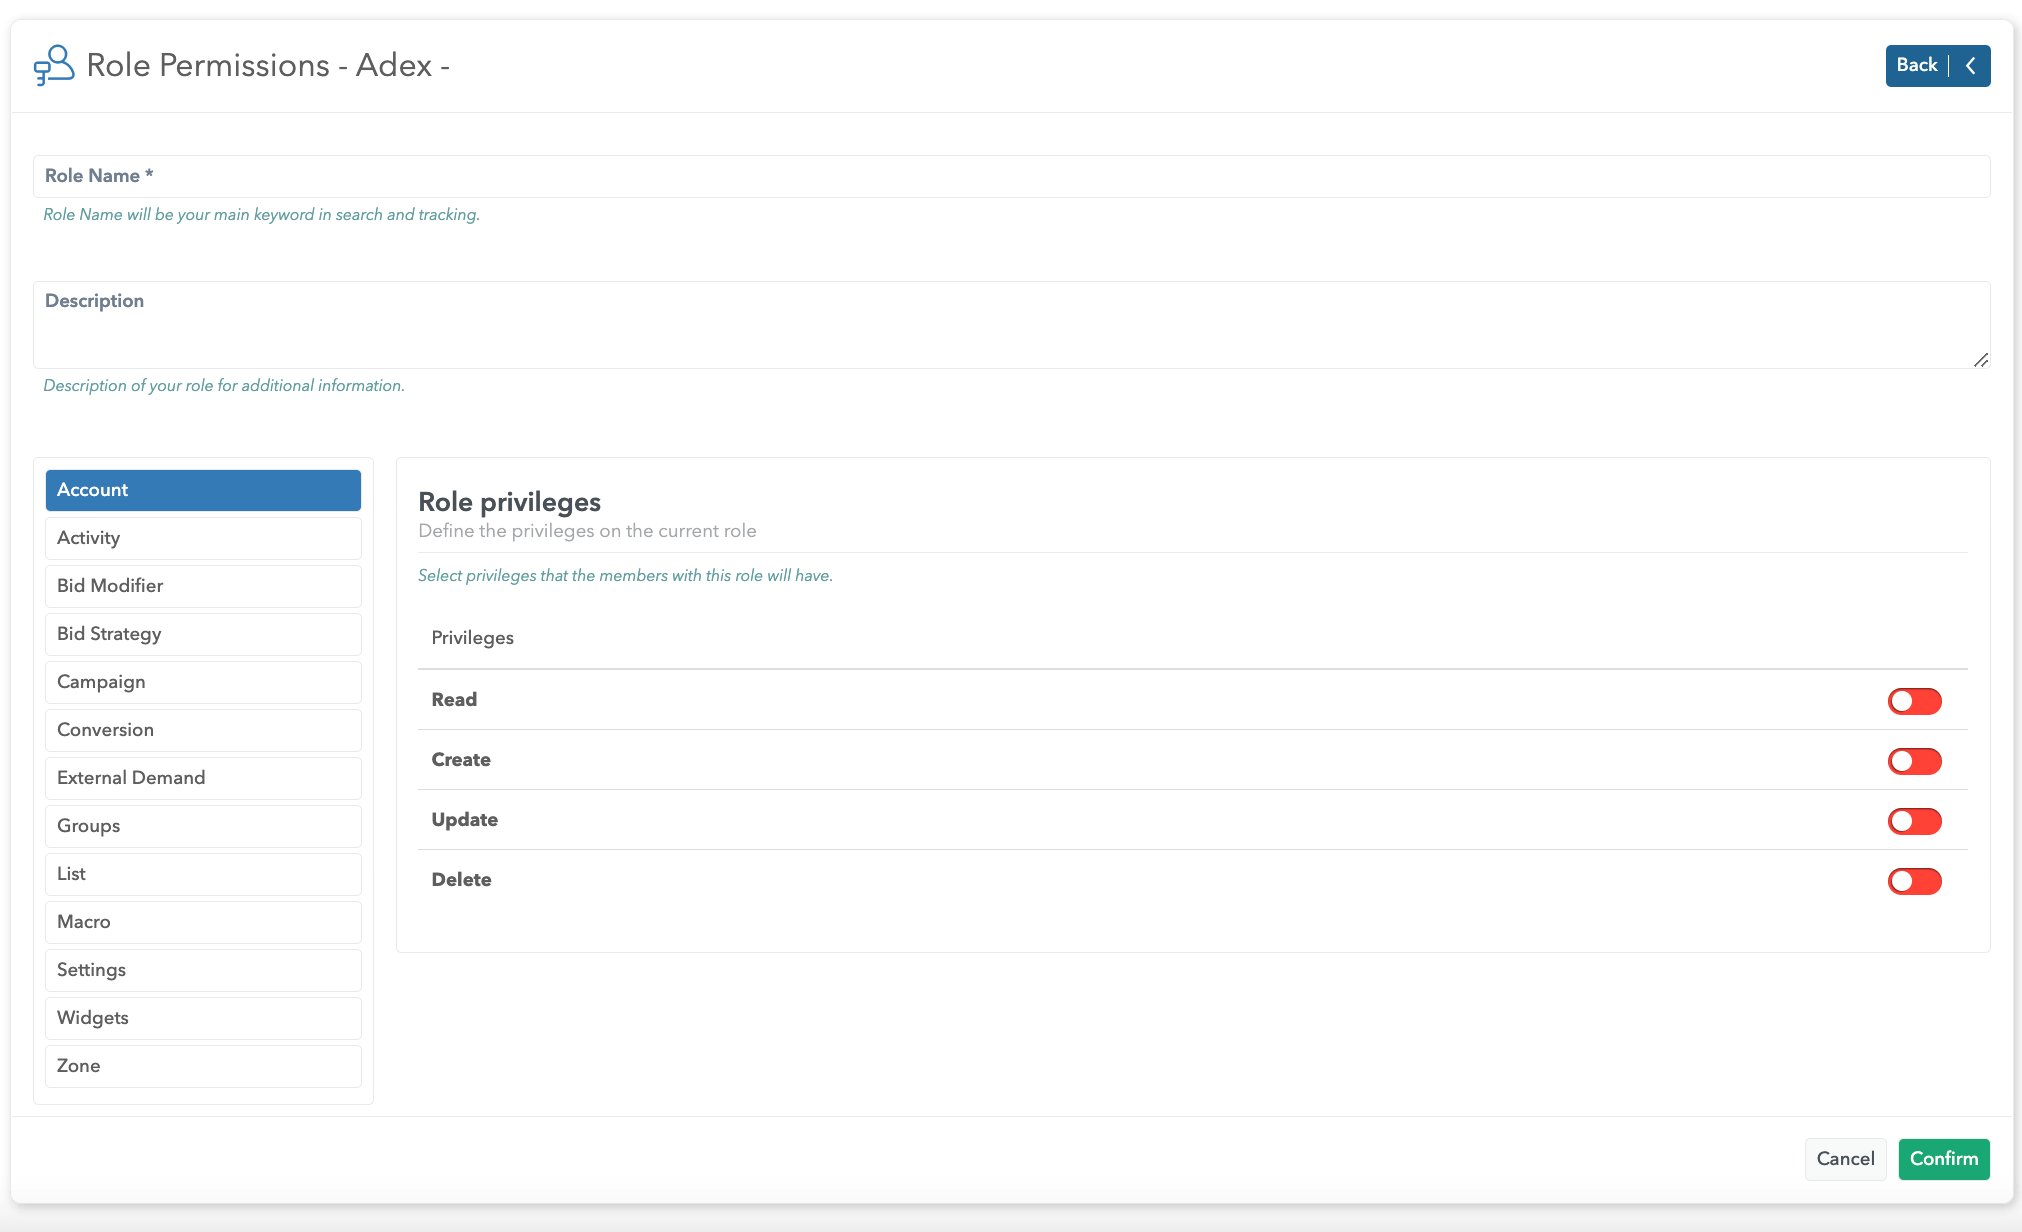
Creating a Role - On the Access tab, you can create a new Role (Add+). The next step during creation is to name the Role (in the Role Name field). Select a segment from the offered list, and then on the right side, check the privilege that you want to assign to the Role. After completing the previous steps, it is necessary to confirm by clicking the Confirm button.