Campaign Manager

Campaigns
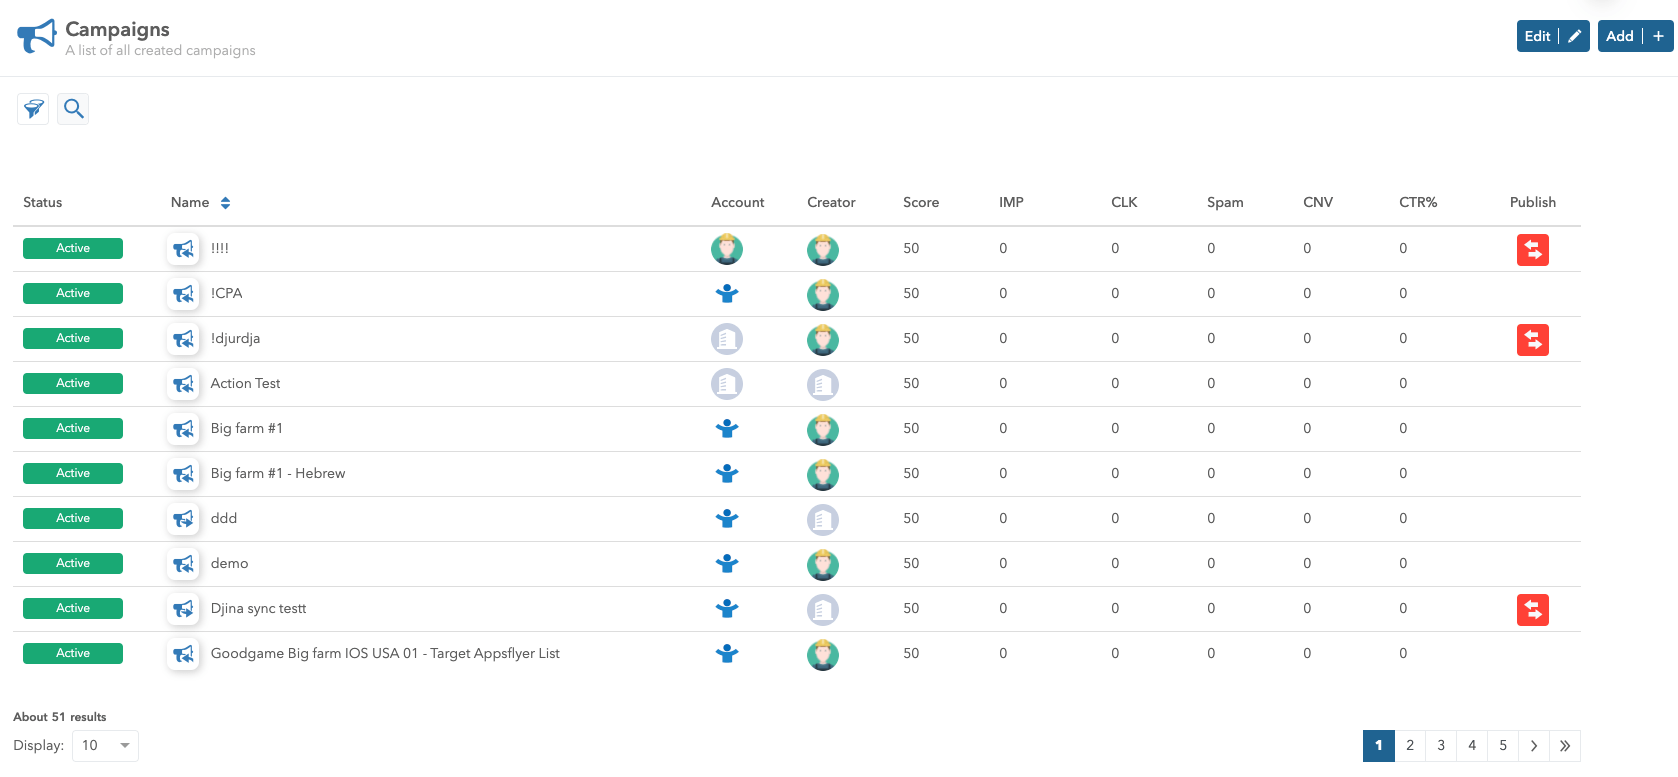
Campaigns tab is used to create and customize each Ad served to your audience, set up targeting, bid strategy, determine the budget and A/B test.
Each Campaign on the list shows the basic information and performance data, such as:
campaign status
campaign name
account associated with the campaign
creator of the campaign
campaign score
impressions
clicks
spam clicks
CNV
click through rate
publish button
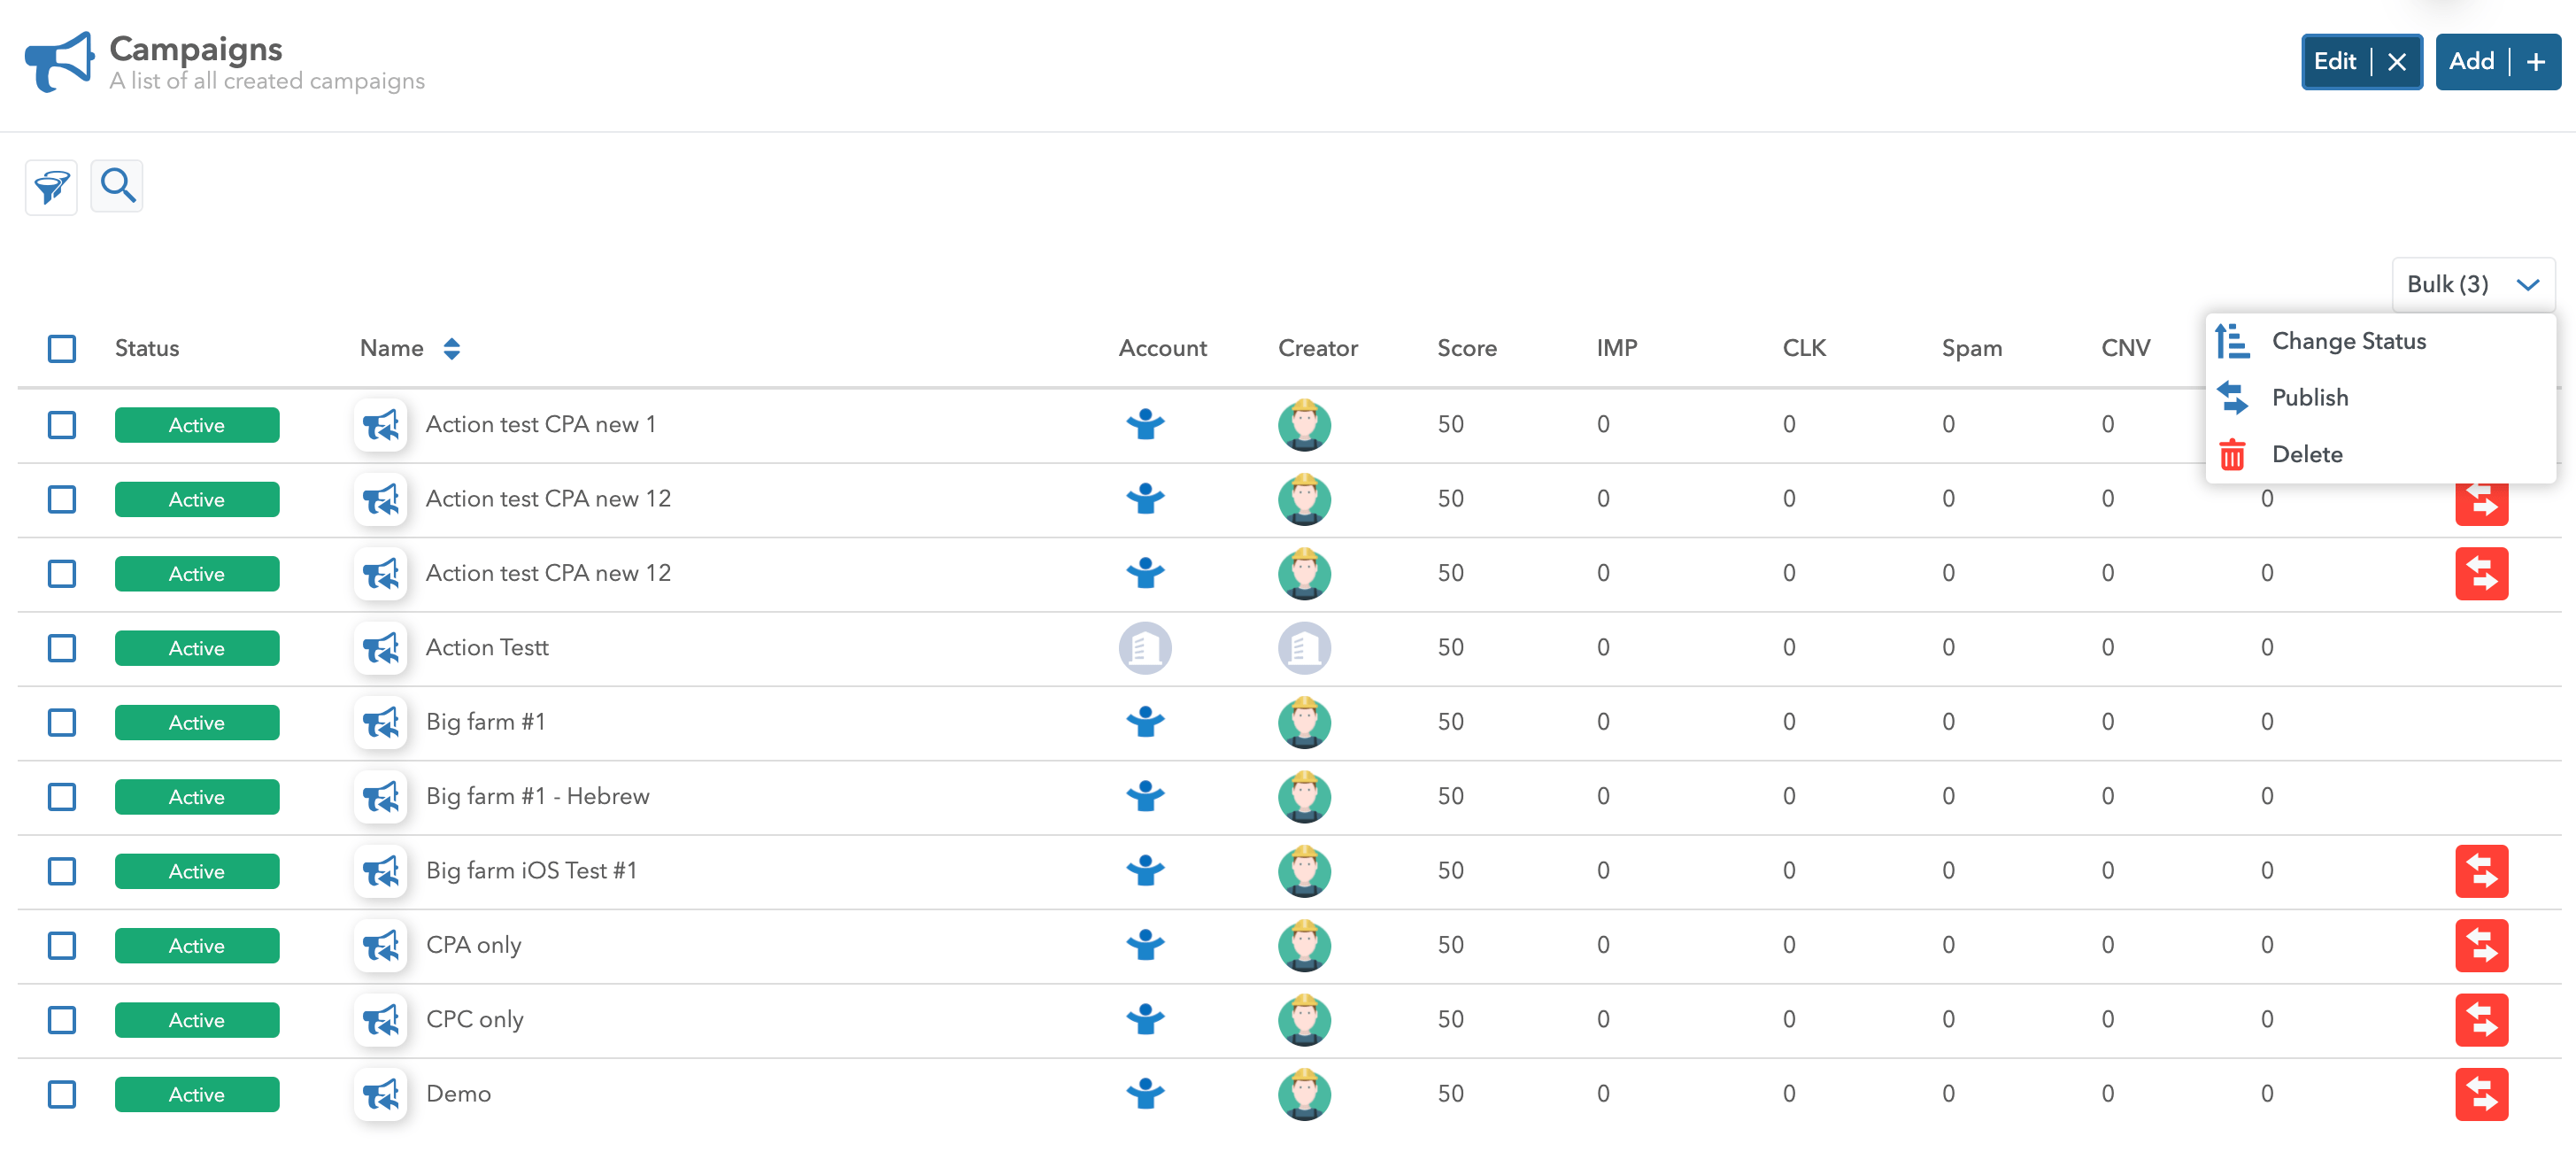
Choose Edit and select the wanted campaigns to Change status, Publish or Delete.
You are able to Search through Campaigns and Filter them according to their status, account, group, publish status and type.
Create a Campaign
Please follow this step-by-step guide to create a campaign:
Step 1. Select the Campaigns tab
Step 2. Add a new Campaign
Step 3. Fill in the information required:
Add a Name for your campaign
Select the Account from which the financial resources will be allocated
Connect it to an External demand or leave it unselected for internal marketing strategy
Choose the Pricing model
Determine Score for the relevancy of the campaign amongst other campaigns with the same criteria
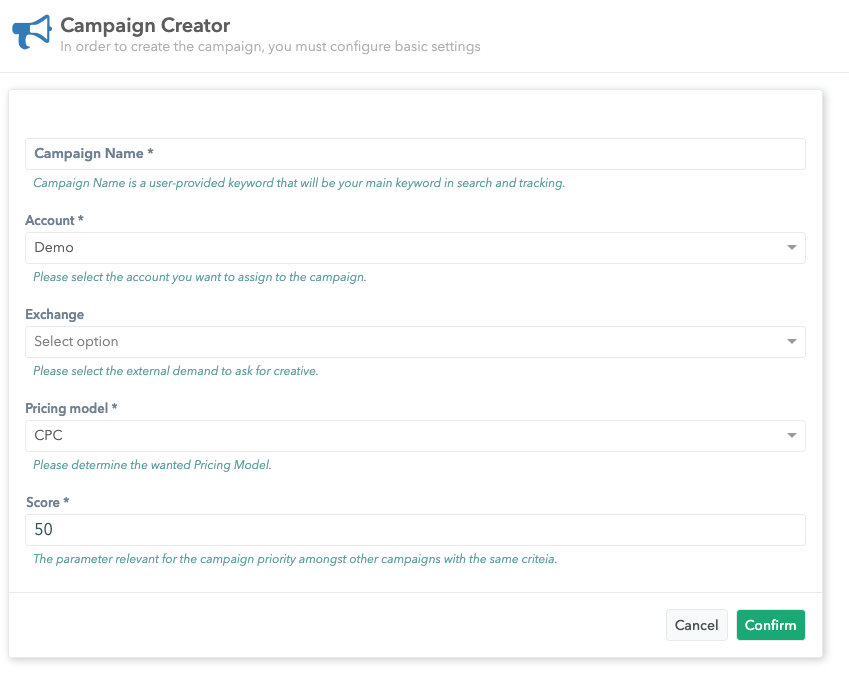
Step 4. Confirm the changes.
Edit Campaign
Please follow this step-by-step guide to edit a Campaign:
Step 1. Select the Campaigns tab
Step 2. Choose the Campaign you want to edit
Step 3. Edit the following:
- name
- status
- score
- start date
- end date
- groups
Each campaign can be assign to a Group for a more efficient targeting.
Note: Each change made regarding the campaign won’t be implemented until it’s published.
Publish button can be found in two places:
1. In the list view of your campaigns, as the last parameter in the column (red icon with two white arrows on it)
2. When you click on the specific campaign and make a change - the publish button will appear in the upper right corner (next to the copy button)

Basic
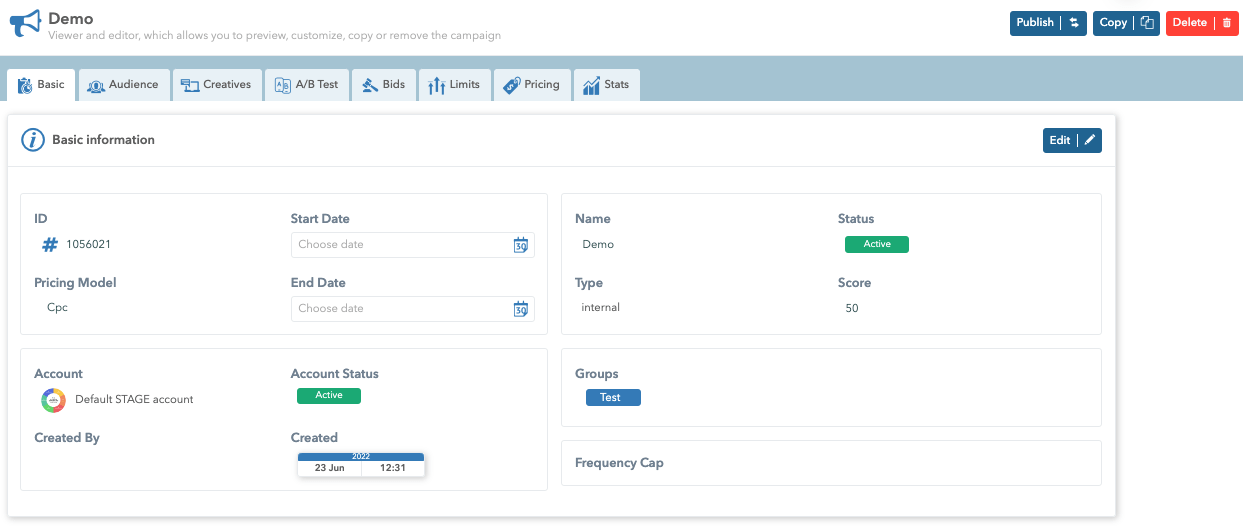
The Basic tab in Campaigns displays information related to the campaign.
Campaign ID is a unique platform-wide id.
Pricing Model (CPC, CPA, CPM) - a model based on which pricing is calculated. This model is defined when creating a campaign, and it is not possible to edit it later.
Start Date and End Date
Name - the name of the campaign that is assigned when creating a campaign, and it can be edited.
The campaign name makes it easier for users to navigate, although using id as a search parameter is a better way because of the uniqueness of the number.
The complete list of Campaign statuses:
| Status | Description | ||
|---|---|---|---|
| Pending | campaign is set and is waiting for confirmation | ||
| Ready | campaign is set and got confirmed, now it is in the phase of waiting to be sent | ||
| Active | campaign is in the process of sending | ||
| Implementing | campaign is being implemented | ||
| Paused | campaign is on hold temporarily | ||
| Suspended | campaign is not active either temporarily or permanently | ||
| Disabled | the campaign is finished or is stopped by the account manager and there is no plan on scheduling it again | ||
| Hourly limit | campaign has entered its hourly limit (finance/frequency) | ||
| Daily limit | campaign has entered its daily limit (finance/frequency) | ||
| Monthly limit | campaign has entered its monthly limit (finance/frequency) | ||
| Lifetime limit | campaign has entered its lifetime limit (finance/frequency) |

Type
| Type | Description | ||
|---|---|---|---|
| Internal | Ads that were created by you | ||
| External | Ads that are pulled from your external demand |
Score - The higher the Score, the better the chance that the campaign will be successful. By default, it is set to 50.
Account - Each campaign must be linked to an Account.
Account Status - shows the current status of the Account associated with the campaign and can be edited on the Accounts tab. Account status can be Active, Verification, Rejected, Paused, Inactive, Archived, Hourly limit, Daily limit, Monthly limit and Lifetime limit.
Created By - shows the user who created the campaign.
Created - represents the date and time the campaign was created.
Groups - is a set of groups in which a particular campaign is located.
Frequency cap - Show the campaign N time/s per user in time period of N hour/s. Set changes will only affect internal web push creatives.
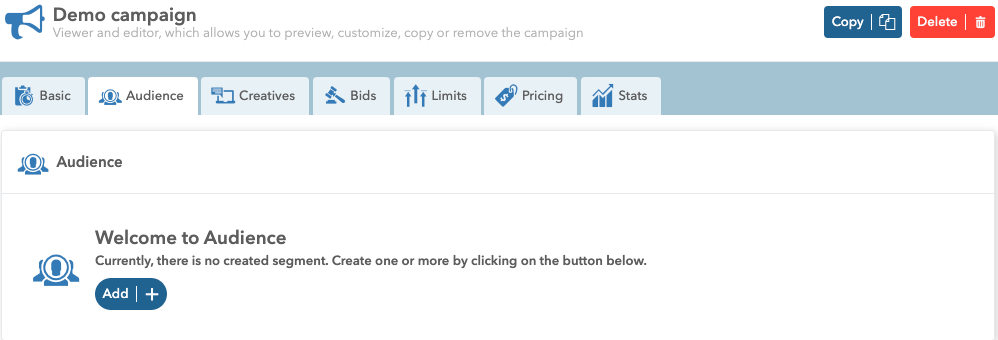
Audience
Please follow this step-by-step guide to set up Audience targeting for your Campaign:
Step 1. Inside each campaign there is an audience tab
Step 2. Add audience
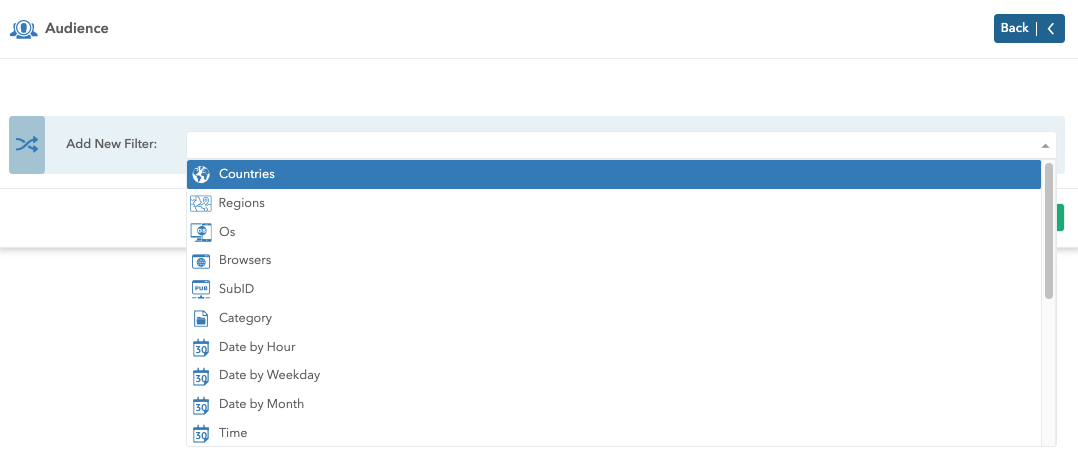
Step 3. Select an audience type for a more specific segmentation
Delete each item by selecting Edit and remove the wanted audience fragments
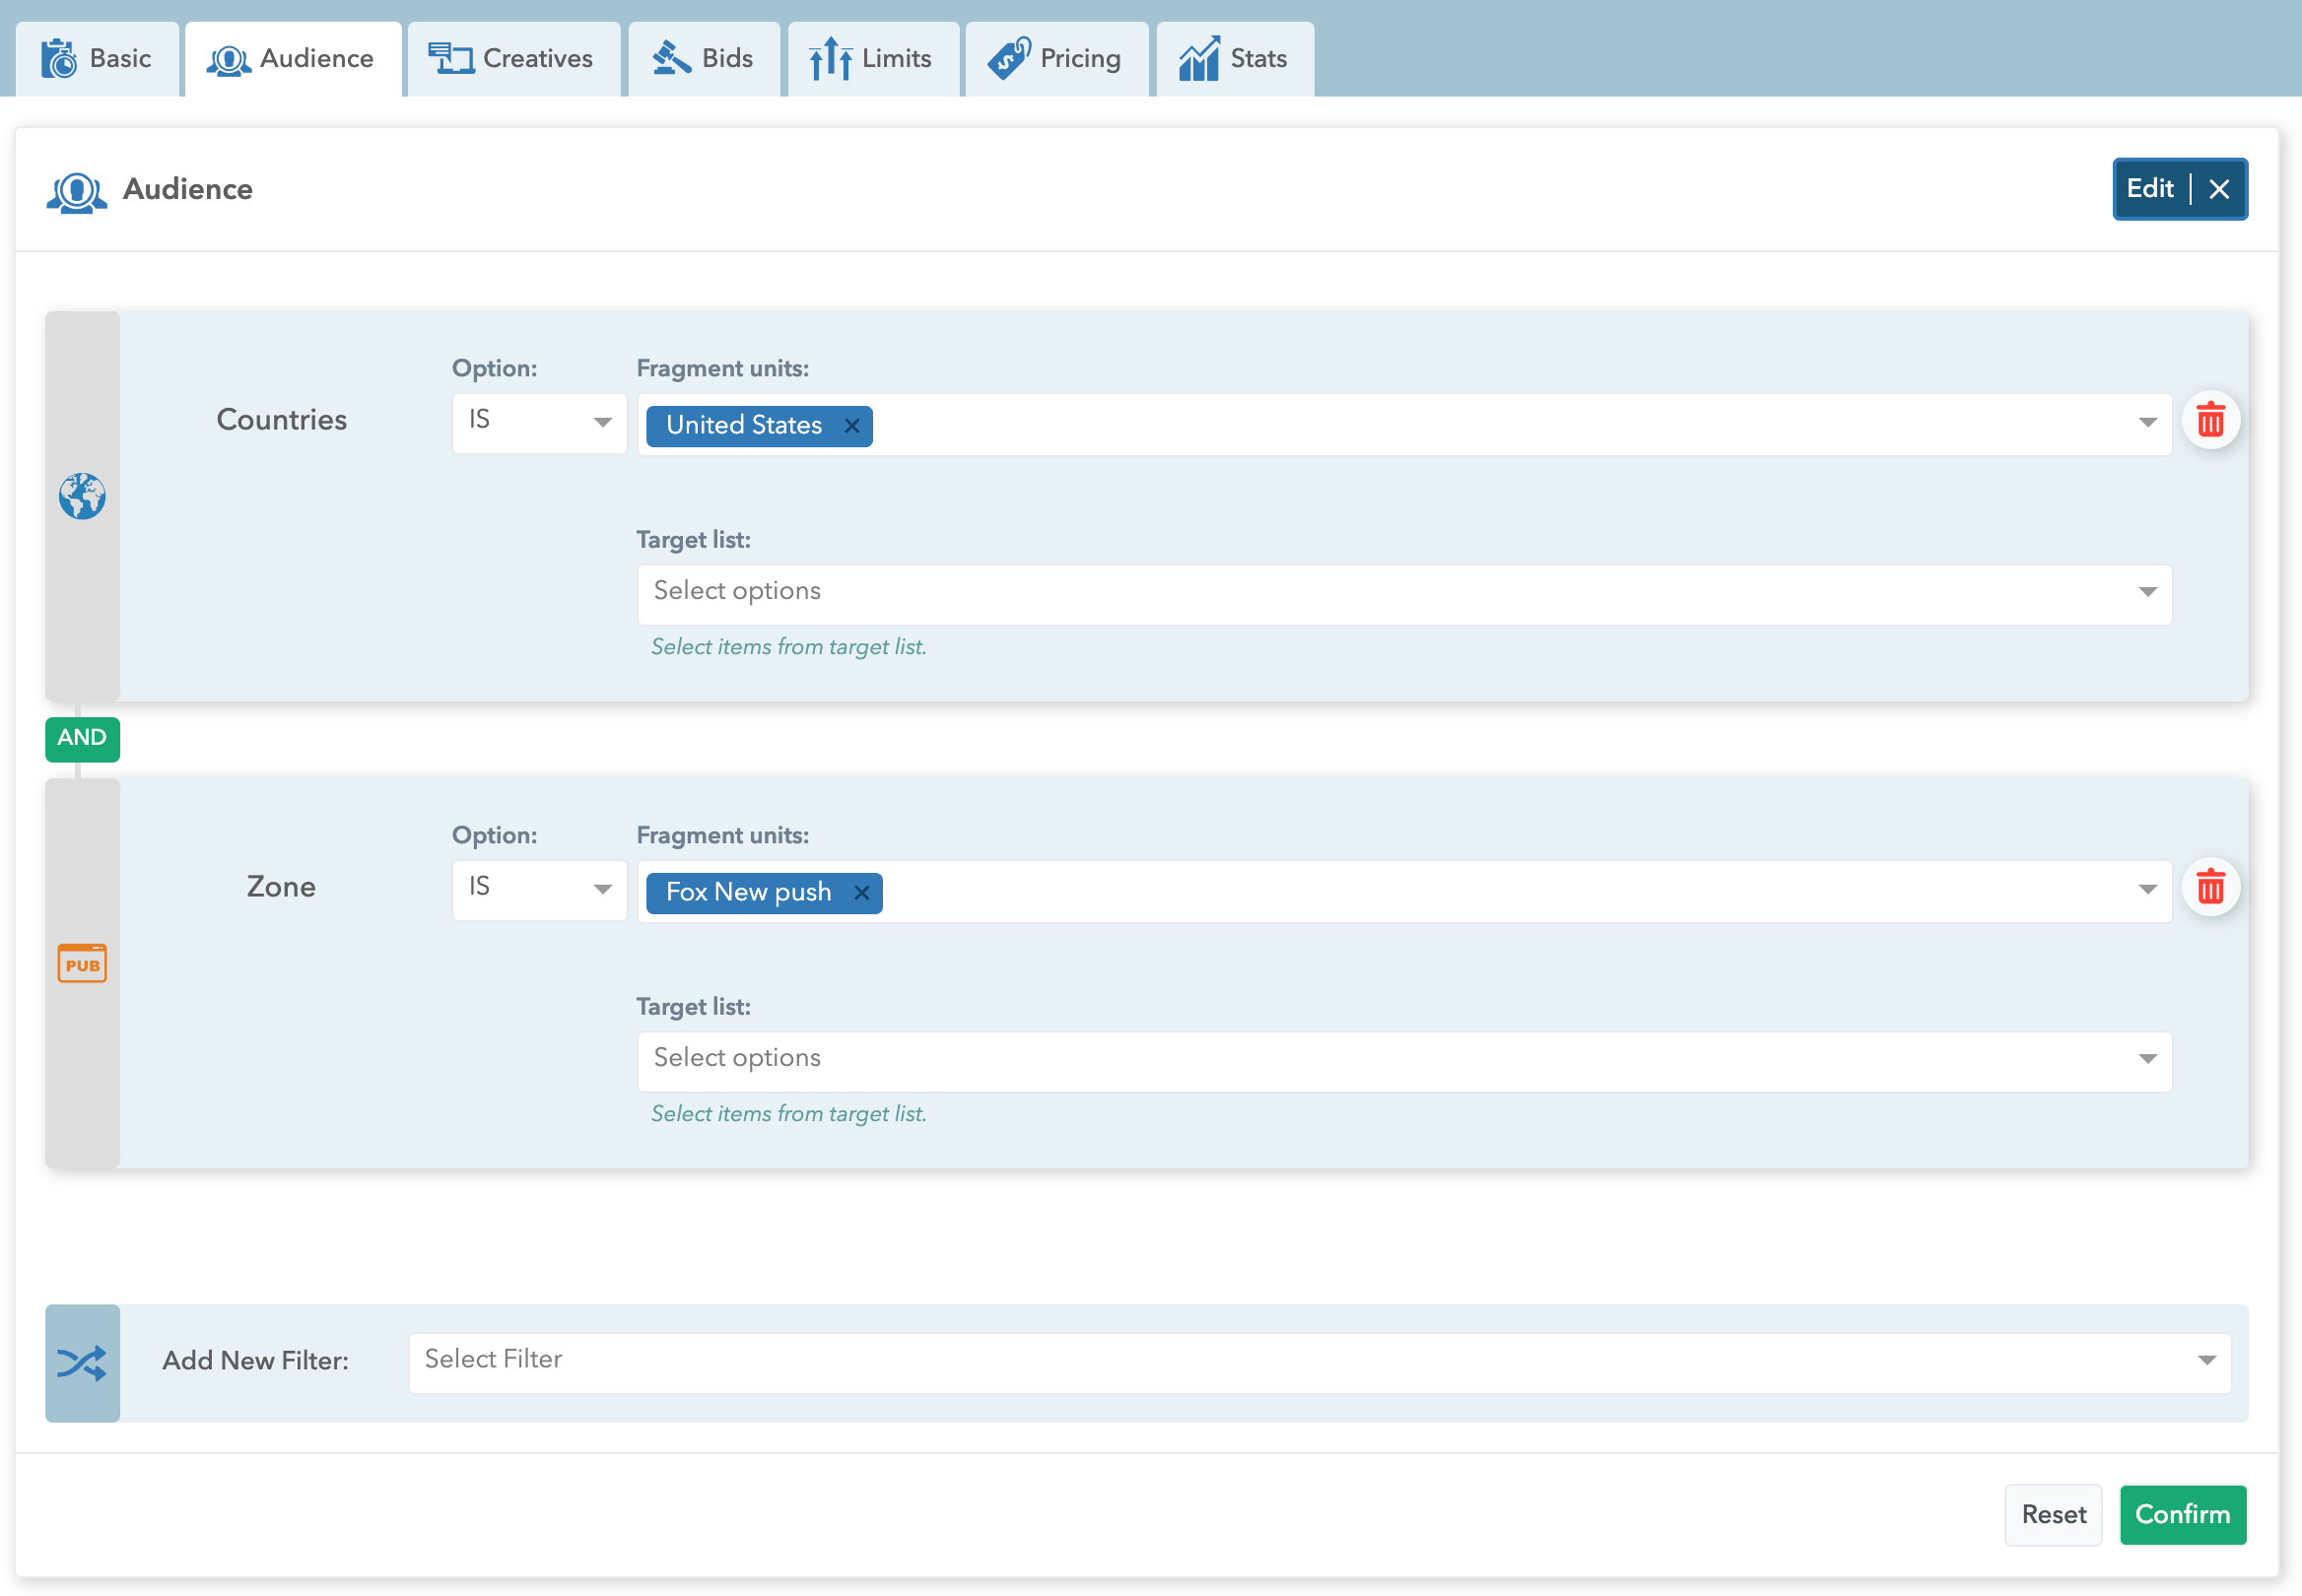
Step 4.
Confirm the changes.
Type of Audience
Type of audience you want to reach:
| Name | Description | ||
|---|---|---|---|
| Country | based on the Country of the user’s IP address Germany, France, Spain, etc. | ||
| Regions | based on the Region of the user’s IP address Abruzzo, Aceh, Morava, etc. | ||
| OS | based on the operating system and OS version that they are browsingAndroid- Donut (1.6), iOS (12.4), etc. | ||
| Languages | based on targeting certain languages Arabic, Bulgarian, Catalan, etc. | ||
| Connection Type | based on connection type Cable/dsl, Cellular, Corporate, Dialup, and Unknown | ||
| Browsers | based on the browser that they clicked on Chrome, Firefox, Safari, Opera, etc. | ||
| SubID | based on the ID of the Publisher It can only be an alphanumeric string with max 64 characters | ||
| Category | based on your audience’s interests Wine, food and drink, etc. | ||
| Time | based on targeting on certain minutes, hours, days, months and days of the week. When this targeting is set, a certain campaign will be displayed in the mentioned time fragment | ||
| User Data | this approach only works in triggering RTB native zones, and it is based on the custom values for your users. It is possible to add max three user data. | ||
| Tags | based on targeting on certain tags. When this targeting is set, a certain campaign will be displayed when sending an Adex message via scheduler | ||
| User Age | based on user age targeting, users which match the set vlues for the subscribed age are targeted. | ||
| IP | based on the user’s IP address ( individual IP or a range of IP’s) a specific IP address or a network | ||
| Page | based on the pages you want to forward the user’s any website | ||
| Zone | based on the Zone - traffic Native, Push, Display | ||
| Has user data | based on the custom values for your partners name=Jared, nickname=Jar, clicker=true | ||
| Device tracking/type/manufacturer | based on the application’s Advertising ID Yes, Mobile, Apple | ||
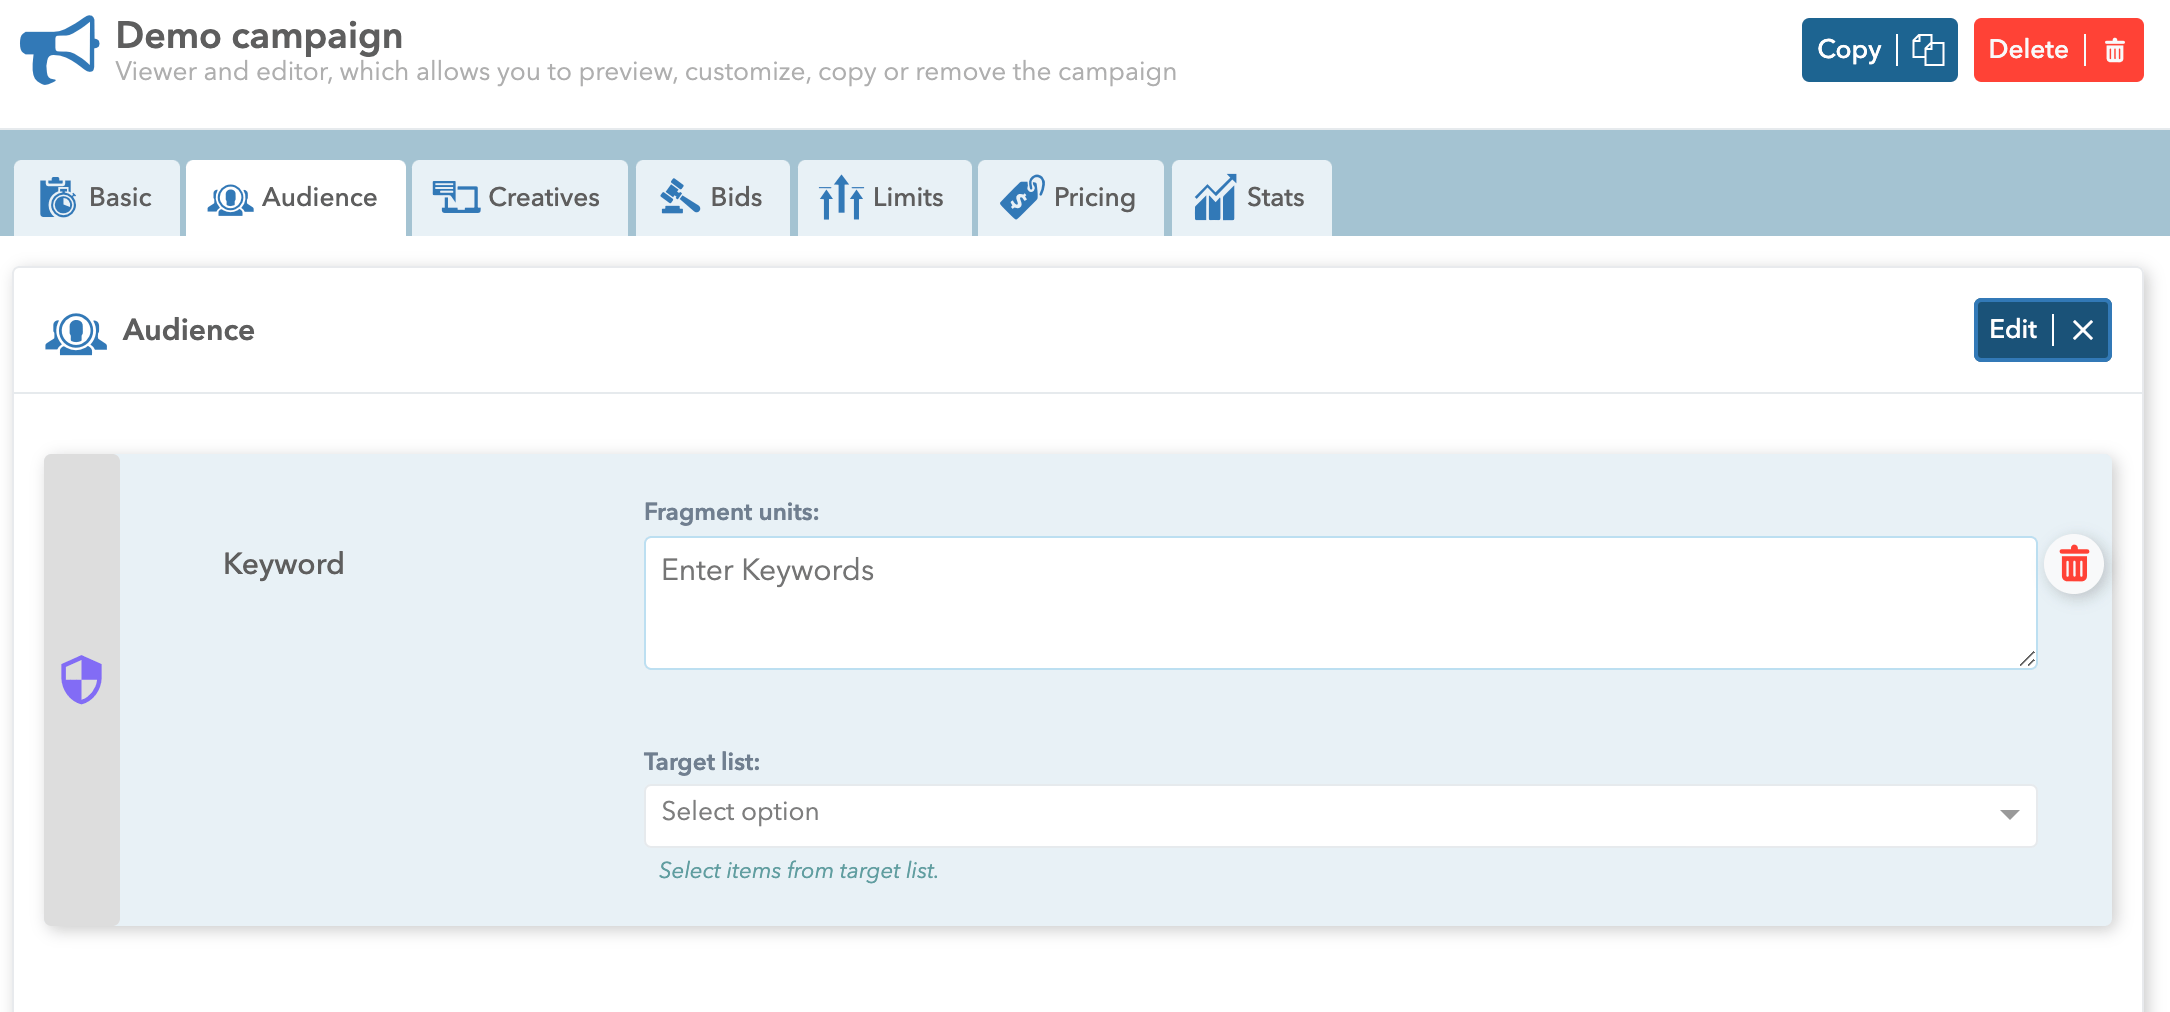
| Keyword | based on the keywords cars, boats, planes |
Keyword rules
The keyword must contain at least 3 and maximum of 150 characters
In OR guidance, a pipe is used instead of a comma (pipe symbol: | )
Enter is used for AND guidance
An exclamation point is used for negative keywords targeting
Allowed characters are: a-z, 0-9 and underscores (_)
Keyword features:
SubID is a numeric string, and keywords have multiple matching parameter
They do not have an IS / IS NOT function
Keywords are case-insensitive
Spaces ( ) are ignored and changed with underscores (_)
The maximum number of keywords that can be added to the targeting is 20
The maximum number of keyword lists that can be added to the target is 10
Meaning of parameters:
- One word targeting - type the keyword you want to match
Example: CarsOnly campaigns with the keyword Cars will be targeted.
- Two word targeting - type the keywords in two rows and separate them with enter
Example: Cars, MotoOnly campaigns with keywords Cars and Moto will be targeted.
- Three terms targeting - one of which has OR citation
Example: Cars | bicycle, MotoOnly campaigns based on Cars OR bicycles will be targeted, but with the obligatory presence of Moto in targeting.
- Two terms targeting - one of which has a negative keyword which preceded by an exclamation mark
Example: !cars, MotoOnly campaigns with the keyword Moto will be targeted, but WITHOUT the presence of cars in the target.
Wildcard matches:
- Targeting everything that ends with a certain keyword
Example: %juiceCampaigns will target only words like juice, apple_juice, but will NOT target a word like juice_bottle.
- Targeting only words that start with a word
Example: juice%Campaigns will target only words like juice, juice_bottle, but will NOT target a word like apple_juice.
- Targeting everything that has a word in it
Example: %juice%Campaigns will target only words like juice, juice_bottle_apple_juice and juicer.
- Targeting everything that doesn’t have a word in it
Example: !%juice%
- Targeting everything that doesn’t end with a word
Example: !%juice
- Targeting anything that doesn’t start with a word
Example: !juice%
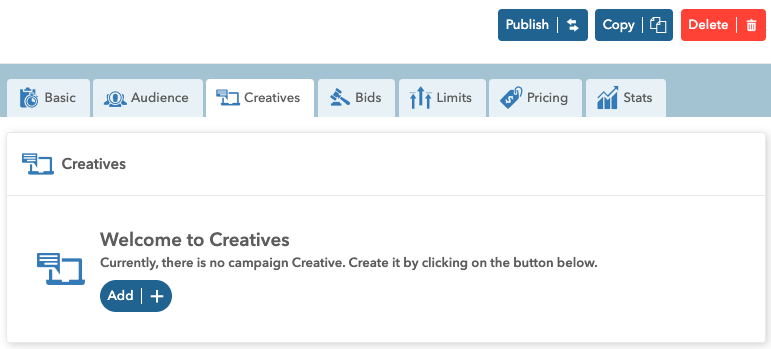
Creatives
To add a creative to an internal/external campaign, click the Add button on the Creative tab within the campaign. Within the internal campaign, it is possible to add Dynamic native and Web push object creative, while for external campaigns, it is possible to add Dinamic native external demand or Web push external demand creative.
You can choose one of the following statuses for your creatives:
- Active
- Verification
- Reject
- Paused
- Inactive
- Archived
Add Creatives
Please follow the steps below to add a Creative for your campaign:
Step 1. Inside each campaign there is a creatives tab
Step 2. Add a Creative
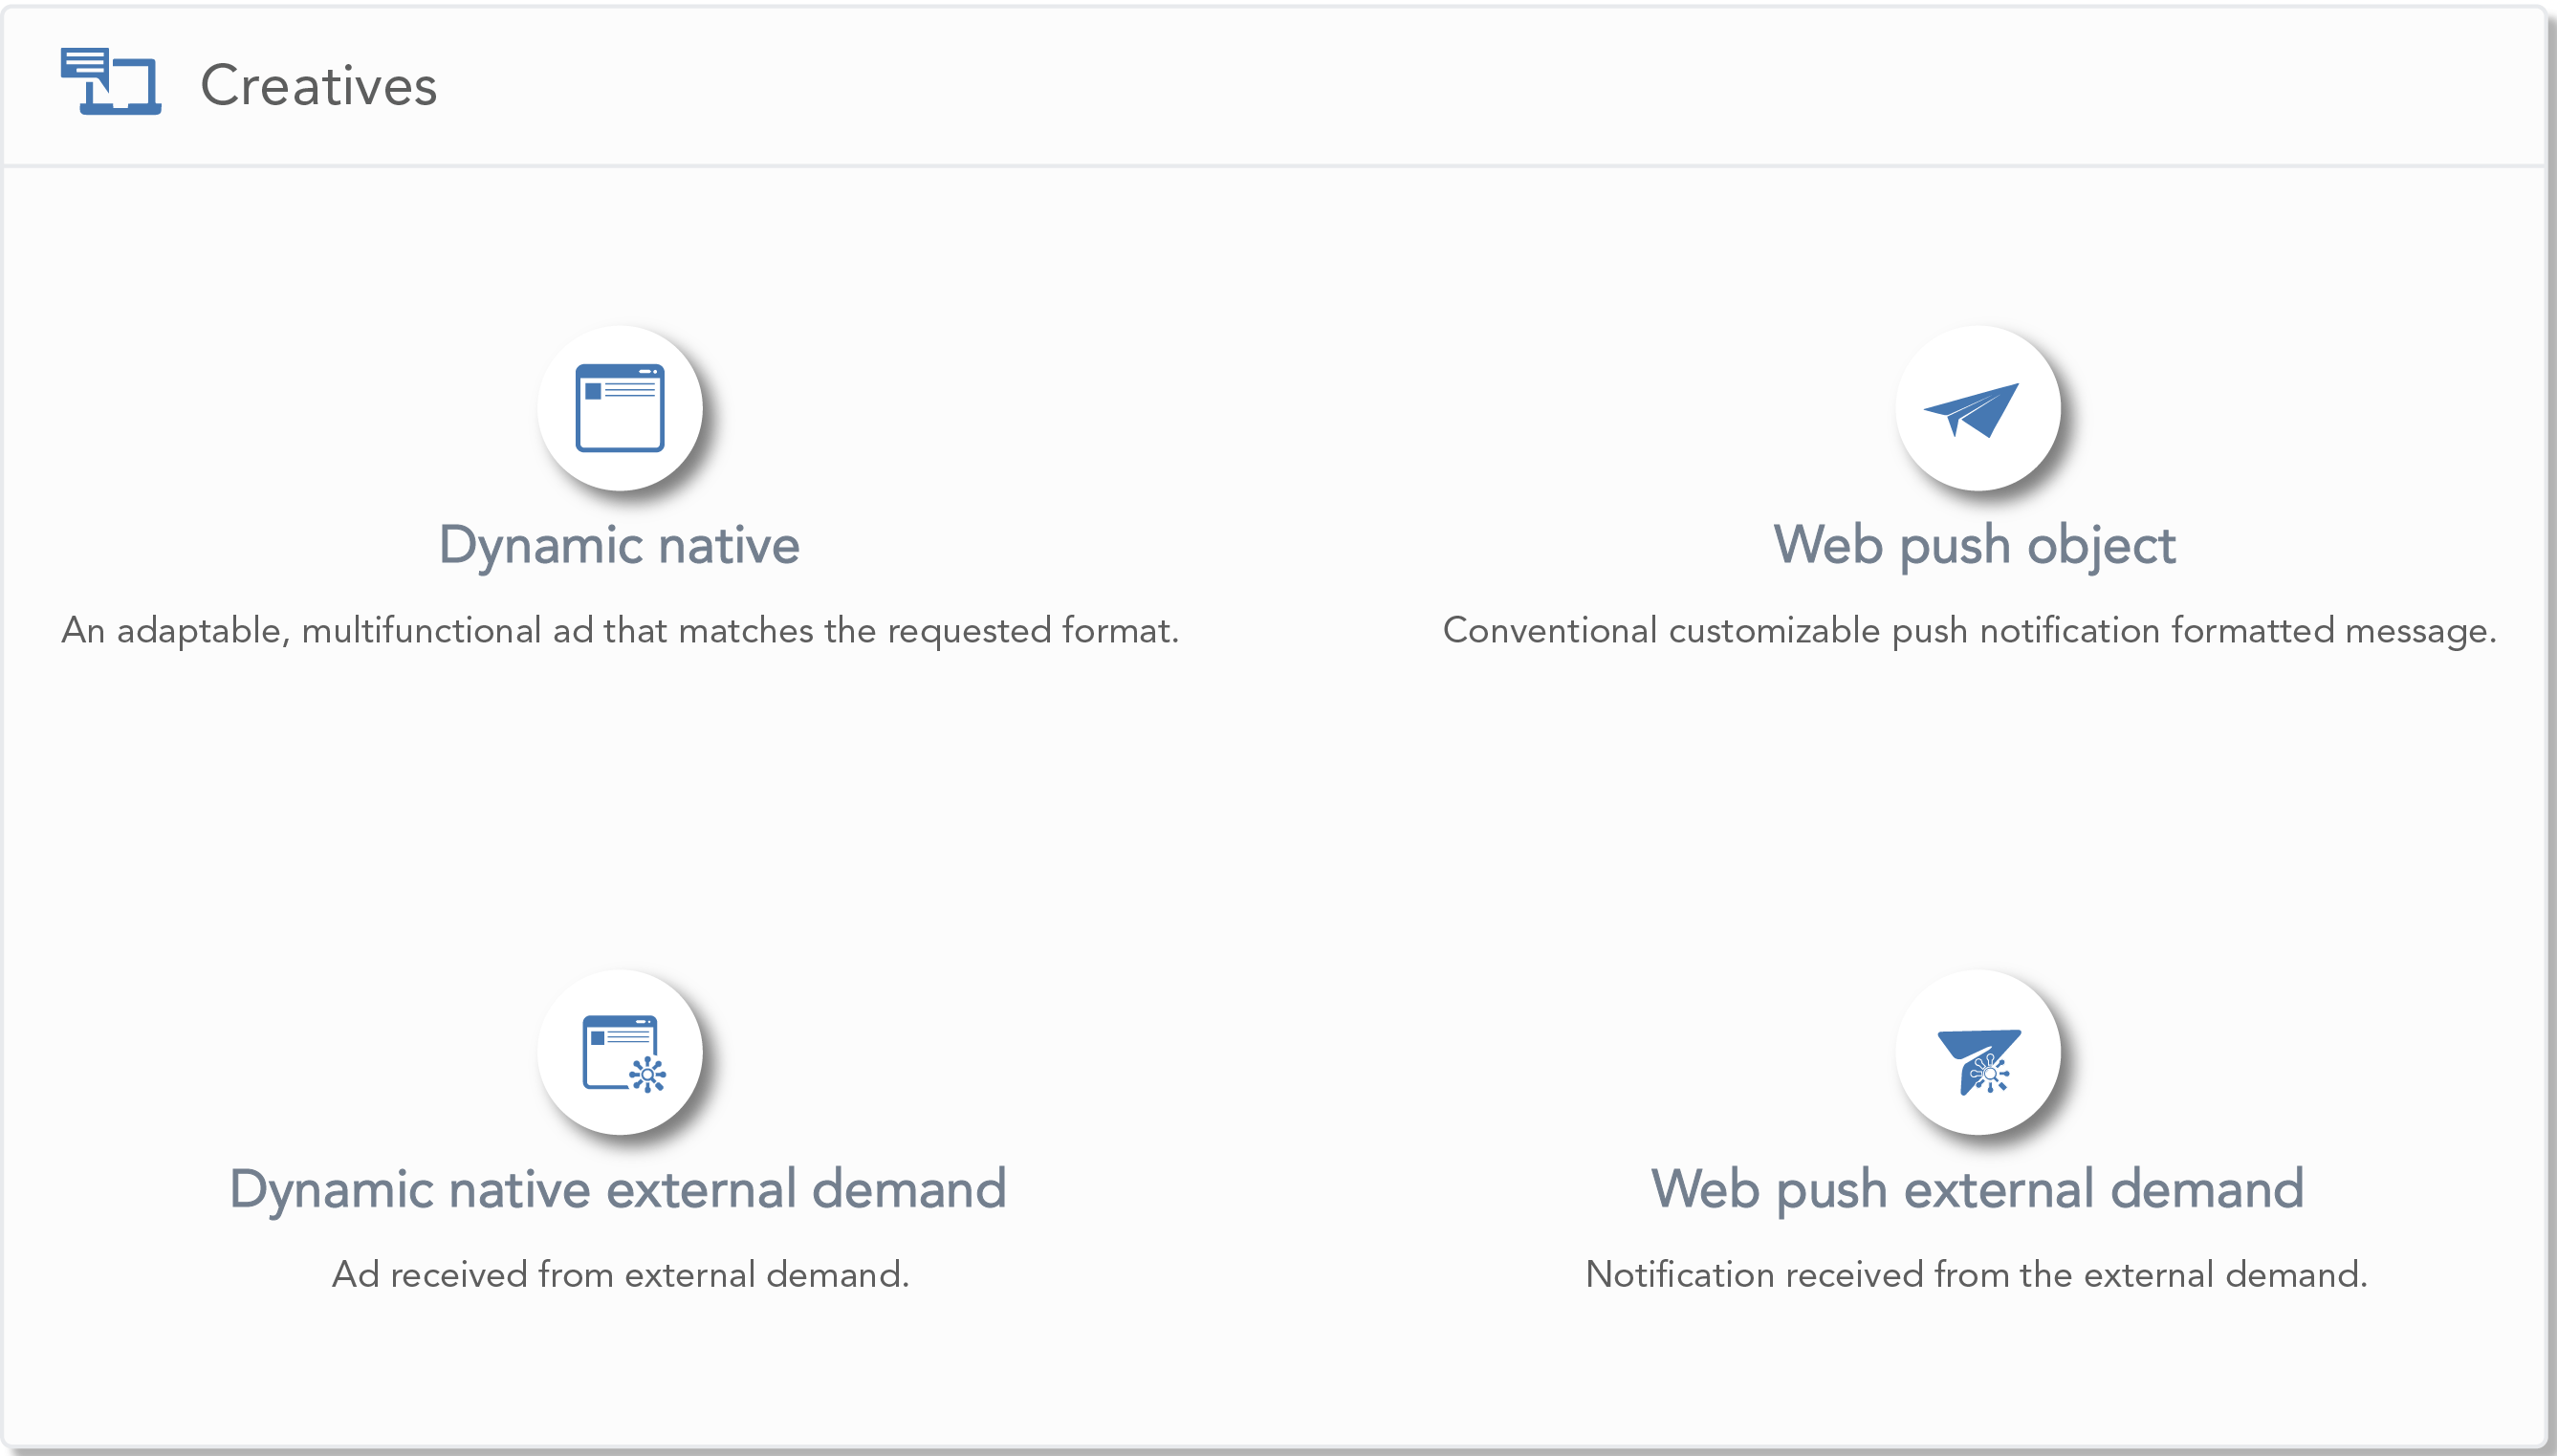
Step 3. Select the type of creative:
- Dynamic native
- Web push object
- Dynamic native external demand
- Web push external demand
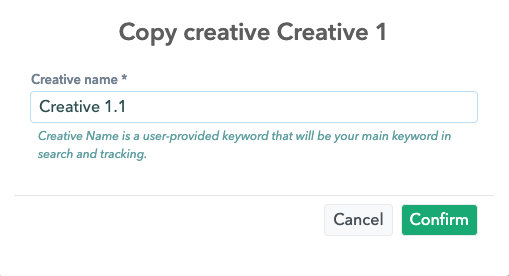
Copy Creatives
Ocamba allows you to copy pre-existing creatives. This is very useful when you need to create a creative that is similar to an old one, previously made. By copying the creative, you create a second version of it.

To copy the creative, click on the copy button in the upper right corner or on the copy icon next to the creative in the Creatives card.
You will be asked to name your new creative.
Edit Creatives
To edit a creative, click on it and make the desired changes. Once you are done with editing, click on the confirm button.

Preview of Web push object creative
While creating Web push object creative, it is possible to preview the notification for iOS, Android, Windows, and MacOS. Additionally, you can preview existing Web push object creative by clicking an eye icon.

Types of Creatives
- Dynamic native
- Web push object
- Dynamic native external demand
- Web push external demand
Dynamic native
Follow the steps below for a Dynamic native creative:
Step 1. Fill in the creative name
Step 2. Choose the Title which will be shown as a part of that Ad
Step 3. Choose an Image for the add (HTTPS://)
Step 4. Choose the Data objects by clicking on the Plus icon and the drop-down menu will appear
Step 5. Data objects are built-in and can be following parameters:
sponsored
description
description 2
rating
likes
downloads
price
sale price
phone
address
display URL
Call to Action text
Banner
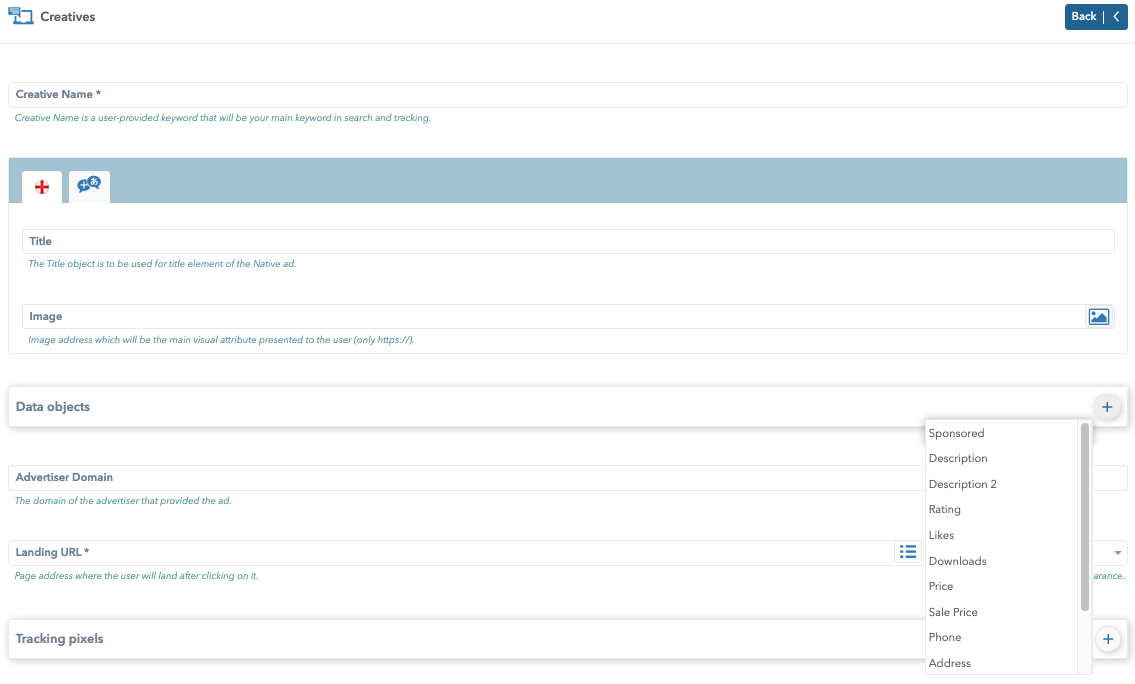
Step 6. Insert the domain of the advertiser that provided the add
Step 7. Paste the Landing URL and/or select the option by clicking on the icon in the Landing URL field (Maximum for Landing URL is 2048 and the letters must be written using the regular alphabet)
Step 8. Set the target method for the ad appearance:
_blank
_self
_parent
_top
Step 9. Set the tracking pixels to track the users behaviour (up to three pixels)
Step 10. Determine the status of the creative. The options are: Active, Verification, Rejected, Paused, Inactive or Archived

Web push object
Follow the steps below for a Web push object creative:
Step 1. Choose the name for the Creative
Step 2. Add the title - the main textual aspect that will be the most visible to the user
Step 3. Add body - a further description and bride title-related textual addition (ie. notification content)
Step 4. Insert an image - image address that will be the main visual attribute presented to the user (HTTPS:// is allowed). The optimal width is 1024px width (minimum of 512px), but the ratio must be 2:1.
Step 5. Choose the Icon URL that will be a secondary visual attribute presented to the user (HTTPS:// is allowed). The optimal size is 64px x 64px.
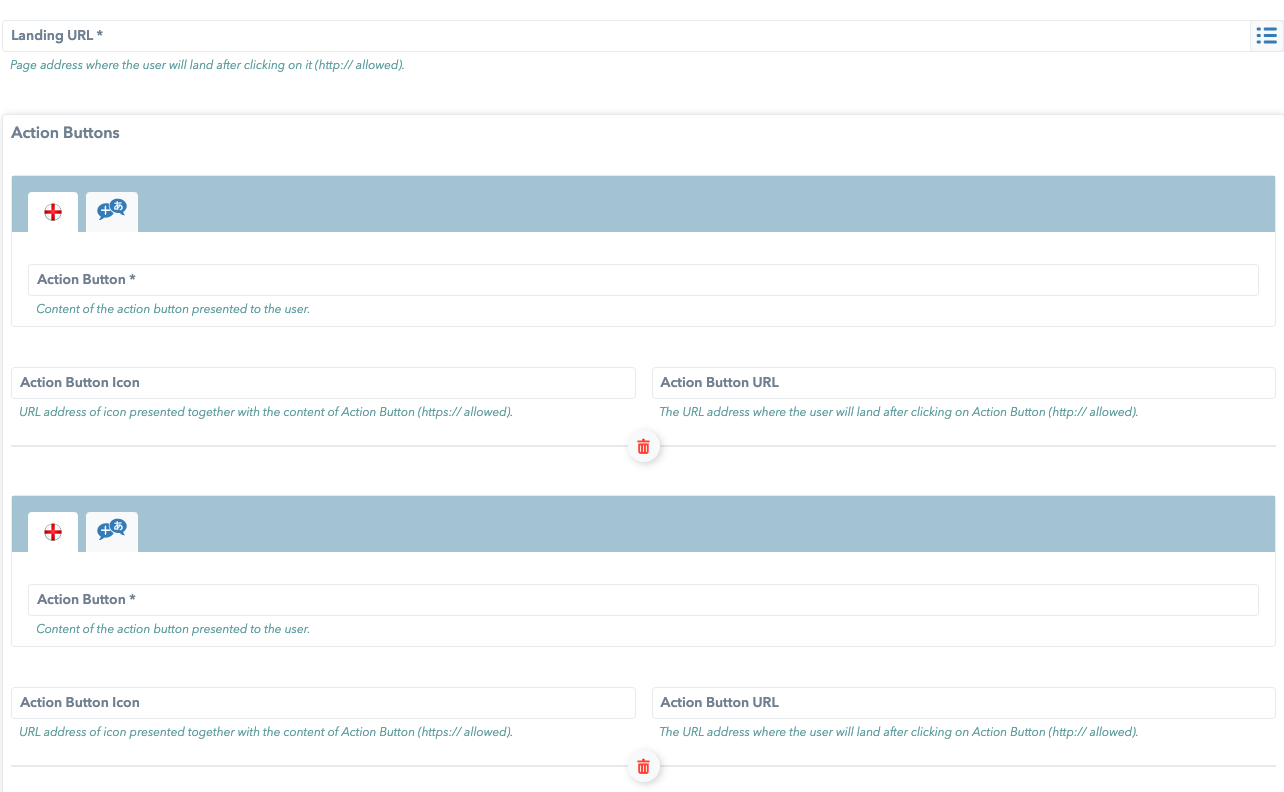
Step 6. Paste the landing URL - page address where the user will land after a click on it (HTTPS:// is allowed) - (Maximum for Landing URL is 2048 and the letters must be written using the regular alphabet)

Step 7. Add up to two Acton buttons. The components of Action buttons:
action button - content of the button that is presented to the user
action button icon - the URL address of the icon that is presented together with the content of the action button (HTTPS:// is allowed)
action button URL - the URL address where the user will land after clicking on the action button (HTTPS:// is allowed)
Step 8. Define the notification options. The options for push notifications:
Type tag - one of the categories from IAB 2.5
Vibration pattern - a parameter related to the vibrations that will occur after receiving a push notification. It is expressed in milliseconds in the following way vibration-pause-vibration, where the middle parameter is the pause between two vibrations
Renotify - by which we change an outdated notification whose time is no longer relevant with fresh information and all that in a silent method (on/off principle)
Request interaction - if this option is enabled, after sending notification users have to act (ie click on one of the CTA buttons). It is available for desktop users only
Silent - also an on/off option, which sends a notification to the user without waking the screen, making a sound and vibration. Applies to mobile users only
Badge - monochromatic mini-icon (HTTPS:// is allowed). Most often, it is used to show from which application comes notification
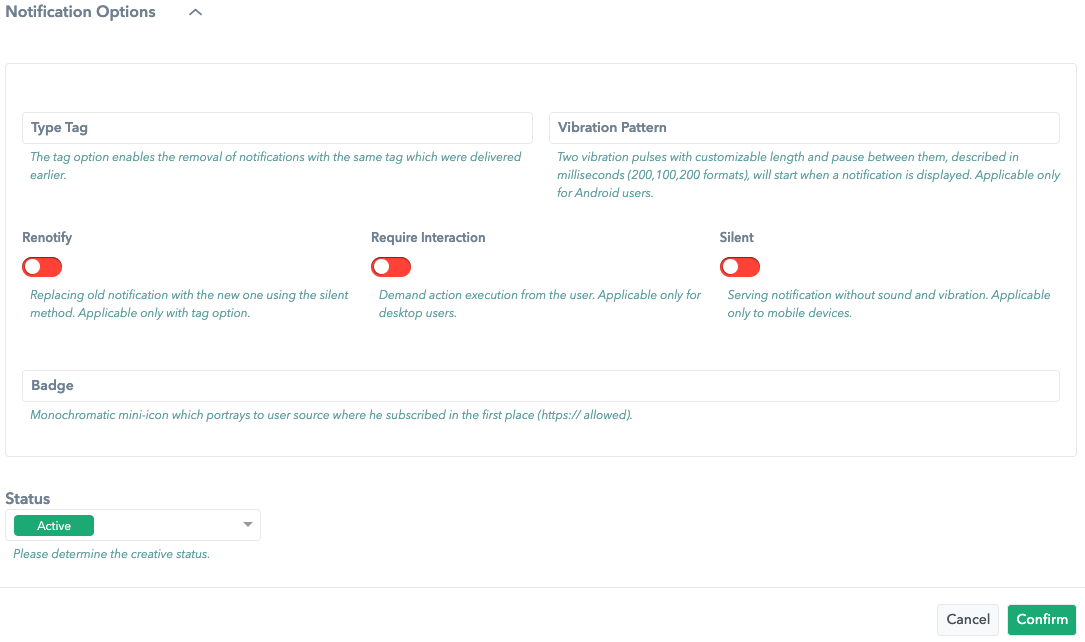
Step 9. Decide the Status of the creative.
Step 10. Confirm the changes
Dynamic native external demand
Follow the steps below for a Dynamic native external demand:
Step 1. Fill in the creative name
Step 2. Choose the Title which will be shown as a part of that Ad
Step 3. Choose an Image for the add (HTTPS://)
Step 4. Choose the Data objects by clicking on the Plus icon and the drop-down menu will appear
Step 5. Data objects are built-in and can be following parameters:
sponsored
description
description 2
rating
likes
downloads
price
sale price
phone
address
display URL
Call to Action text
Banner
Step 6. Insert the domain of the advertiser that provided the add
Step 7. Paste the Landing URL and/or select the option by clicking on the icon in the Landing URL field (Maximum for Landing URL is 2048 and the letters must be written using the regular alphabet)
Step 8. Set the target method for the ad appearance:
_blank
_self
_parent
_top
Step 9. Set the tracking pixels to track the users behaviour (up to three pixels)
Step 10. Determine the status of the creative which can be Active, Verification, Rejected, Paused, Inactive or Archived
Note: When you change the toggle button from red to green it will show the data that you entered instead of the partners configuration.
Inside the creatives you can also configure and use macros. Through this tool you can change specific partner fields, and the options are: upper, lower, append and prepend.
- upper() - function allows to convert all letters to uppercase ${lower(EXT_TITLE)}
- lower() - function allows to convert all letters to lowercase ${lower(EXT_TITLE)}
- append - function allows to add text after partners configuration ${EXT_TITLE+Hello}
- prepend - function allows to add text before partners configuration ${Hello+EXT_TITLE}
Web push external demand
Follow the steps below for a Web push external demand creative:
Step 1. Choose the name for the Creative
Step 2. Add the title - the main textual aspect that will be the most visible to the user
Step 3. Add body - a further description and bride title-related textual addition (ie. notification content)
Step 4. Insert an image - image address that will be the main visual attribute presented to the user (HTTPS:// is allowed). The optimal width is 1024px width (minimum of 512px), but the ratio must be 2:1.
Step 5. Choose the Icon URL that will be a secondary visual attribute presented to the user (HTTPS:// is allowed). The optimal size is 64px x 64px.
Step 6. Paste the landing URL - page address where the user will land after a click on it (HTTPS:// is allowed) - (Maximum for Landing URL is 2048 and the letters must be written using the regular alphabet).
Step 7. Add up to two Acton buttons. The components of Action buttons:
action button - content of the button that is presented to the user
action button icon - the URL address of the icon that is presented together with the content of the action button (HTTPS:// is allowed)
action button URL - the URL address where the user will land after clicking on the action button (HTTPS:// is allowed)
Step 8. Define the notification options. The options for push notifications:
Type tag - one of the categories from IAB 2.5
Vibration pattern - a parameter related to the vibrations that will occur after receiving a push notification. It is expressed in milliseconds in the following way vibration-pause-vibration, where the middle parameter is the pause between two vibrations
Renotify - by which we change an outdated notification whose time is no longer relevant with fresh information and all that in a silent method (on/off principle)
Request interaction - if this option is enabled, after sending notification users have to act (ie click on one of the CTA buttons). It is available for desktop users only
Silent - also an on/off option, which sends a notification to the user without waking the screen, making a sound and vibration. Applies to mobile users only
Badge - monochromatic mini-icon (HTTPS:// is allowed). Most often, it is used to show from which application comes notification
Step 9. Decide the Status of the creative. It can be: Active, Verification, Rejected, Paused, Inactive or Archived
Step 10. Confirm the changes
Inside the creatives you can also configure and use macros. Through this tool you can change specific partner fields, and the options are: upper, lower, append and prepend.
- upper() - function allows to convert all letters to uppercase ${lower(EXT_TITLE)}
- lower() - function allows to convert all letters to lowercase ${lower(EXT_TITLE)}
- append - function allows to add text after partners configuration ${EXT_TITLE+“Hello”}
- prepend - function allows to add text before partners configuration ${“Hello”+EXT_TITLE}
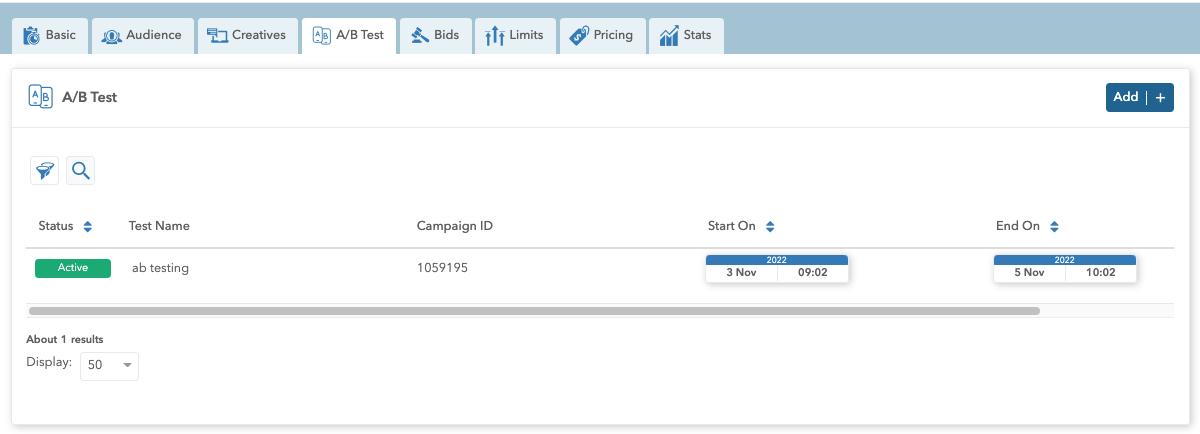
A/B Test
For active creatives, it is possible to create an A/B test to check which is the most adequate creative to display to the target audience. All created A/B tests within the campaign are located on the A/B test tab, where you can see basic information about the specific A/B test (Start on, End on, which campaign it belongs to, what its status is).
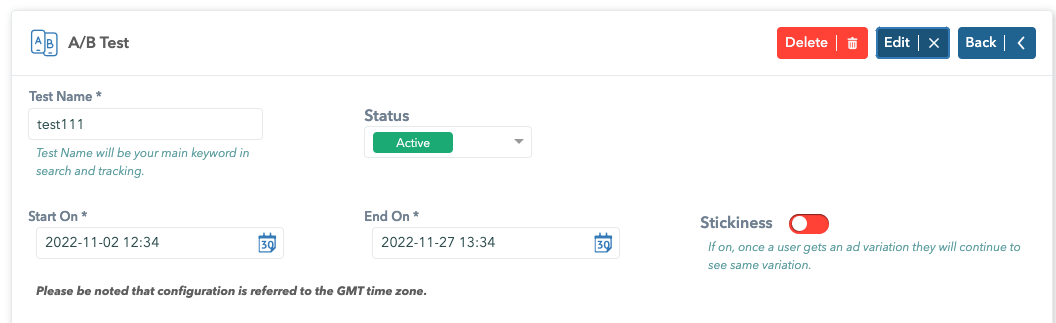
To create an A/B test within campaigns, you need to do the following:
Step 1. In the Test Name input, you need to enter a name for the test. Step 2. Determine the time for how long the test will last (Start on, End on) Step 3. Stickiness - If it’s on, when the user receives a variation of the ad, they will continue to see the same variation. Step 4. Control Group - All currently active creatives are selected here. Step 5. Audience Step 6. Finally, click the Confirm button, and the A/B test configuration will be saved.
When you open an existing A/B test, you can edit the following:
- Test Name
- Status - can be Active, Inactive, Finished
- Start On and End On
- Stickiness
- Variations
- Audience
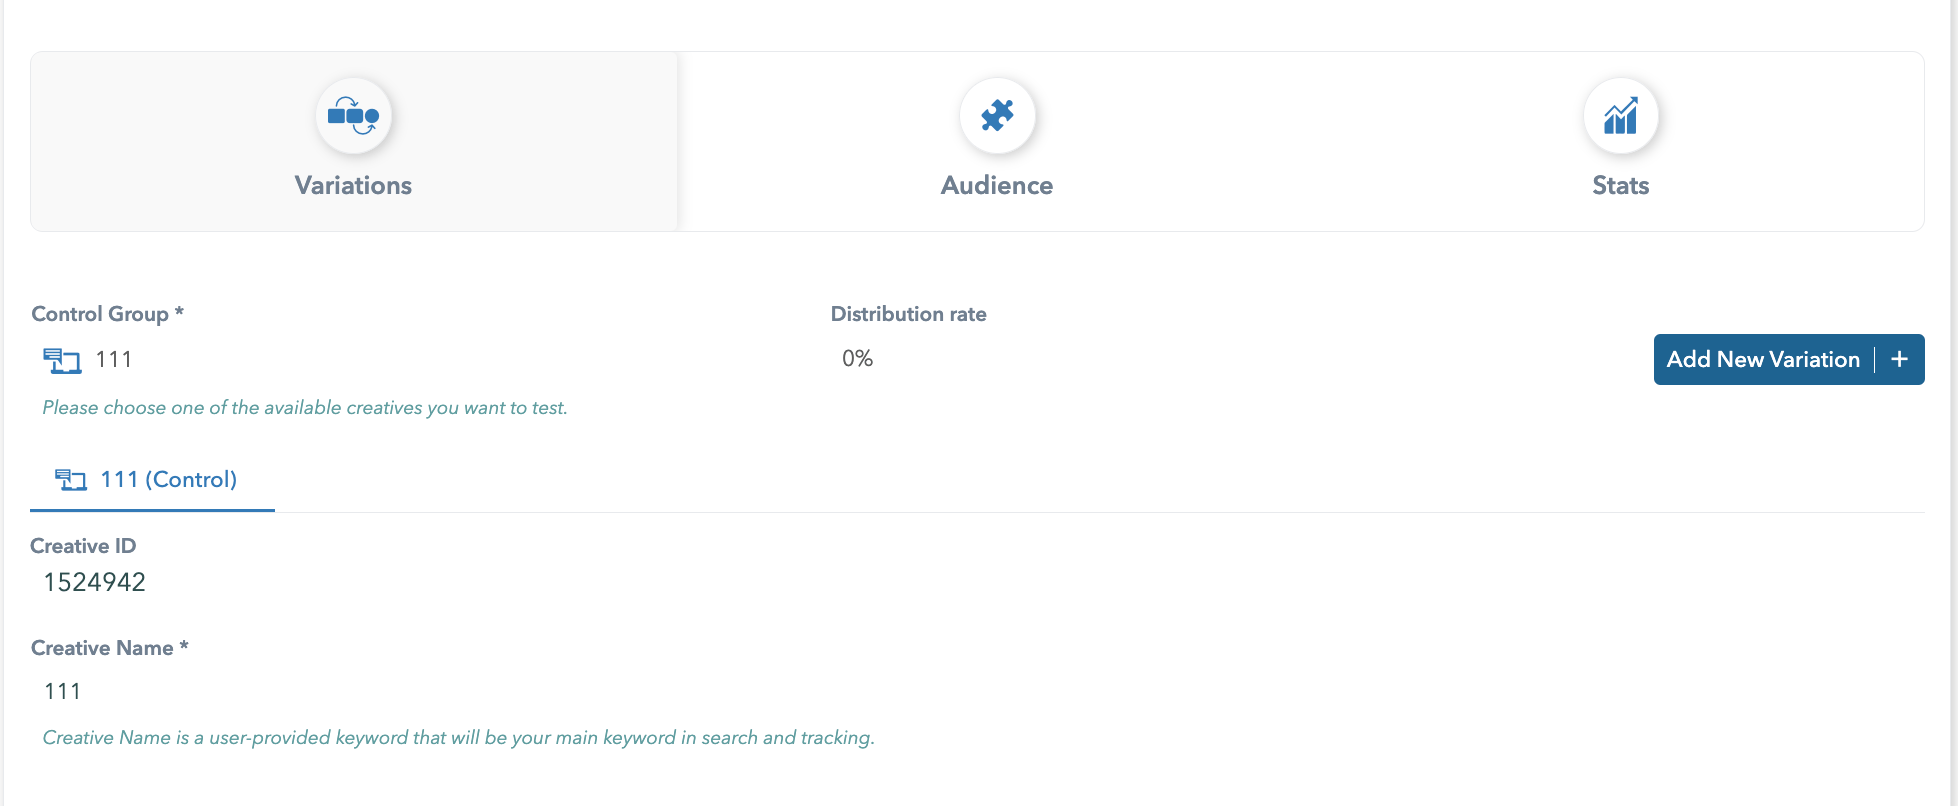
Variations
Within Variations tab it is possible to see control group, where you will be shown the percentage of traffic distribution on the specific creative (if there is a distribution on the creatives themselves). It is possible to add variations to creative control by clicking the Add button (maximum of 3 variations in addition to the control variation).
To add a variation, it is necessary to fill in the name of the test variation. Then, if the variation is added to Native creative, you can add the following within the Test Subject: Title, Image, Data Object (Sponsored, Description, Description 2, Rating, Lakes, Downloads, Price, Sale Price, Phone, Address, Display URL, Call to Action text, Banner) and Landing URL. But, if the variation is added to Push creative, you can add Title, Body, Image, Icon URL, Landing URL, Tag type & Renotify, Vibration pattern, Require Interaction, and Silent.
To start the test, you need to save the changes previously made by clicking the Confirm button, and after that, you need to publish the campaign by clicking the Publish button.
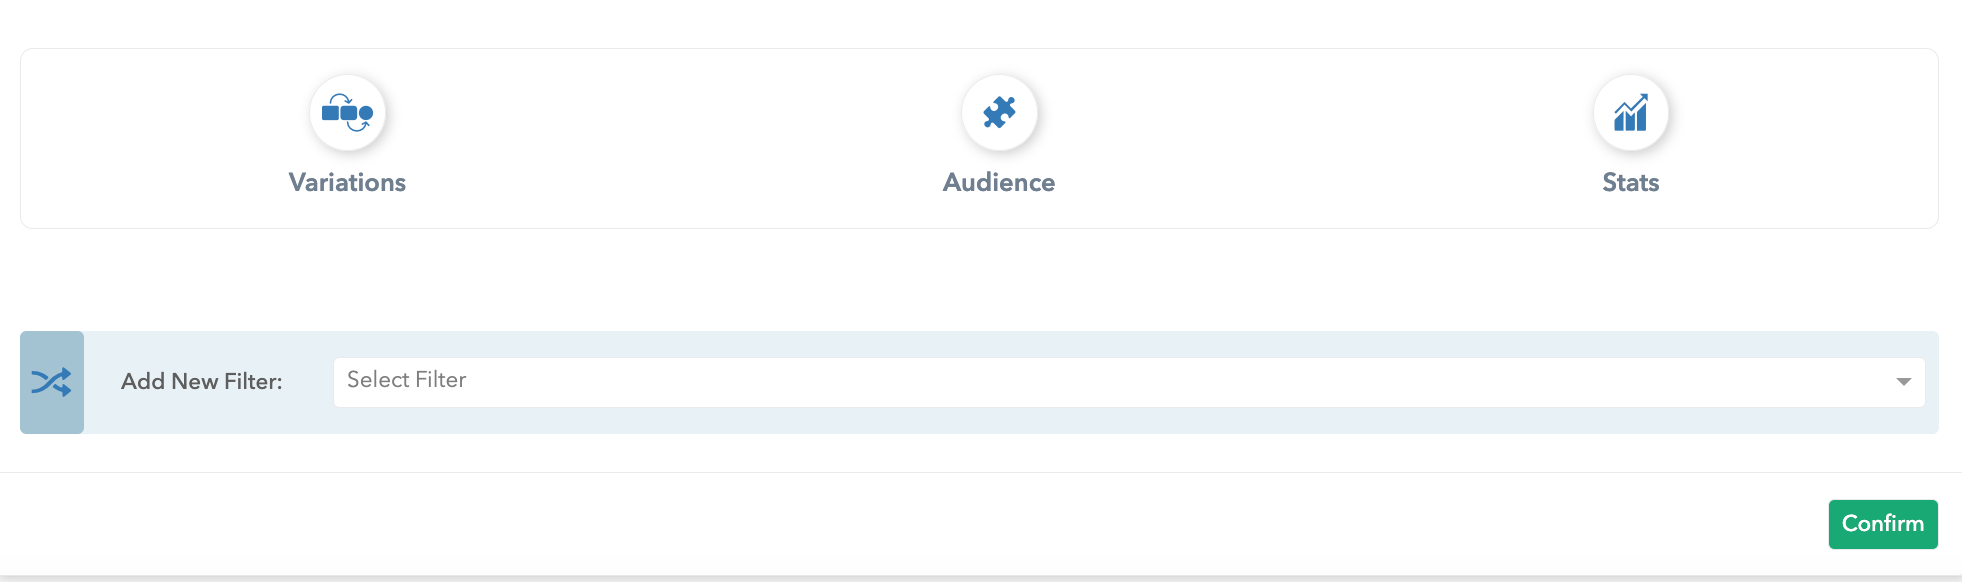
Audience
Within Audience tab, it is possible to add an audience for the A/B test to select the target group. Available Audiences within A/B tests are Country, Browser, Region, OS, Time, SubID, Category, User Data, Device Tracking, Device Type, Device Manufacturer, Tags, User Age, IP, Zone, Page, Has User Data, Keyword.
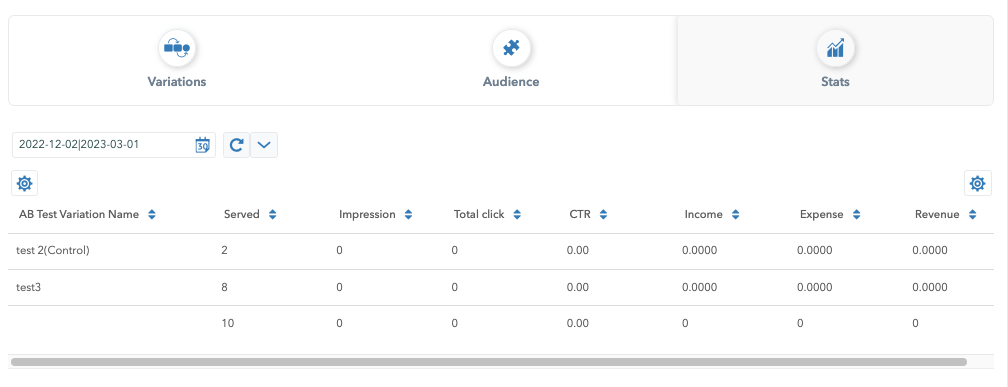
Stats
Within the Stats tab, you can see statistics for all variations, based on which you will edit and adjust your creative. Statistics are presented in tabular form, and data are presented based on selected dimensions and metrics.
The user can select any offered Dimensions (Creative ID, Creative and AB Test Variation Name, and User Language) and Metrics (Served, Impression, Click, Spam click, Total click, CTR, Conversion, Income, Expense, Revenue, and Expected Income).
Next to the calendar, there is a button to Refresh statistics. It is possible to set an automatic refresh that would be performed for a certain period (30s, 1m, 5m, 15m, 30m, 1h, 2h, 1d) by selecting the desired option from the dropdown menu.
If there is an active test on the campaign, a warning icon will appear in the upper right corner next to the Copy and Delete buttons - “Direct or indirect changes in the campaign can impact results of active A/B tests. These changes include but are not limited to the following tabs: Basic, Audience, Creatives, Bids, Limits, and Pricing.”
Bids
Once you have successfully created the Campaign, go to the Bids card, you will be presented with the default screen and values.
Everything shown is configurable, and you can easily edit it by clicking on the pen icon or the Add button to add new bid modifiers.
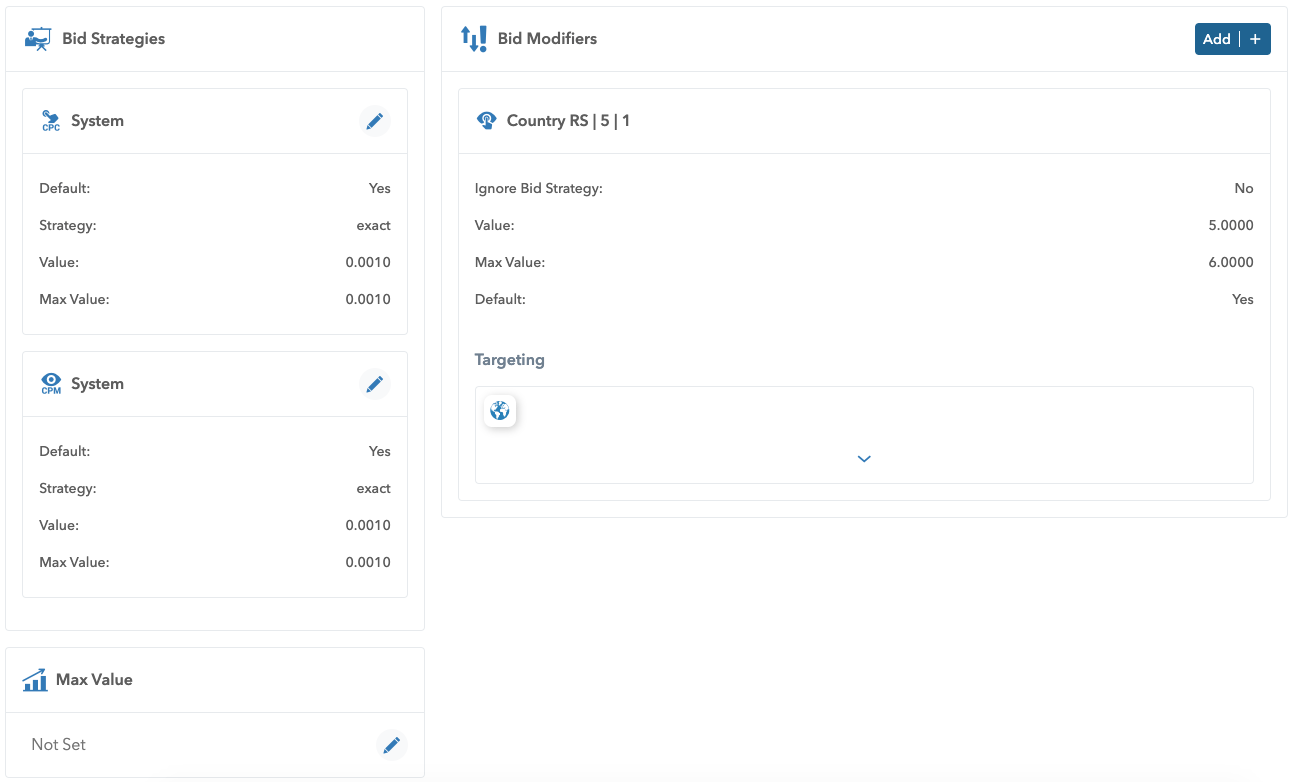
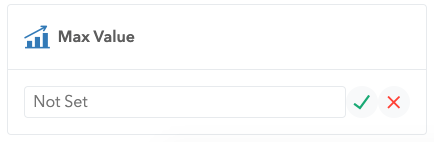
Max Value
Add a max value by clicking on the Pen icon right next to it.
If the Max value is not set, the rules from strategies and modifiers will be employed.
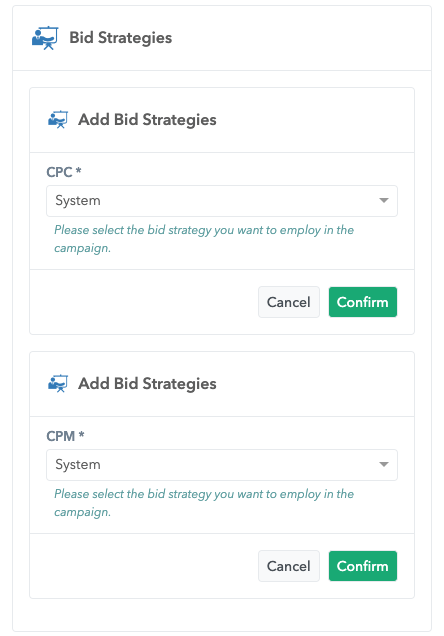
Bid Strategy
Click on the pen icon in the Bid strategies/System and choose a bid strategy system that you had previously set in Bid strategies.
A drop-down list will be shown to you to choose the wanted Bid strategy for either CPM or CPC by clicking on it.
Note that the strategy you set to be the default in bid strategy will be shown here.
You will have to choose one default strategy for CPC and one for CPM.
If you wish to set a different bid strategy than the default one, click on it in the drop-down menu.
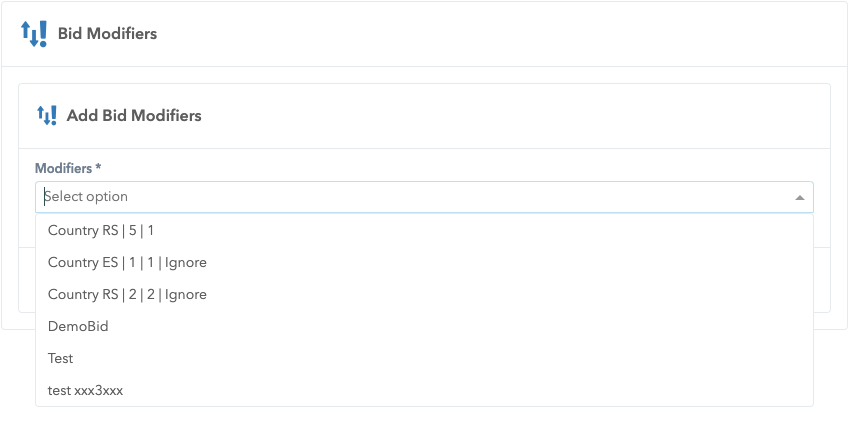
Bid Modifiers
Click on the Add button in the Bid modifiers and choose a bid modifier previously created in Bid modifiers.
A drop-down list will be shown to you, and you will choose the wanted Bid modifier by clicking on it.
To set the default bid modifier, go to the Bid modifiers tab.
You can add multiple bid modifiers per campaign.
Limits
After creating a campaign, you might want to add Limits to it.
Limit your campaign in two ways:
by finances
by frequency
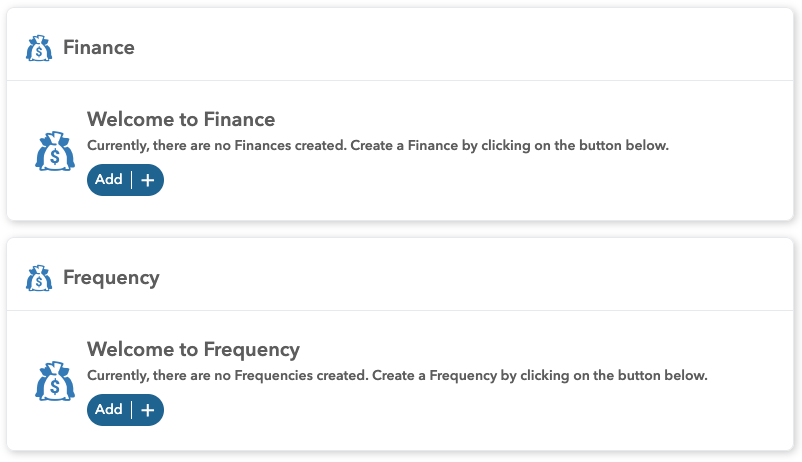
Finance
Add Finance for your Campaign by clicking on the Add button in the Finance window.
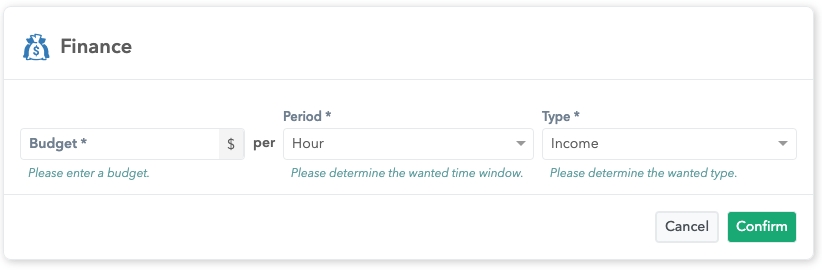
Fill in the required information regarding your budget and determine the time period (Hour, Day, Month, Lifetime) and type of budget (Income, Expense).
The finance is set to work in budget per period and type manner.
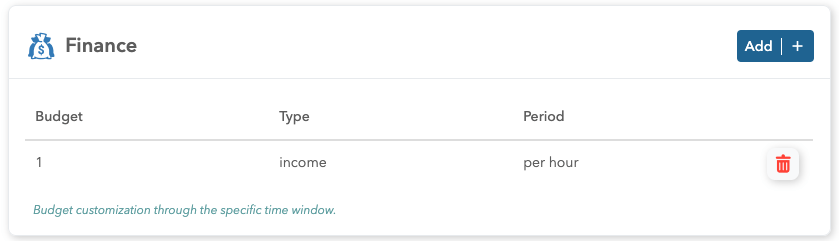
When you’ve added Finances, you will see them in the list view under the Limits card.
To add more - click on the Add button
To delete a Finance - click on the red bin icon in the column
Frequency
Add Frequency to your campaign by clicking on the Add button in the Frequency window.
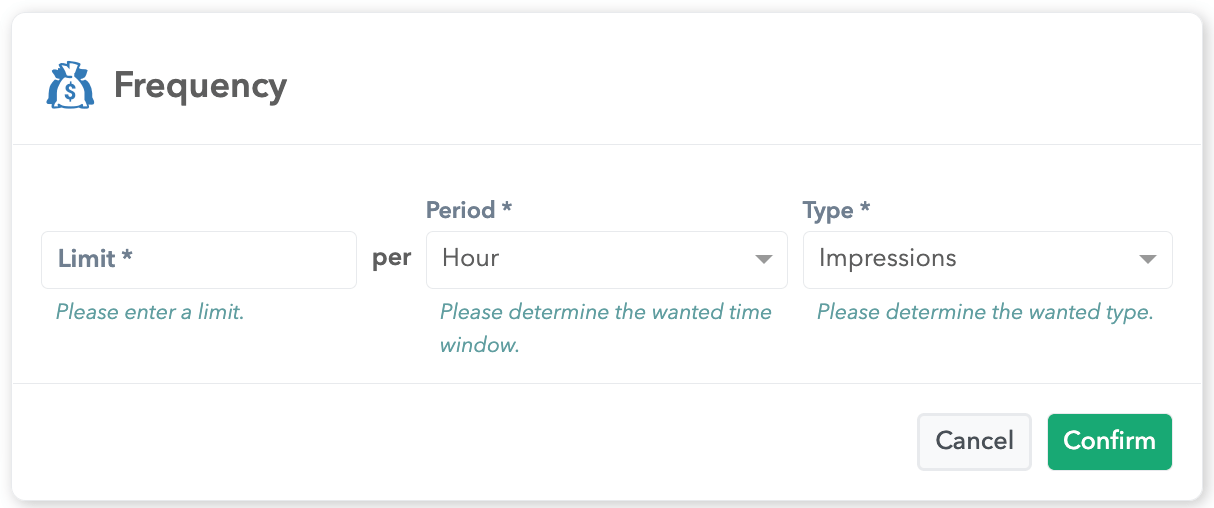
Fill in the required information regarding your limit and determine the time period (Hour, Day, Month, Lifetime) and type (Impressions, Clicks, Conversions).
The frequency is set to work in limit per period and type manner.
The type window can be set to be either impressions, clicks or conversions.
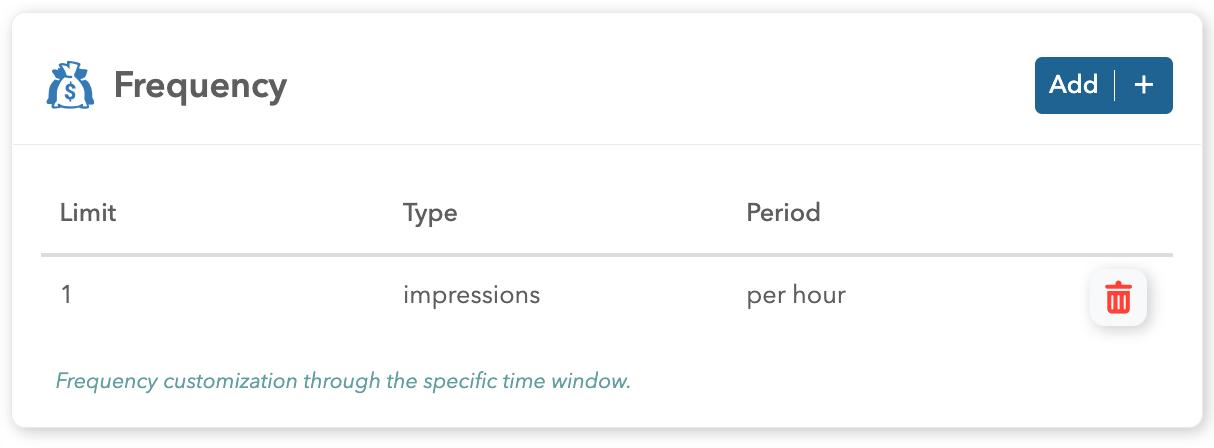
Added Frequency will be shown in the list view under the Limits card.
To add more - click on the Add button
To delete the Frequency - click on the red bin icon in the column
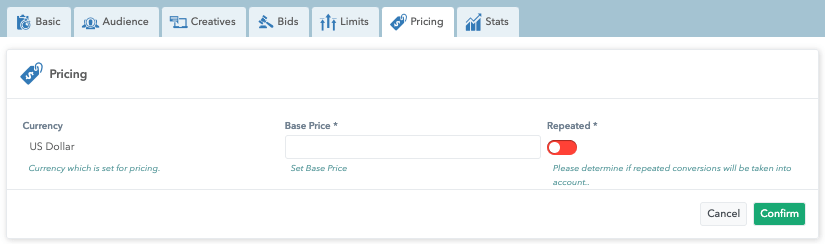
Pricing
Add pricing for your campaign from the Pricing card in Campaign’s editor.
Step 1. Click on the Add button
Step 2. Choose the wanted currency from the drop-down menu
Step 3. Determine the Base price
Step 4. Choose if you want your conversion to be repeated
Step 5. Click on the Confirm button
Optional: Add price per country configuration by clicking on the Add symbol.
Then, select one or more countries from the drop-down menu and set a price.
When done, you will be able to see and edit the pricing.
Now that Pricing is created, you will see it when you click on the Pricing card.
Here, you will get access to the Conversion setting that allows you to determine conversion price per country.

The tag is used for tracking user actions.
Conversion determines the wanted pricing model.
Once the changes are done, click on the Confirm button.
To cancel the edits click on the Cancel button.
Stats and Pricing modifier by Category
If you want to get statistics by Category, you will need to pass the parameter, i.e. &cat=iab1-3 in the request.
If there is no defined targeting of Categories on the Zone Audience, the request with the additional parameter &cat=iab1-3 will pass. A new result is shown in the stat tab.
But, if you have a Category defined in Zone Audience and it is set differently from the one in the request, it will not change the statistics because the request did not match the Zone Audience.
In the Designer report, if you choose Adex Advertiser, Adex Publisher or Adex Click sources, you will be given new dimensions (IAB category id, IAB category name and IAB category group id).
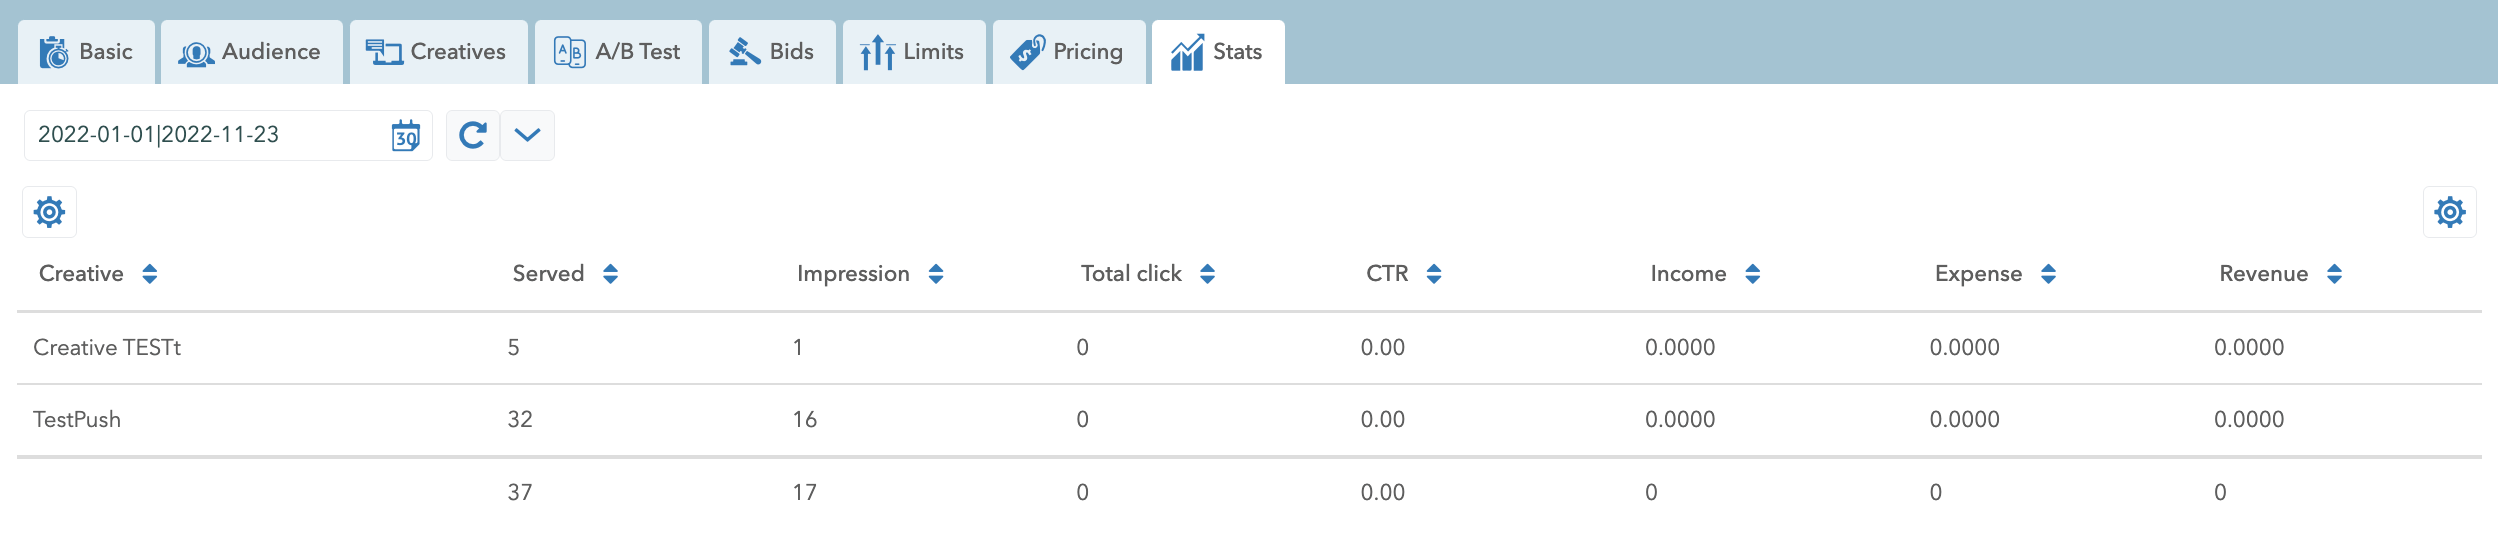
Stats
Campaign statistics provides a better insight into the performance of the campaign itself. It can be reached by clicking on Campaigns on the main menu, and then after selecting the desired campaign, click on the Stats tab. Statistics are presented in tabular form based on previously chosen dimensions and metrics.
The user can select any offered Dimensions (Creative, Creative ID and User Language) and Metrics (Served, Impression, Click, Spam click, Total click, CTR, Conversion, Income, Expense, Revenue, and Expected Income).
Next to the calendar, there is a button to Refresh statistics. It is possible to set an automatic refresh that would be performed for a certain period (30s, 1m, 5m, 15m, 30m, 1h, 2h, 1d) by selecting the desired option from the dropdown menu.
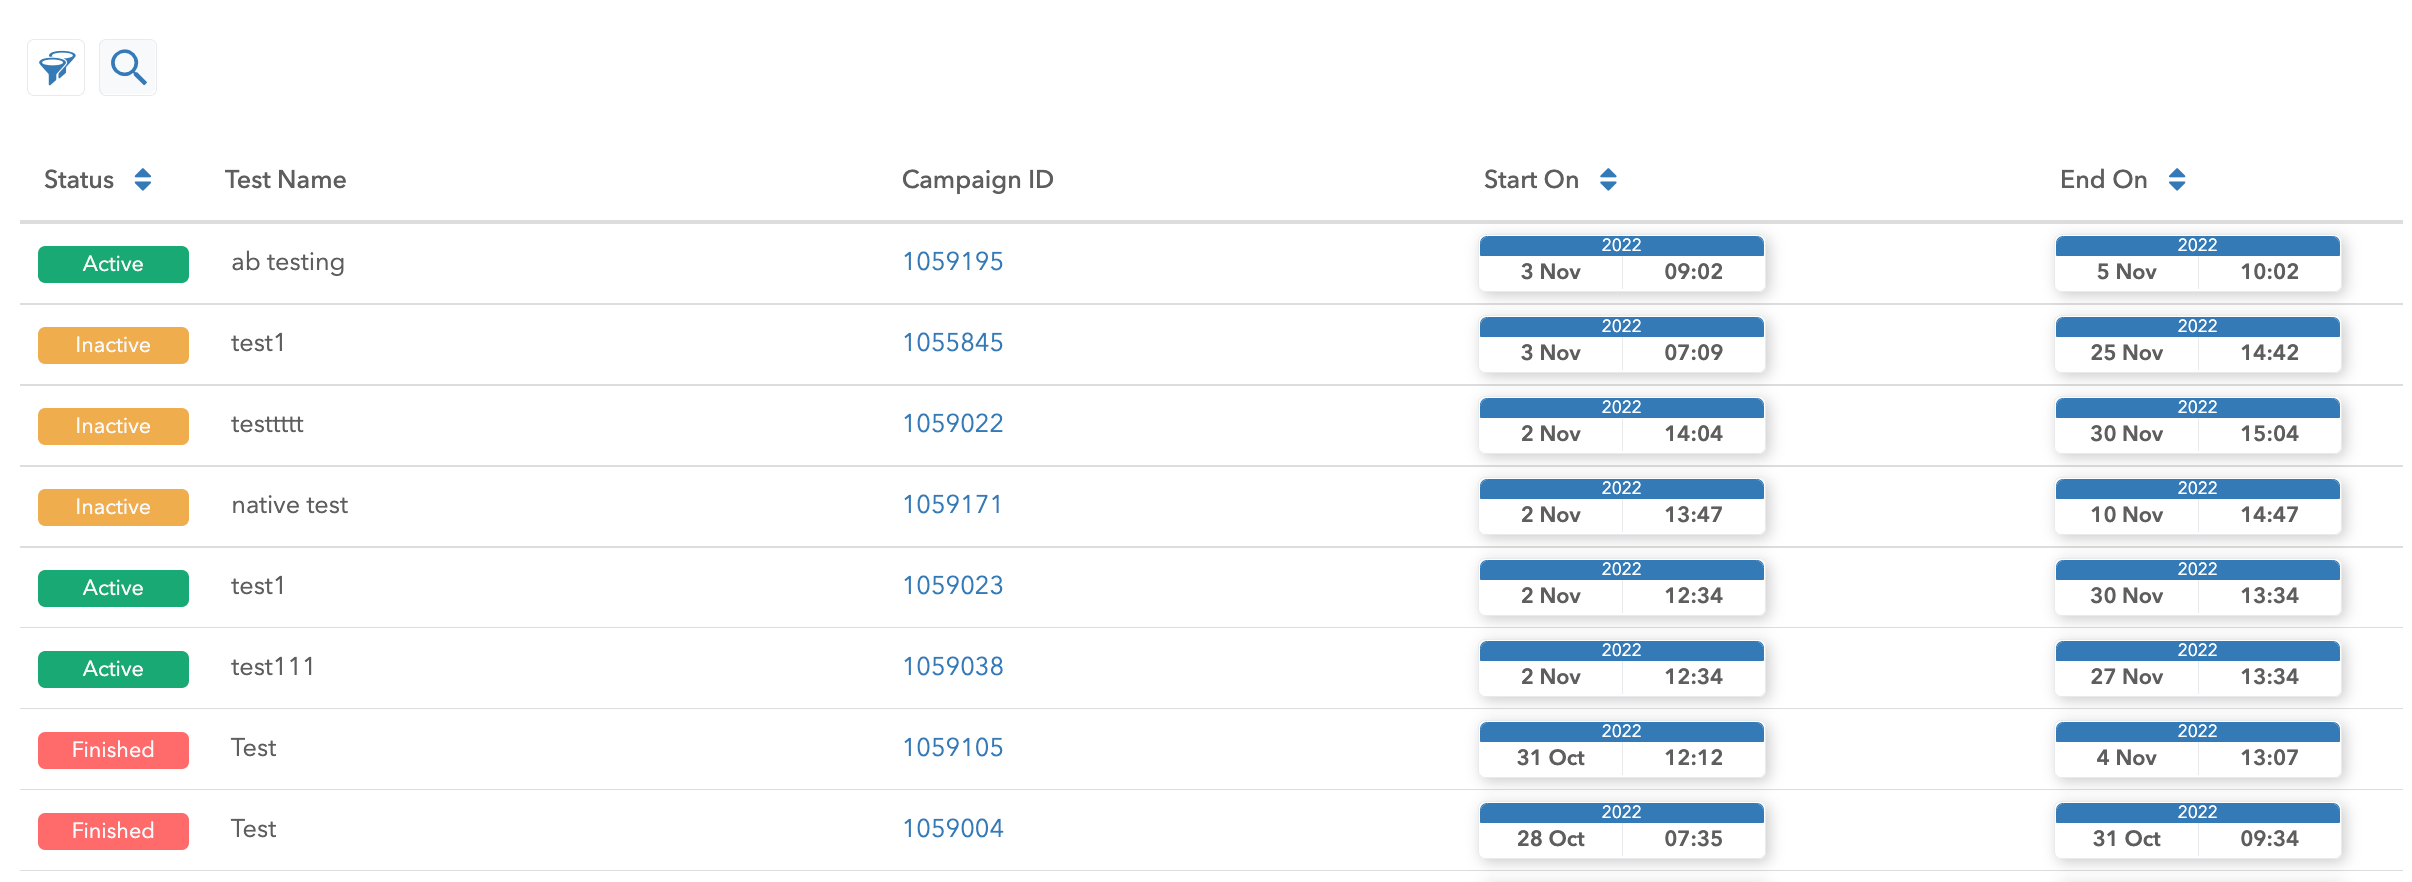
A/B Tests
Within the A/B Tests tab, you can see all created A/B tests. Within the list, you can see: Status, Name, Campaign ID, Start on, and End on. When you open a certain test, you can see all the information related to that test, such as Name, Status, Start on, End on, Stickiness, Variations, Audience, and Stats.
Groups
When you click on the Groups option, you will be presented with two tabs - Tags tab and Application tab - with a list of your groups and apps. In the Tags tab you can see a list of all your Tag groups which you can preview, edit, customize and remove groups. The difference between the mentioned tabs is that you can sort your tags within one group in Tags tab by status and name.
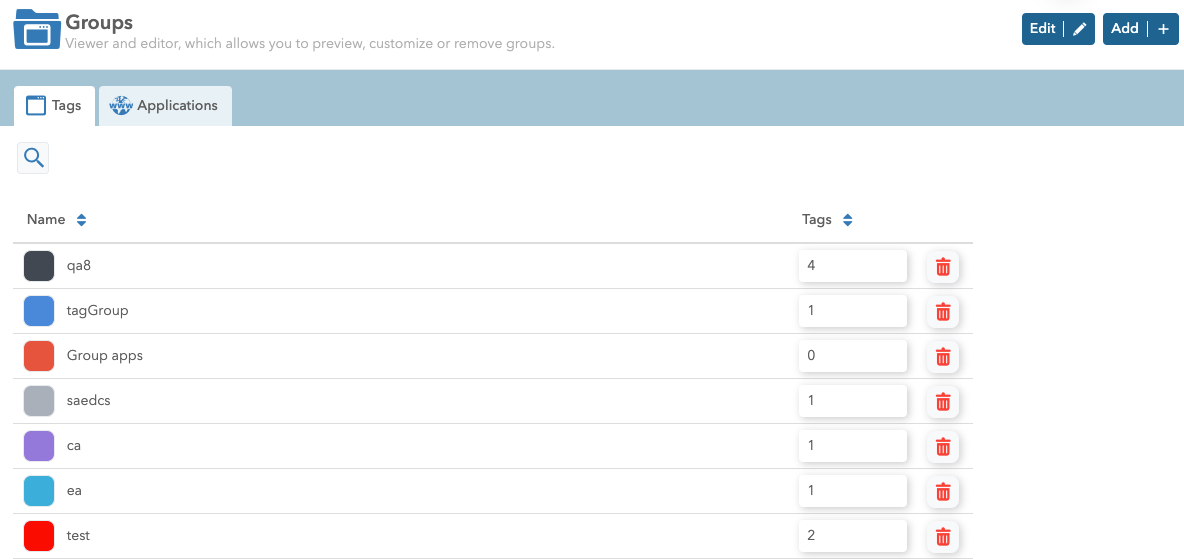
Delete a Group - click on the red bin icon next to it. Search through Groups - click on the magnifying glass icon. Edit Groups - click on the Edit button in the upper right corner.
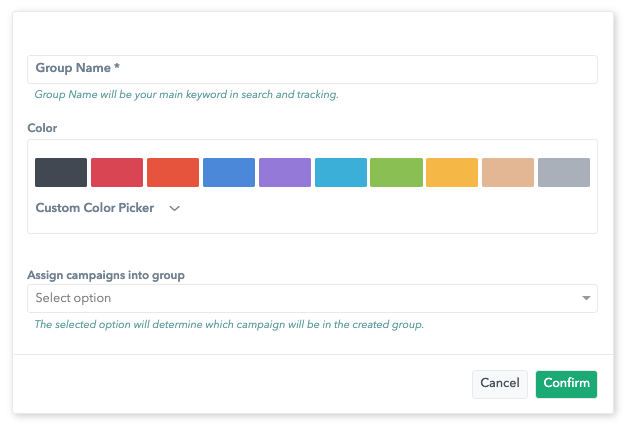
Add a Group
Please follow this step by step guide for creating new group: 1. Go to the Campaign Manager/Groups and click on the Add button in the upper right corner. 2. Create a name for your group and keep in mind it should be meaningful and easy for you to remember and find. 3. Customize the group by choosing its colour from the pre-set group of colours or pick a custom colour from the customer colour picker option. 4. Assign tags to your group. 5. When you are done click on the confirm button.
Edit a Group
We have created a group in the next section as an example.
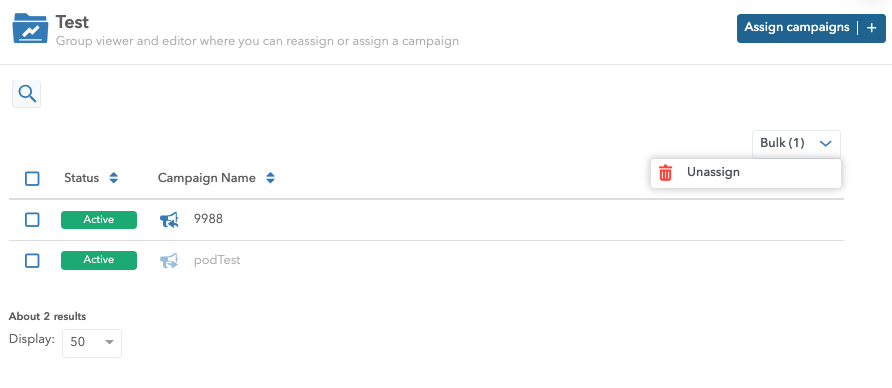
If you forgot to add the Campaign or you have created a new one in the mid-time, you can easily add them to the group by clicking on the Assign campaigns button.
When you have selected the Campaigns you want to add to the group click on the Confirm button.
If you did it by mistake, click on the Cancel button.
To unassign the Campaign click on the Bulk option and selected the Campaign you want to unassign.
Once you’ve selected all the Campaigns you want to unassign click on the unassign button from the drop-down menu in the Bulk.