Supply
Display

The display zone contains placements that are very similar to widgets, with the difference that widgets are defined by the 3rd party developer. In contrast, placements are predefined, and currently, we have a banner layout. You can easily create a placement for your needs on the Ocamba platform and insert a tag on your site. We will then render it based on your placement in the zone.
1. The tag of your Display zone (located on the Basic tab in the section Ad Tag Generator) must be set in the head section of your website.
2. The tag of your Placement (located on a certain placement inside the Placement tab) must be set in the body section of your website.
There are 8 basic Ad unit sizes, and they are:
- 250x250 - Square
- 200x200 - Small Square
- 468x60 - Banner
- 728x90 - Leaderboard
- 300x250 - Inline Rectangle
- 336x280 - Large Rectangle
- 120x600 - Skyscraper
- 160x600 - Wide Skyscraper
There are 26 Ad unit size in total that are supported by Ocamba:
- 120x240 - Vertical Banner
- 320x100 - Large Mobile Banner
- 320x50 - Mobile Banner
- 336x280 - Large Rectangle
- 468x60 - Full Banner
- 580x400 - Netboard
- 720x300 - Pop-Under
- 728x15 - Horizontal Links
- 728x90 - Leaderboard
- 88x31 - Micro Bar
- 970x250 - Billboard
- 970x90 - Large Leaderboard
- 300x600 - Half-page Ad
- 300x250 - Medium Rectangle
- 120x60 - Button 2
- 120x600 - Skyscraper
- 120x90 - Button 1
- 125x125 - Square Button
- 160x600 - Wide Skyscraper
- 180x150 - Rectangle
- 200x200 - Small Square
- 234x60 - Half Banner
- 240x400 - Vertical Rectangle
- 250x250 - Square Pop-Up
- 300x100 - 3:1 Rectangle
- 980x120 - Panorama
The HTML code widget can be massive, while display layouts are rendered for a small size. Therefore you get a better response, and there will be no significant delay in waiting for the ad to show. The site or network has a display (tag), which directly returns the campaign, much cheaper and faster than the widget.
Zone Placement
The placement tab is available only within the Display Zone. Placement is used to define how much space will be available for an ad to be displayed.
Please follow this step-by-step guide to create a placement for your Zone:
- Click on the Add button will show you the fields that need to be filled in.
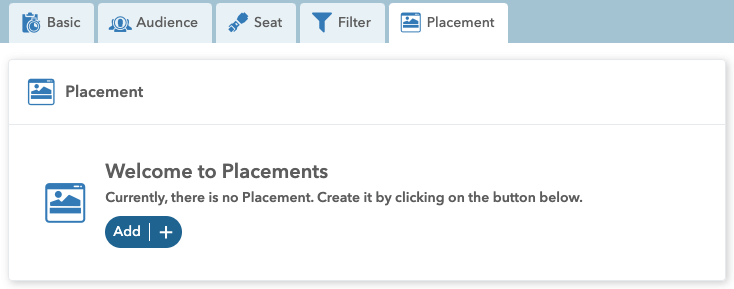
- It is necessary to fill in the Placement ID, Layout and Unit Size.
- Your placement will be created by clicking on the Confirm button.
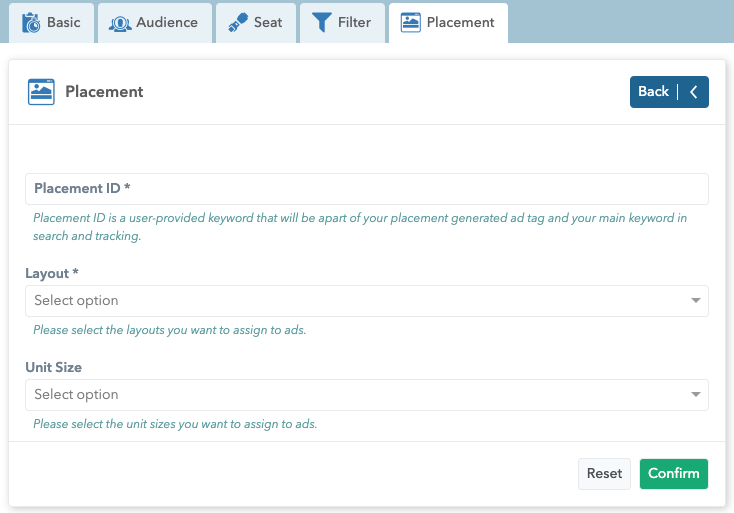
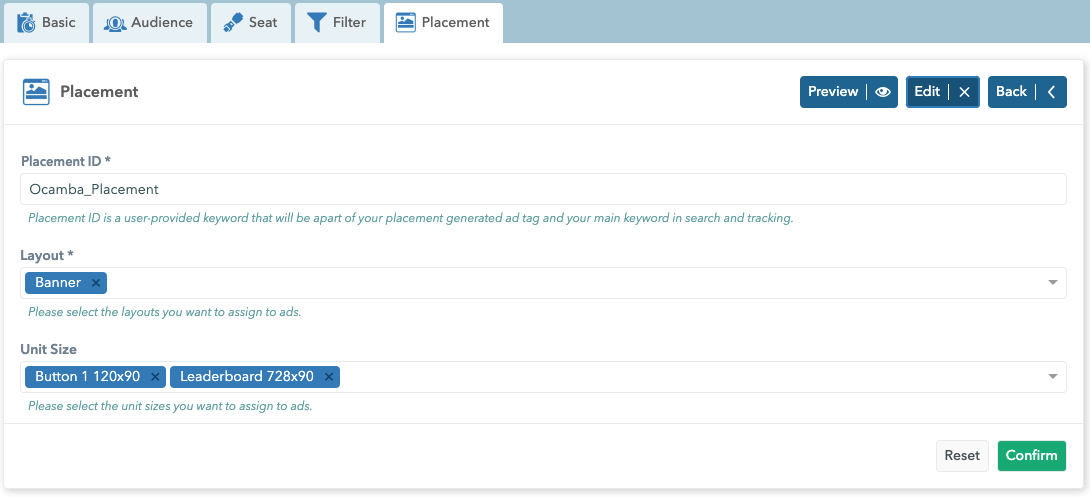
Placement ID is a user-provided keyword that will be apart of your placement generated ad tag and your main keyword in search and tracking.
Layouts are a type of placement. The current option for the placement type is a banner. Layout is a type of rendering of the ad itself. The ad will be displayed when the display zone tag is inserted on the page with the selected layout.
Note: The benefit of the display layouts is in rendering, because it has a small size, while the HTML code widget can be massive. That way, you get a better response time, and there will be no significant delay for the ad to show.
Unit Size represents the dimensions of the placement on which the ad will be displayed.
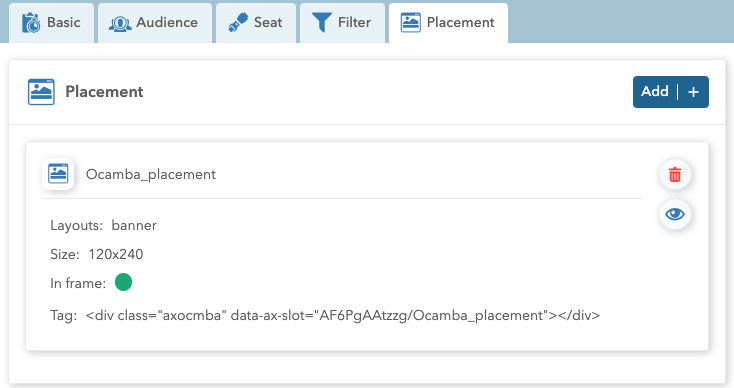
In Iframe option is set to active by default. It represents the positioning of the ad to be displayed within the Iframe. If a malware code is inside the ad, it will not affect the entire page but only the Iframe where the ad is located.
If you want to delete the placement, you will need to click on the red can icon located on the right side of the placement. Also, it is possible to Preview the created placement by simply clicking on the “eye” icon located below the Delete icon. In this case, a module will pop out in which it is possible to select the type of a device (desktop, mobile, tablet) and the dimension of the placement. Also, by clicking on the placement name, on the right side, you can see a Preview button that has the same function as the “eye” icon.
Important tips:
You need to have a zone-related campaign for an ad to show.
Only dynamic native (internal campaigns) and dynamic native external demand (external campaigns) creatives can be used for the display zone.
It is necessary to emphasize that when creating a Creative, everything that you write in the image input field must be an adequate size as the configured unit size in the Zone.
It is necessary to insert the script part of the tag, followed by the tags from each placement.
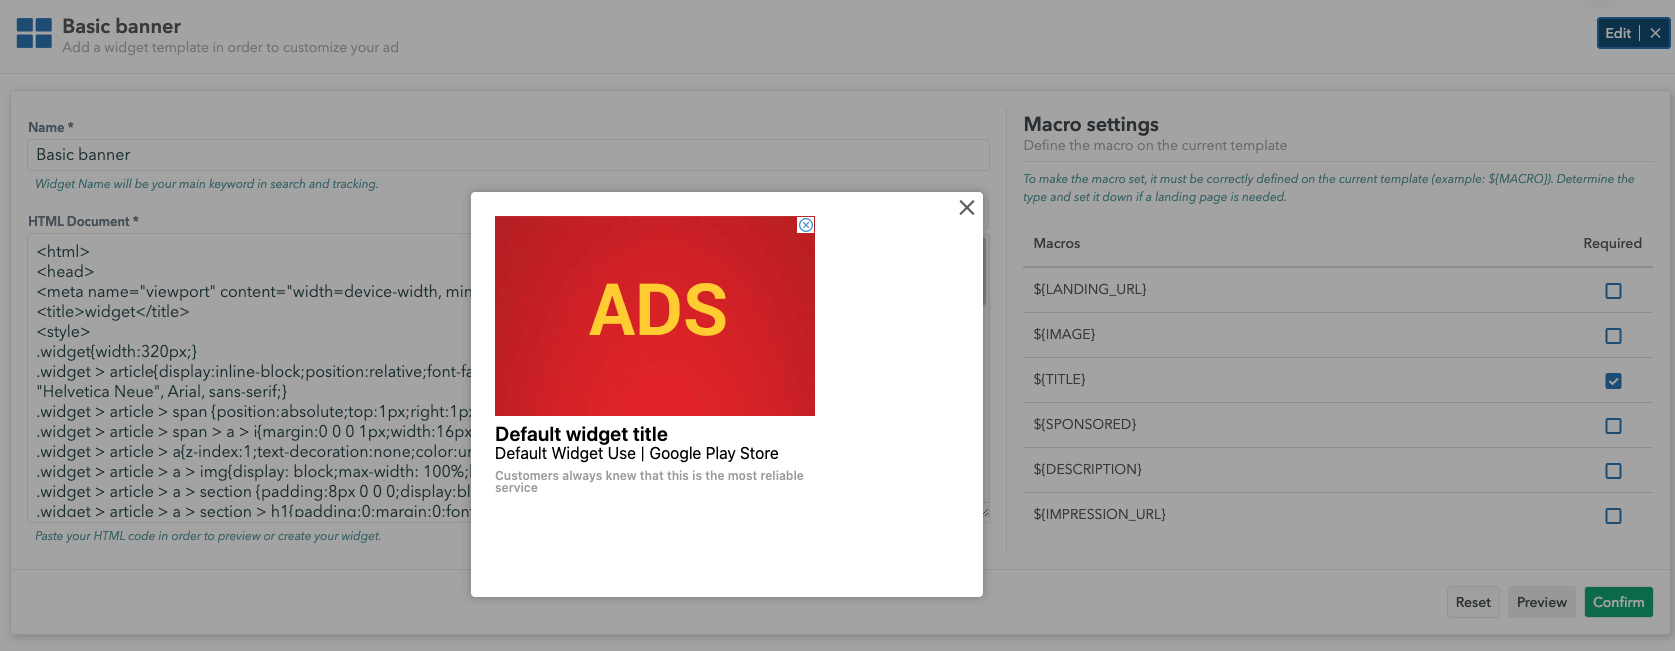
Widget
Widget zones are graphic zones that render HTML code. To understand better Widget Zones, here is a short explanation. The Exchange network arrives at the zone that must have a specific widget. The zone will select a series of campaigns. The campaign which matches the request will be rendered through a specific widget. The rendered widget returns to the zone.
You can choose which templates will be rendered in the widget tab within the zone, while the widgets tab from the left menu on our Ocamba platform contains all created templates. This type of zones is commonly used by companies that have their developers. The developer defines everything within the widget (button, image, title, etc.).
Macros are set inside the HTML code to change the campaigns’ fields and insert them into the code (landing URL, impression, click, or other events).
If you have a specific widget, you will go to the zone tab, take the tag generator, add i.e. wid=123, and the desired widget will be displayed.
It is possible to add maximum 10 widgets in the zone within the widget tab. Therefore, one random out of these 10 widgets will be returned when you send a request. But if you specify the id of a widget, the exact one will be returned.
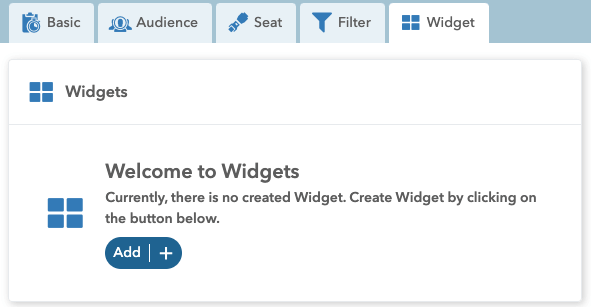
Zone Widget
The Widget tab is available only within the Widget Zone. Widget Zone cannot be active unless a widget has been added.
Please follow this step-by-step guide to set up Widgets for your Zone:
- To add a widget within the widget tab in the Zone, click the Add button.
- The next step is to select the desired widgets from the drop-down menu. Deselecting all widgets will result in Zone inactivity.
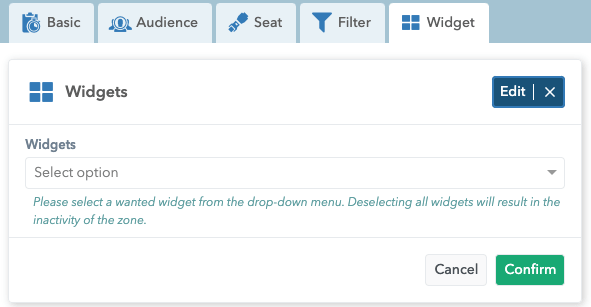
- Click the Confirm button to add the selected widget.
Native
Native is one of the most common zone types, also called native feed or XML feed.
When creating a zone, you get an AdTag Generator, representing an endpoint or a link called to get an ad.
Simple JSON is a primary feature of the native zone, and it allows publishers to very quickly parse on their side. It is quite widespread and is used for Server-to-Server calls. The JSON object contains a key and a series of ads. The native zone represents an easy integration, and it restores basic data. Simple JSON format has a limit, and it is best to keep the response as small as possible.
In the response of the native zone, the client receives a series of objects containing pixels, URL, title, bid, description, id, icon, etc. Pixel triggered on the client-side represent an impression. When it goes to the URL, then it is counted as a click.
In AdTag Generator, there are specific parameters that you can pass. If you don’t send anything, we take data from headers by the browser and use it to understand better the user and return adequate ads.
Push
Push format represents our predefined JSON. It is displayed on the browser, and each browser has its specific settings. To apply them in real-time, it is necessary to return them through a bid response.
The action button is a specific option for push and defines potential actions that the user can perform. All these actions need to be done through the response.
For example, if we are talking about the desktop type of device, the image is not displayed on the notification. Therefore, it is unnecessary to forward it while, e.g. the icon shows in the notification and needs to be delivered.
For a mobile phone, the image is displayed, but after you swipe the notification.
The push zone allows you to set all the rules you want to apply to send notifications.
For example, if you set sticky: true -> instruct the user to interact with the ad. If set to false, the notification will be displayed and removed from the screen after a few seconds.
A dynamic native campaign can contain all kinds of data, but the zone extracts only the necessary data from the Campaign. The more data you fill in when creating an ad, the better. These settings will be applied and displayed in different ways in relation to the zone.
Smartlink
The Smartlink zone is a simple HTTP response used for redirects, i.e. it does not return any format but redirects to a specific page. Each Campaign has its landing URL. In other words, the Smartlink zone has no impressions, only clicks, and it is redirected to landing_url. The number of requests equals the number of clicks on the Smartlink zone.