Zones

Zone Types
To create a Zone, you will first need to decide which zone type you want to create.
There are six different zone types: OpenRTB, Native, Push, Widget, Display and Smartlink.
OpenRTB protocols allow apps to evaluate and bid on impressions in real-time.
Native - Display through banners or other ad formats made of text, images, flash, video and audio.
Push - Display through banners or other ad formats made of text, images, flash, video and audio.Note: Campaigns and Zones can have the same account for sending push notifications.
Widget - Display through banners or other ad formats made of text, images, flash, video and audio.
Display - Display is the process of advertising products or services in visual displays such as images and videos on publisher sites. Display ads are placed on sites in the form of banners, images and text.
Smartlink - Display through banners or other ad formats of text, images, flash, video and audio.
The main differences between the zones are the formats.
For more information about zone types, you can visit section Supply.
Zone Placement
The placement tab is available only within the Display Zone.
Placement is used to define how much space will be available for an ad to be displayed.
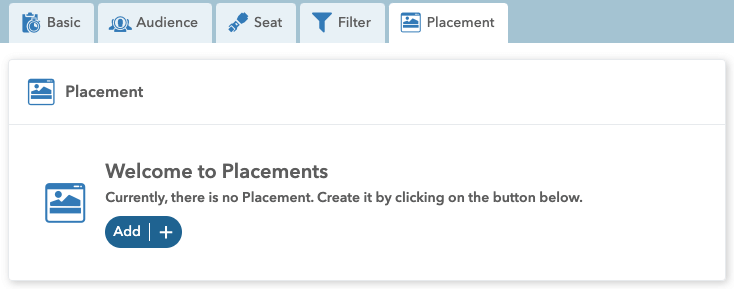
Please follow this step-by-step guide to create a placement for your Zone:
- Click on the Add button will show you the fields that need to be filled in.
- It is necessary to fill in the Placement ID, Layout and Unit Size.
Note: When creating a placement, it is mandatory to fill in the Placement ID and Layouts.
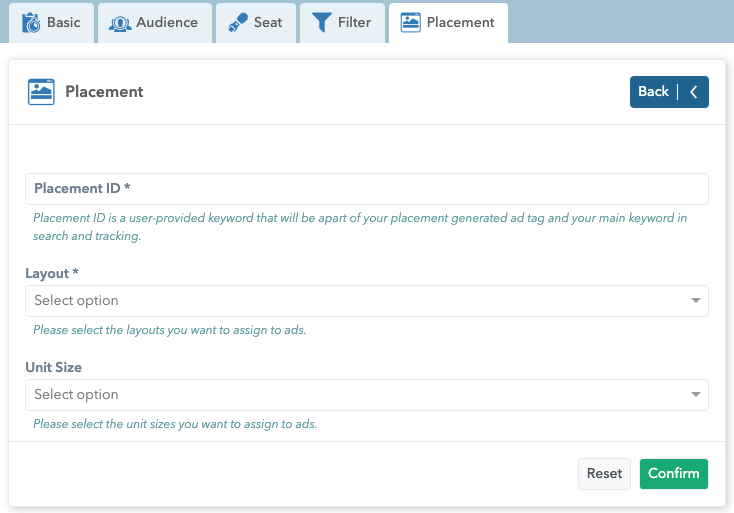
- Your placement will be created by clicking on the Confirm button.
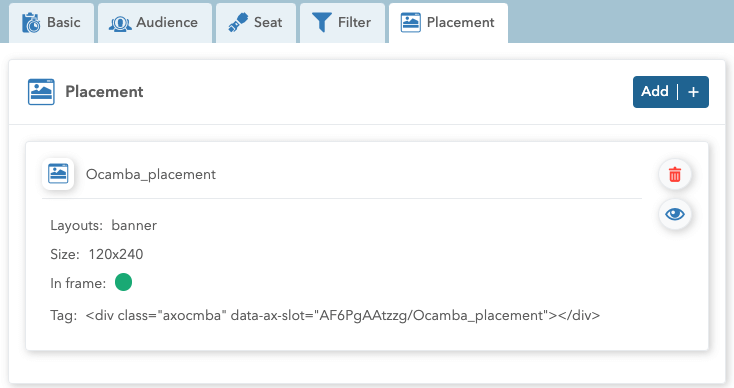
Placement ID is a user-provided keyword that will be apart of your placement generated ad tag and your main keyword in search and tracking.
Layouts are a type of placement. The current option for the placement type is a banner. Layout is a type of rendering of the ad itself. The ad will be displayed when the display zone tag is inserted on the page with the selected layout.
Note: The benefit of the display layouts is in rendering, because it has a small size, while the HTML code widget can be massive. That way, you get a better response time, and there will be no significant delay for the ad to show.
Unit Size represents the dimensions of the placement on which the ad will be displayed.
In Iframe option is set to active by default. It represents the positioning of the ad to be displayed within the Iframe. If a malware code is inside the ad, it will not affect the entire page but only the Iframe where the ad is located.
If you want to delete the placement, you will need to click on the red can icon located on the right side of the placement. Also, it is possible to Preview the created placement by simply clicking on the “eye” icon located below the Delete icon. In this case, a module will pop out in which it is possible to select the type of a device (desktop, mobile, tablet) and the dimension of the placement. Also, by clicking on the placement name, on the right side, you can see a Preview button that has the same function as the “eye” icon.
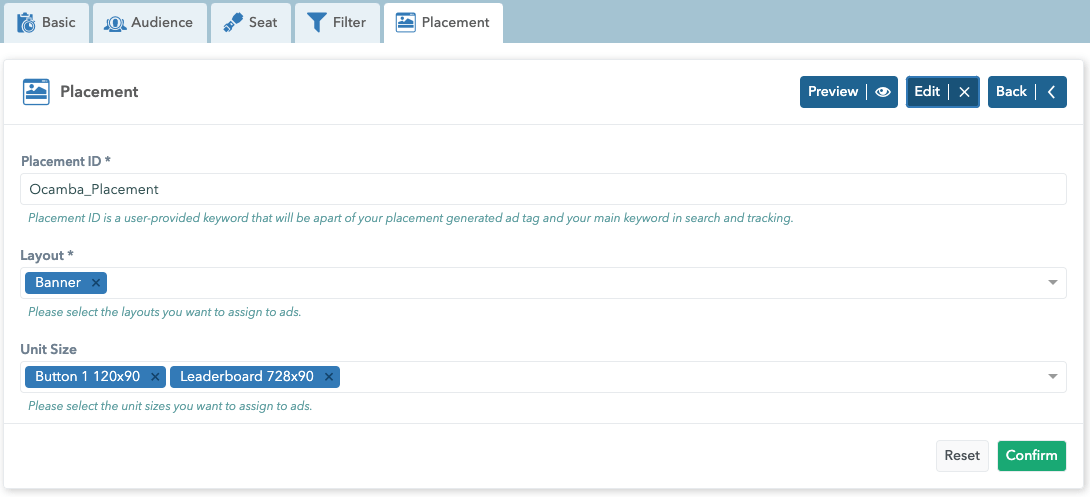
Note: When editing a placement, it is not possible to change the Placement ID.
Important tips:
You need to have a zone-related campaign for an ad to show.
Only dynamic native (internal campaigns) and dynamic native external demand (external campaigns) creatives can be used for the display zone.
It is necessary to emphasize that when creating a Creative, everything that you write in the image input field must be an adequate size as the configured unit size in the Zone.
It is necessary to insert the script part of the tag, followed by the tags from each placement.
Widget
Widget zones are graphic zones that render HTML code.
To understand better Widget Zones, here is a short explanation. The Exchange network arrives at the zone that must have a specific widget. The zone will select a series of campaigns. The campaign which matches the request will be rendered through a specific widget. The rendered widget returns to the zone.
You can choose which templates will be rendered in the widget tab within the zone, while the widgets tab from the left menu on our Ocamba platform contains all created templates.
This type of zones is commonly used by companies that have their developers. The developer defines everything within the widget (button, image, title, etc.).
Macros are set inside the HTML code to change the campaigns’ fields and insert them into the code (landing URL, impression, click, or other events).
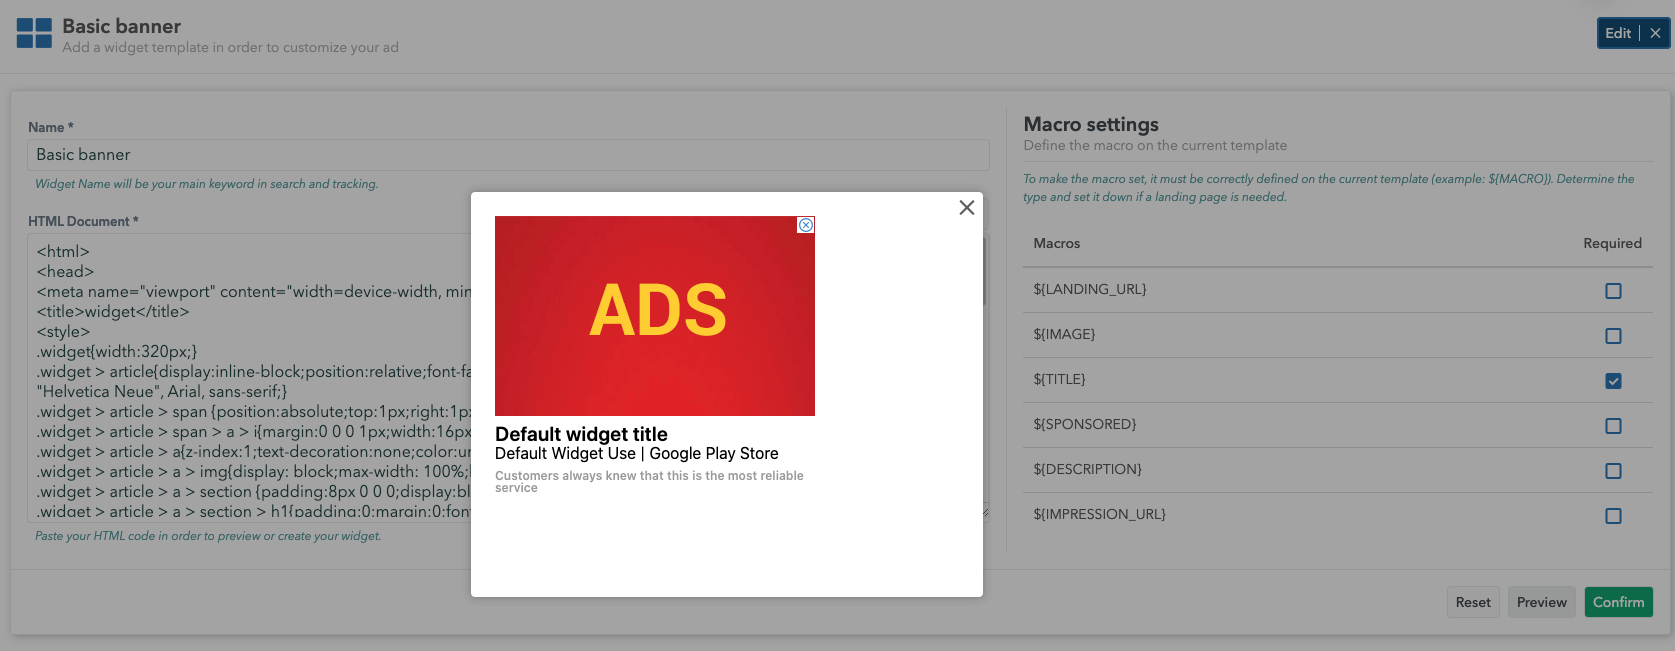
Note: If you don’t add these events manually, we will not attribute them on our side.
If you have a specific widget, you will go to the zone tab, take the tag generator, add i.e. wid=123, and the desired widget will be displayed.
It is possible to add maximum 10 widgets in the zone within the widget tab. Therefore, one random out of these 10 widgets will be returned when you send a request. But if you specify the id of a widget, the exact one will be returned.
Note: On the Zone widget tab, if you select a widget from the drop-down menu, it will be displayed because of the priority.
Zone Widget
The Widget tab is available only within the Widget Zone.
Widget Zone cannot be active unless a widget has been added.
Please follow this step-by-step guide to set up Widgets for your Zone:
- To add a widget within the widget tab in the Zone, click the Add button.
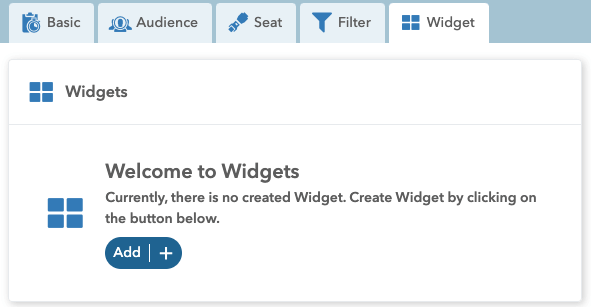
- The next step is to select the desired widgets from the drop-down menu.
Deselecting all widgets will result in Zone inactivity.
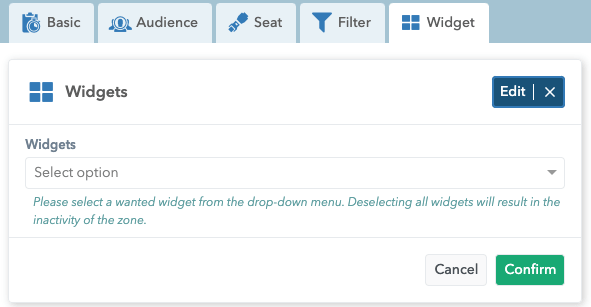
- Click the Confirm button to add the selected widget.
Add a Zone
Click on the Add button in the Zones tab.
Please follow this step-by-step guide to configure a Zone:
1. type in a Zone name that will be your main keyword in search and tracking
2. choose a Zone type
3. choose an account from which the financial sources will be allocated
4. define pricing model
5. decide the campaign priority
6. enter a response timeout
7. define a default campaign search algo
8. decide if you want to omit the bid
9. enter SubID hash key
10. define the status for the zone
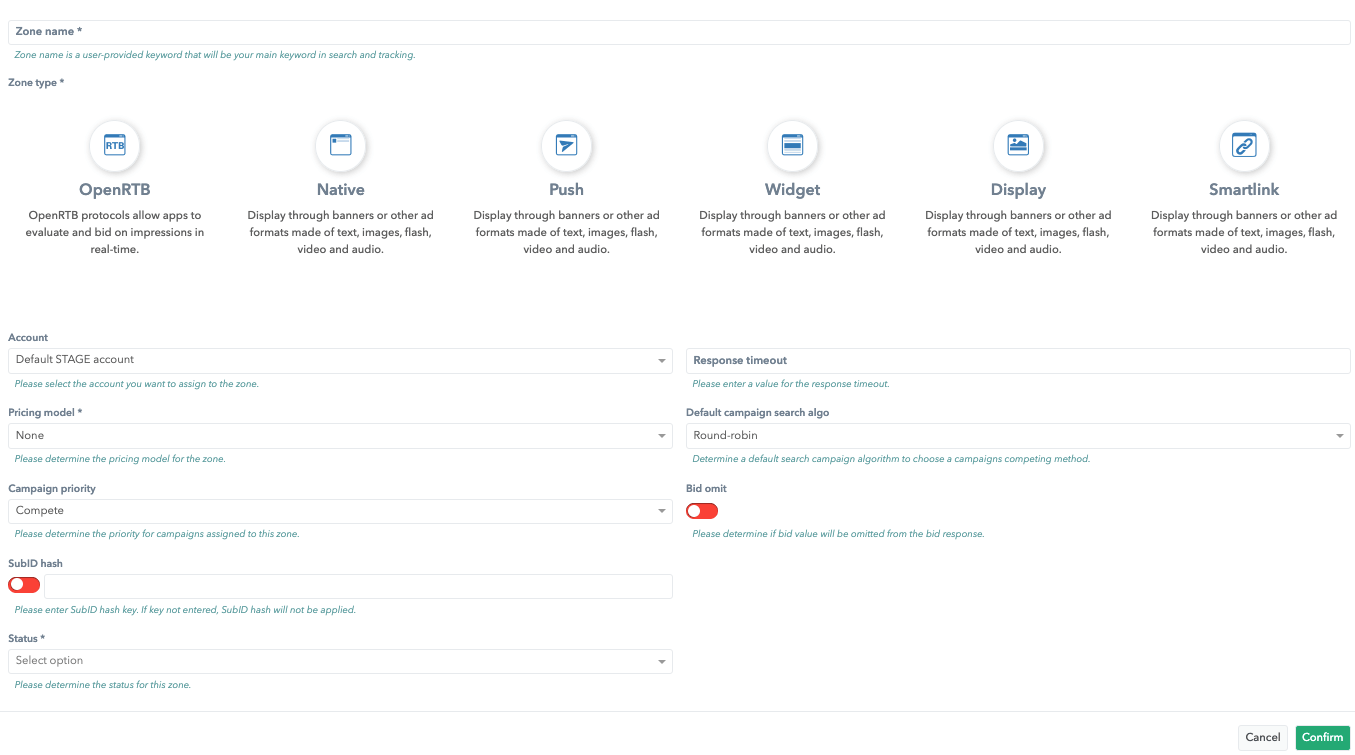
Click on the confirm button, and there you go - you have successfully created your Zone.
Note: For the Zone to be active, the Account Status must be Approved.
Edit a Zone
Please follow this step-by-step guide to edit a Zone:
1. go to the Zones tab
2. Select the Zone you want to edit
3. this opens the viewer and editor, and it allows you to preview, customize or remove the Zone
The basic card shows all the information about the Zone.
In the left portion of the screen, you get information that cannot be changed nor modified:
Zone ID
type
Track ID - it allows us to see which company and Zone it refers to
account
account status
created by
date of creation
ad tag generator - a URL consisting of the domain, path, Track ID, and query parameters (CMP = Campaign ID)
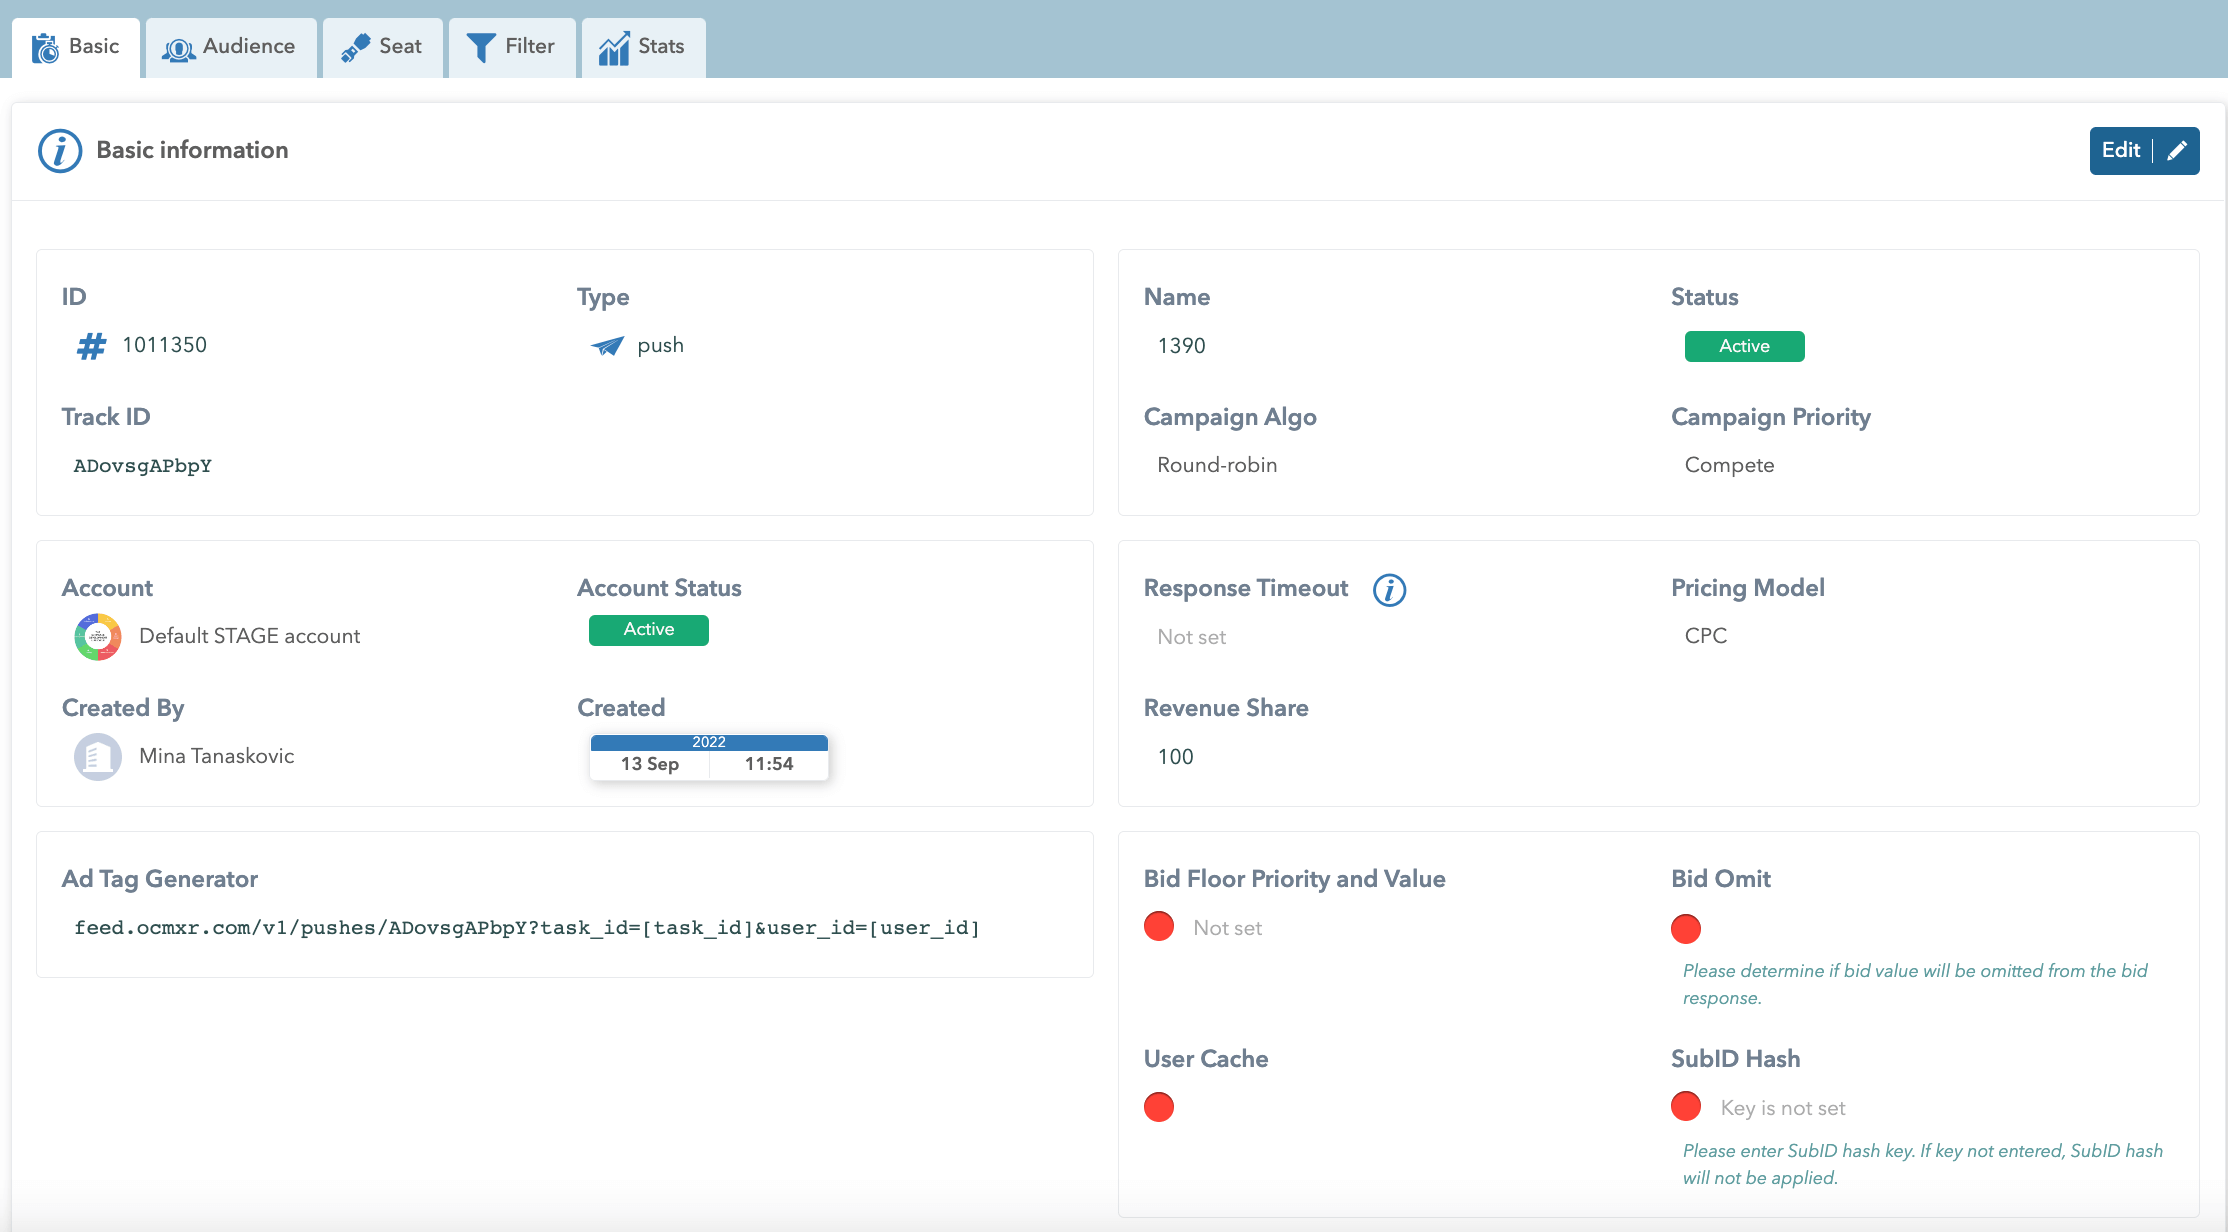
Everything you see on the right side of your screen can be modified and changed.
By clicking on the Pen icon in the desired field, you can edit the following data:
Name - change the name of the Zone
Status - change the Zone’s status by clicking on it and choosing the one from the drop-down list. Status types are: Active, Verification, Rejected, Paused, Inactive and Archived.
Campaign algo - choose between round robin, multi-armed bandit and internal sort by bid and external sort by MAB
Round robin does alternating campaign dialing.
Multi-armed bandit selects the Campaign based on a manually set scoring (eg C1- score 100, C2- score 50, the ratio of showing ads is 2:1). The score goes from 1 to 100, and the default is 50. We do not recommend you to use this type of algo if there are multiple campaigns in the Zone. If you choose multi armed bandit algo, you get two additional fields, Internal Exploration Rate and External Exploration Rate. They are used to give campaigns with lower score a chance to win.
Internal sort by bid and external sort by MAB is available only on Push and Native zones, and it works by sorting internal campaigns by highest bid and external campaigns by the multi-armed bandit. If you choose internal sort by bid and external sort by MAB, you get two additional fields, Internal Exploration Rate and External Exploration Rate. They are used to give campaigns with lower score a chance to win.
- Campaign priority - choose the priority of the Campaign
Compete - internal and external campaigns are equated (fair bidding). Returns campaigns relative to CPC and is the most commonly used model.
Local - returns only internal campaigns
Backfill - someone asks for four ads; Ocamba finds three internal and asks for one external
Unfilled - if Ocamba doesn’t have internal campaigns, we ask for four external, but if Ocamba finds only one internal, it won’t ask for external
Pricing Model - is variable, and in statistics, it is possible to see in what period which model was used. Changing the pricing model changes the attribution of money.
Response Timeout - it is important to respond within a certain period of time (standard 100 m/s, max 500 m/s); how long the ad waits for a response.
SubID hash - is applied to subIDs, and it is used for hashing this param in the request. SubID Hash - it has a key field and a switcher - if we enter the key and turn on the switcher (toggle), it will be applied to the Internal and External campaigns.
Bid Floor Priority and Value - the minimum value we can offer in the Zone.
If it passes below that, we will return 204.
It differs whether it is obtained from the database or the request.
By entering the Basic card, we enter the value into the database, and it is also possible to enter it manually via the URL (bf key).
If the Toggle is green, the priority is query, and if it is red, the Zone has priority, the value is irrelevant.
- Bid Omit - You can determine if the bid value will be omitted from the bid response, in other words when you turn the toggle green your bid will be hidden in the response.
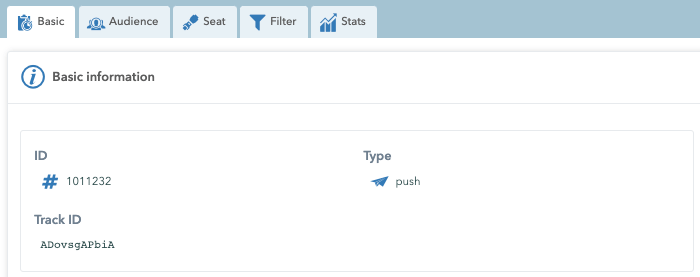
Within the Zone on the Basic tab is the Add Tag Generator in the URL form.
Also, within the Basic tab of the Zone, there is the Track ID and it consists of Zone ID and Company ID.
You, as a publisher, will take this link and put it in the code of your website’s desired page.
When the link is triggered, it will get a certain response.
This response consists of:
Click URL
Picture
Impression pixel
Note: Pixel never returns a response and represents solely the information sent to the server that the ad has been displayed and is important for statistics.
Zone Audience
Please follow this step-by-step guide to set up Audience for your Zone:
1. go to the Zones tab
2. click on the Audience card
3. click on the Add button
4. Define a filter for targeting.
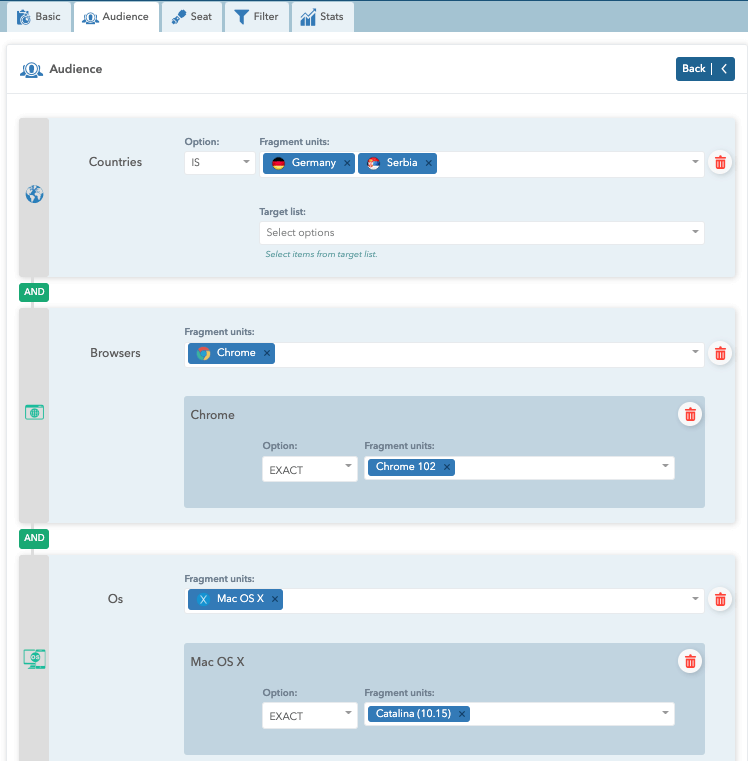
Define filters via the following criteria:
1. Country - based on the Country of the user’s IP address
(Germany, France, Spain, etc.)
2. Region - based on the Region of the user’s IP address
(Morava, Acre, Sumadija, etc.)
3. Languages - based on a certain Language (Arabic, Bulgarian, Catalan, etc.)
4. Browser - based on the user’s browser
(Chrome, Firefox, Safari, Opera, etc.)
5. OS - based on the operating system and OS version that they are browsing
(Android- Donut (1.6), iOS (12.4), etc.)
6. Connection Type based on connection type
(Cable/dsl, Cellular, Corporate, Dialup, and Unknown.)
7. SubID - based on the ID of the Publisher.
It can only be an alphanumeric string with max 64 characters
8. Time - Audience targeting is based on the set time. If the unit fragment within the filter time is set to 5 minutes, the notifications will be sent every hour, every day of the month, and every month.
9. Tags - based on targeting on certain tags. When this targeting is set, a certain campaign will be displayed when sending an Adex message via scheduler.
10. IP - based on the user’s IP address
(individual IP or a range of IP’s)
11. Page - based on the pages you want to forward the user’s
(any website)
12. Has user data - based on the custom values for your partners
(name=Jared, nickname=Jar, clicker=true)
13. Device tracking/type/manufacturer - based on the application’s Advertising ID
(Yes, Mobile, Apple)
For every type of filter, you have the IS / IS NOT option.
Some of the filters, however, work only on a toggle button switch.
For some filters, you will be required to decide which list you want to target.
Once you set your filters, click on the confirm button.
You will be taken back to the Audience card, where you will be able to see the list of all the filters you’ve set.
Zone Seat
Please follow this step-by-step guide to add a Seat for your Zone:
1. Go to the Zones tab
2. Click on the Seat card
3. Click on the Add button
4. Decide on the seat type - It can be either Account, Campaign and/or Group
5. When you decide on the seat type - add accounts/campaigns or groups
6. Define seat priority (when the toggle is switched on, there is a priority over query in request)
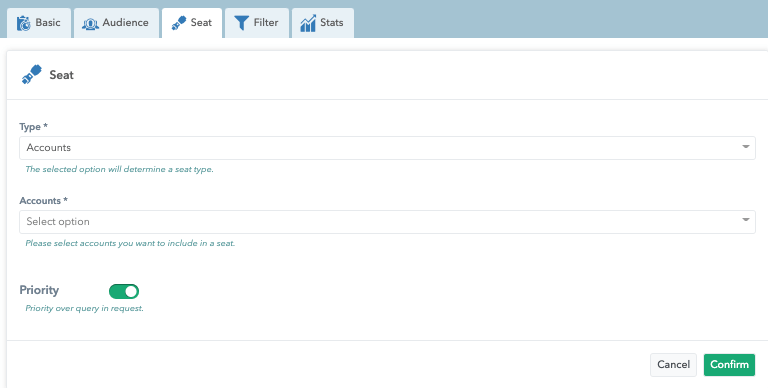
If an Account is selected, Ocamba’s bidder server checks which campaigns belong to that Account and targets one of those campaigns if it meets the conditions.
It is possible to set up both through API and web.
You can do it through the AdTag Generator given to the publishers, and they copy AdTag Generator with certain parameters on their sites.
The seat has priority over the API; if the toggle is set to red (off), the API has priority.
Note: Clicking on the link of the selected item takes you directly to the group/campaign/account.
Zone Filter
Please follow this step-by-step guide to set up Filter for your Zone:
1. Go to the Zones tab in Adex app
2. Click on the Filter card
3. Change the filters by clicking on the Edit button and moving the toggle button
4. Define delay prediction, click on the Edit button and type in the time to allow click on the link to be valid
5. Set max and min values which define when the click will be considered spam
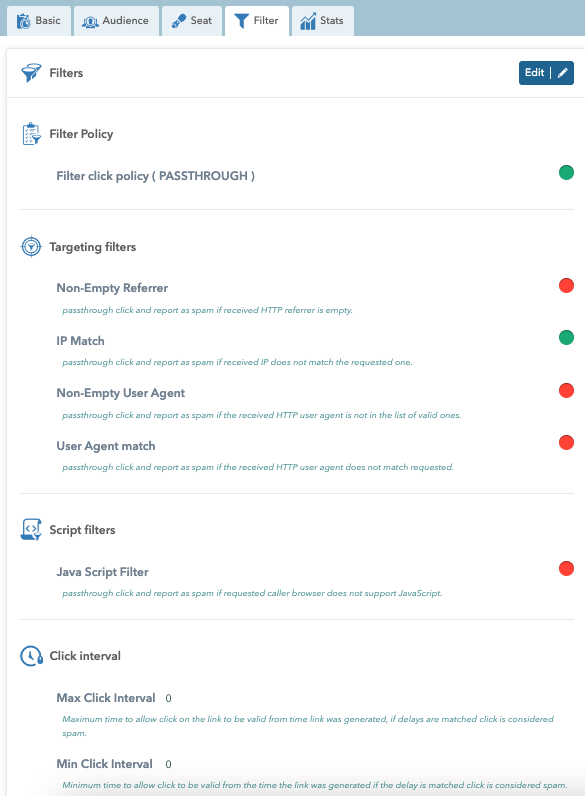
The whole filter tab comes down to Mismatch.
When we talk about IP match, it means that the addresses from the event 1 and the event 2 must be matched.
Note: Click Interval defines the minimum and maximum time that can elapse in order for a click to be considered valid, if the time frame is exceeded it will be spam.
Zone Stats
Zone Stats tab shows the Zone statistics. It is shown in a table form and it provides the basic information for total statistics. The user can select any offered Dimensions (Zone and Zone ID) and Metrics (CIR, Click, Conversion, CPC, eCPM, Expected Income, Requests, Impressions, Fill, FTR%, Total click, CTR, Income, Expense, Revenue, Served and Spam Click).
Note: FTR is calculated as follows: Fill/Requests*100
Note: CTR is calculated as follows: Total click/Impressions
Next to the calendar, there is a button to Refresh statistics. It is possible to set an automatic refresh that would be performed for a certain period (30s, 1m, 5m, 15m, 30m, 1h, 2h, 1d) by selecting the desired option from the dropdown menu.

Note: Parameter Chimp (chain impressions) can be used for redirecting impressions for external demands. To make it more clearly, if array of impression pixels is necessary we will wrap 2 pixels as single call and redirect to second pixel. This is usefull if publisher is able to execute only single pixel.
