Manager Settings

Company tab
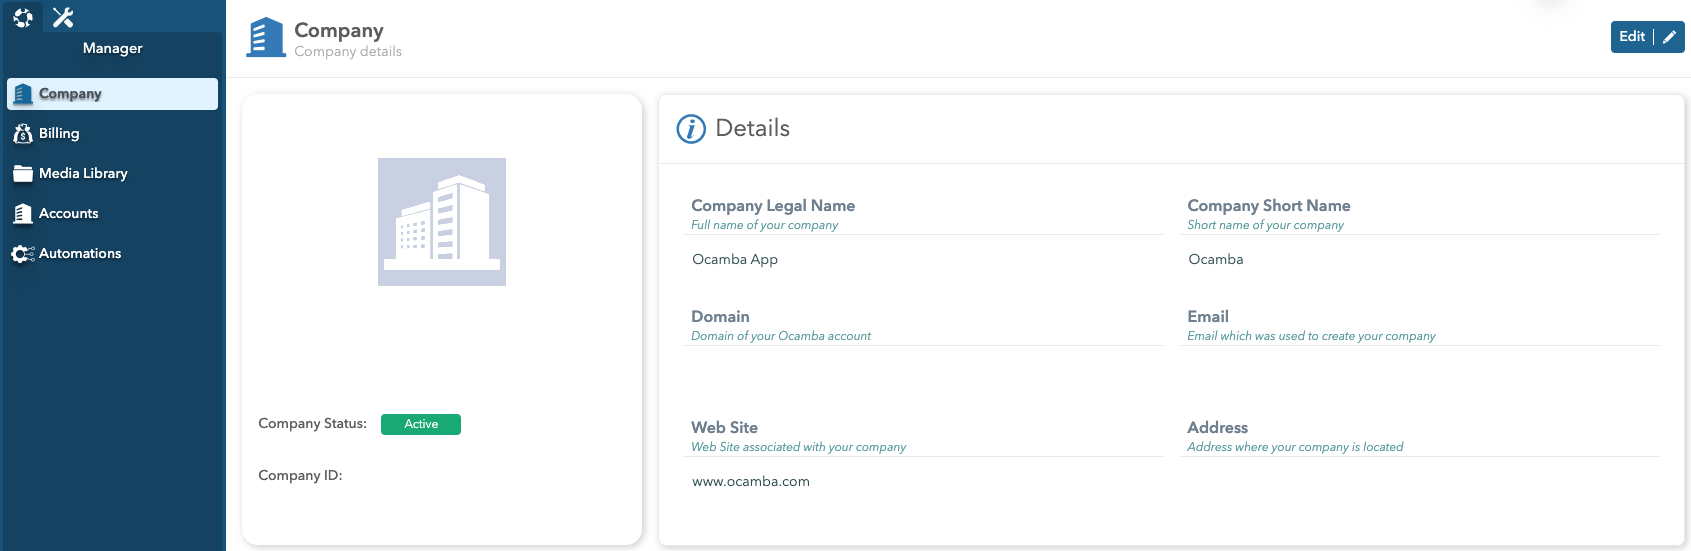
On the Company tab within the Manager app, it is possible to see basic information about the company, such as:
- Company Status
- Company id
- Company Legal Name
- Company Short Name
- Domain
- Web Site
- Address
Billing tab
By clicking on the Billing tab, you can see the section for tracking your finances and the use of the individual app
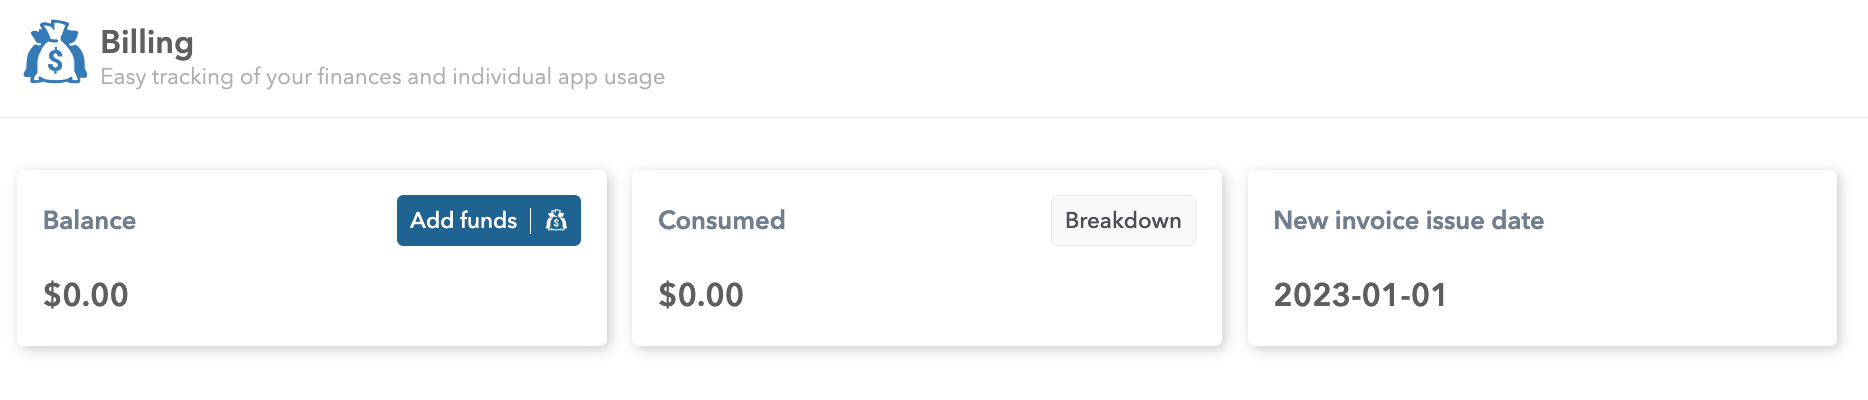
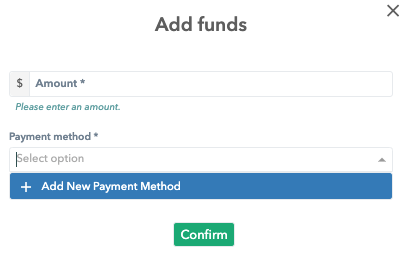
One of the ways to add funds is in the Balance section by clicking the Add funds button. Then a pop-up window opens where you need to enter the amount and select the payment method.
The Overview, Transactions, Receipts, Invoices, My Apps, and Billing Settings tabs are within the Billing.
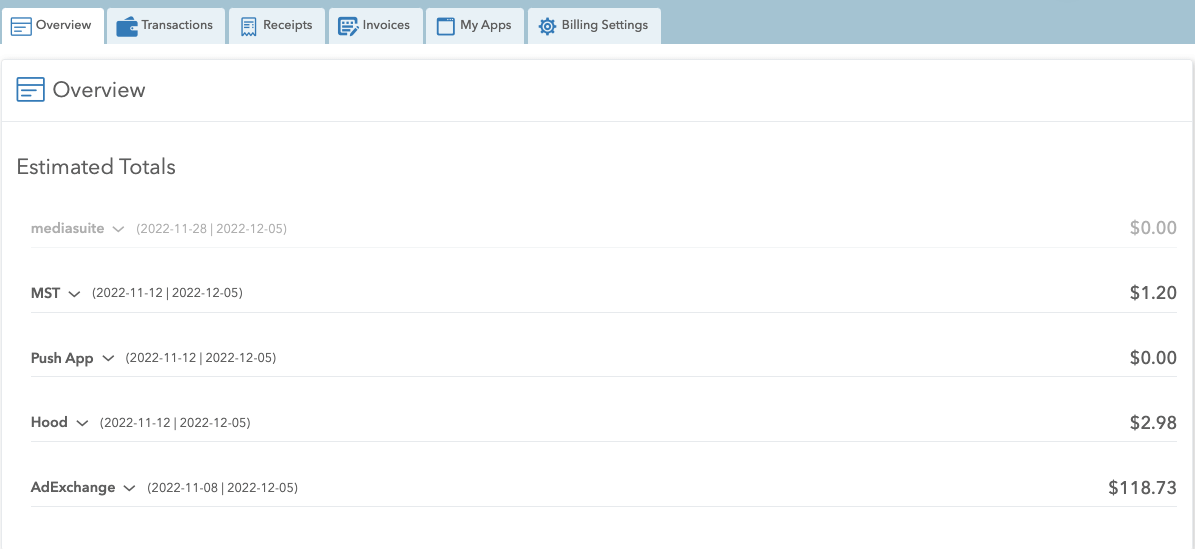
Overview tab
Within the Overview tab, you can see how much money was spent for each app separately. The displayed price is how much is currently spent on the platform and is variable.
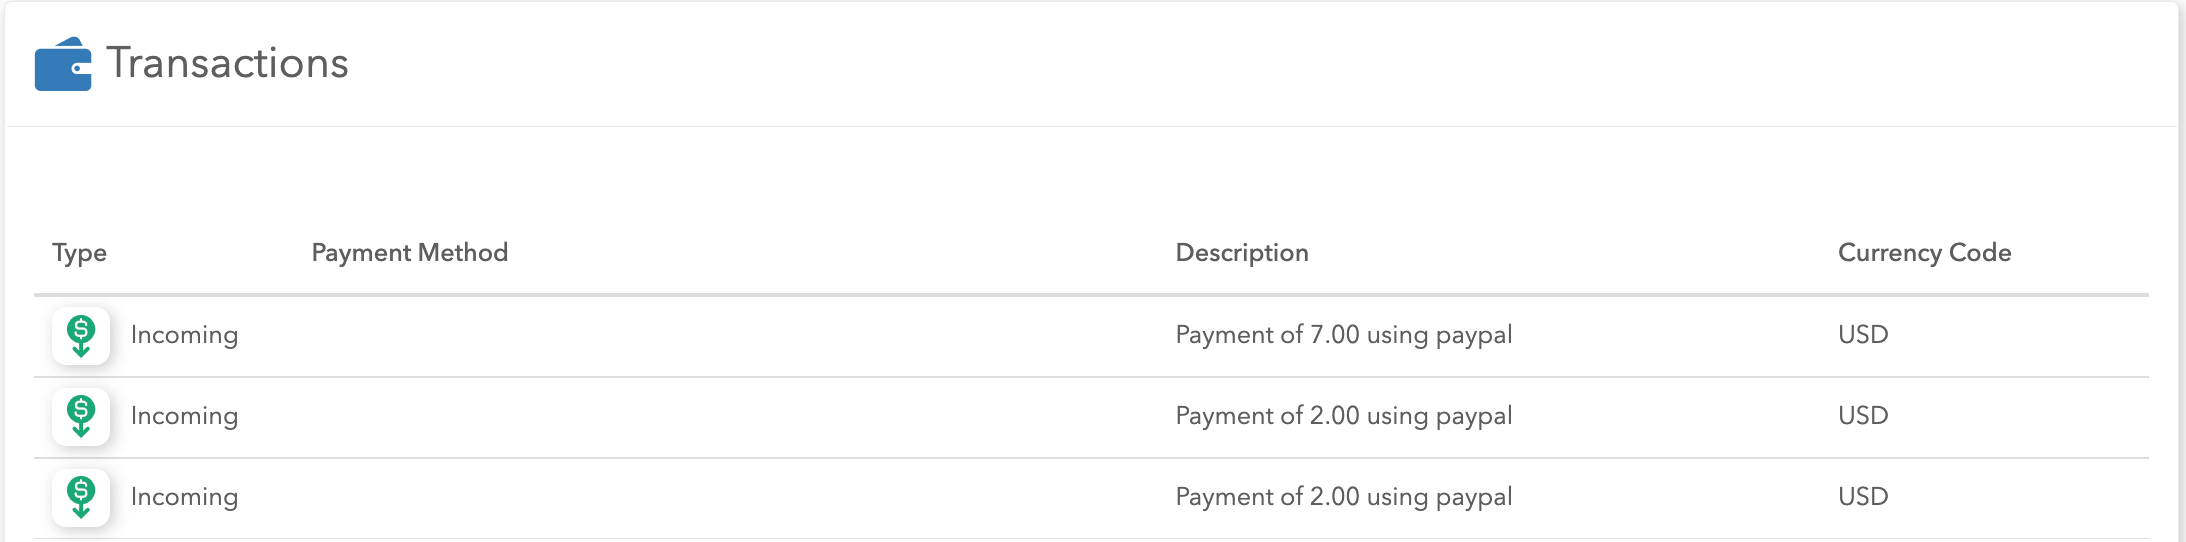
Transactions tab
The Transactions tab displays all transactions with basic information about the invoice number, payment provider, amount, and transaction date.
Incoming transactions represent everything that is added to the balance via added funds. In contrast, outgoing transactions are everything that has been spent.
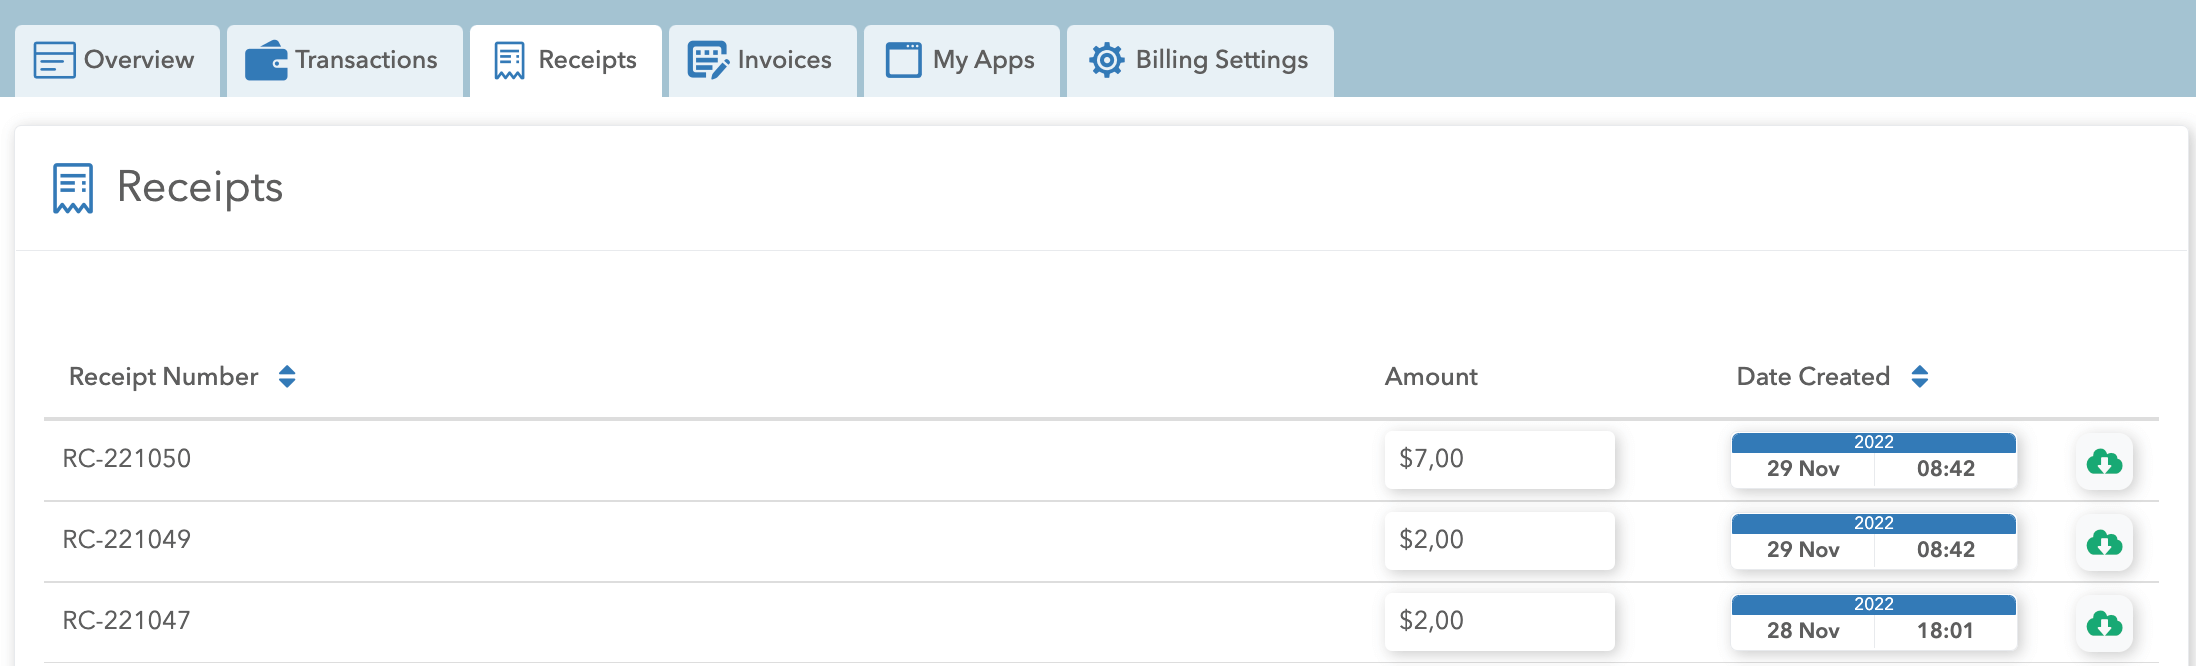
Receipts tab
Within the Receipts tab, we can see a tabular display of receipts with data on the amount and the date when the payment was made. Also, it is possible to download each receipt by clicking on the download icon.
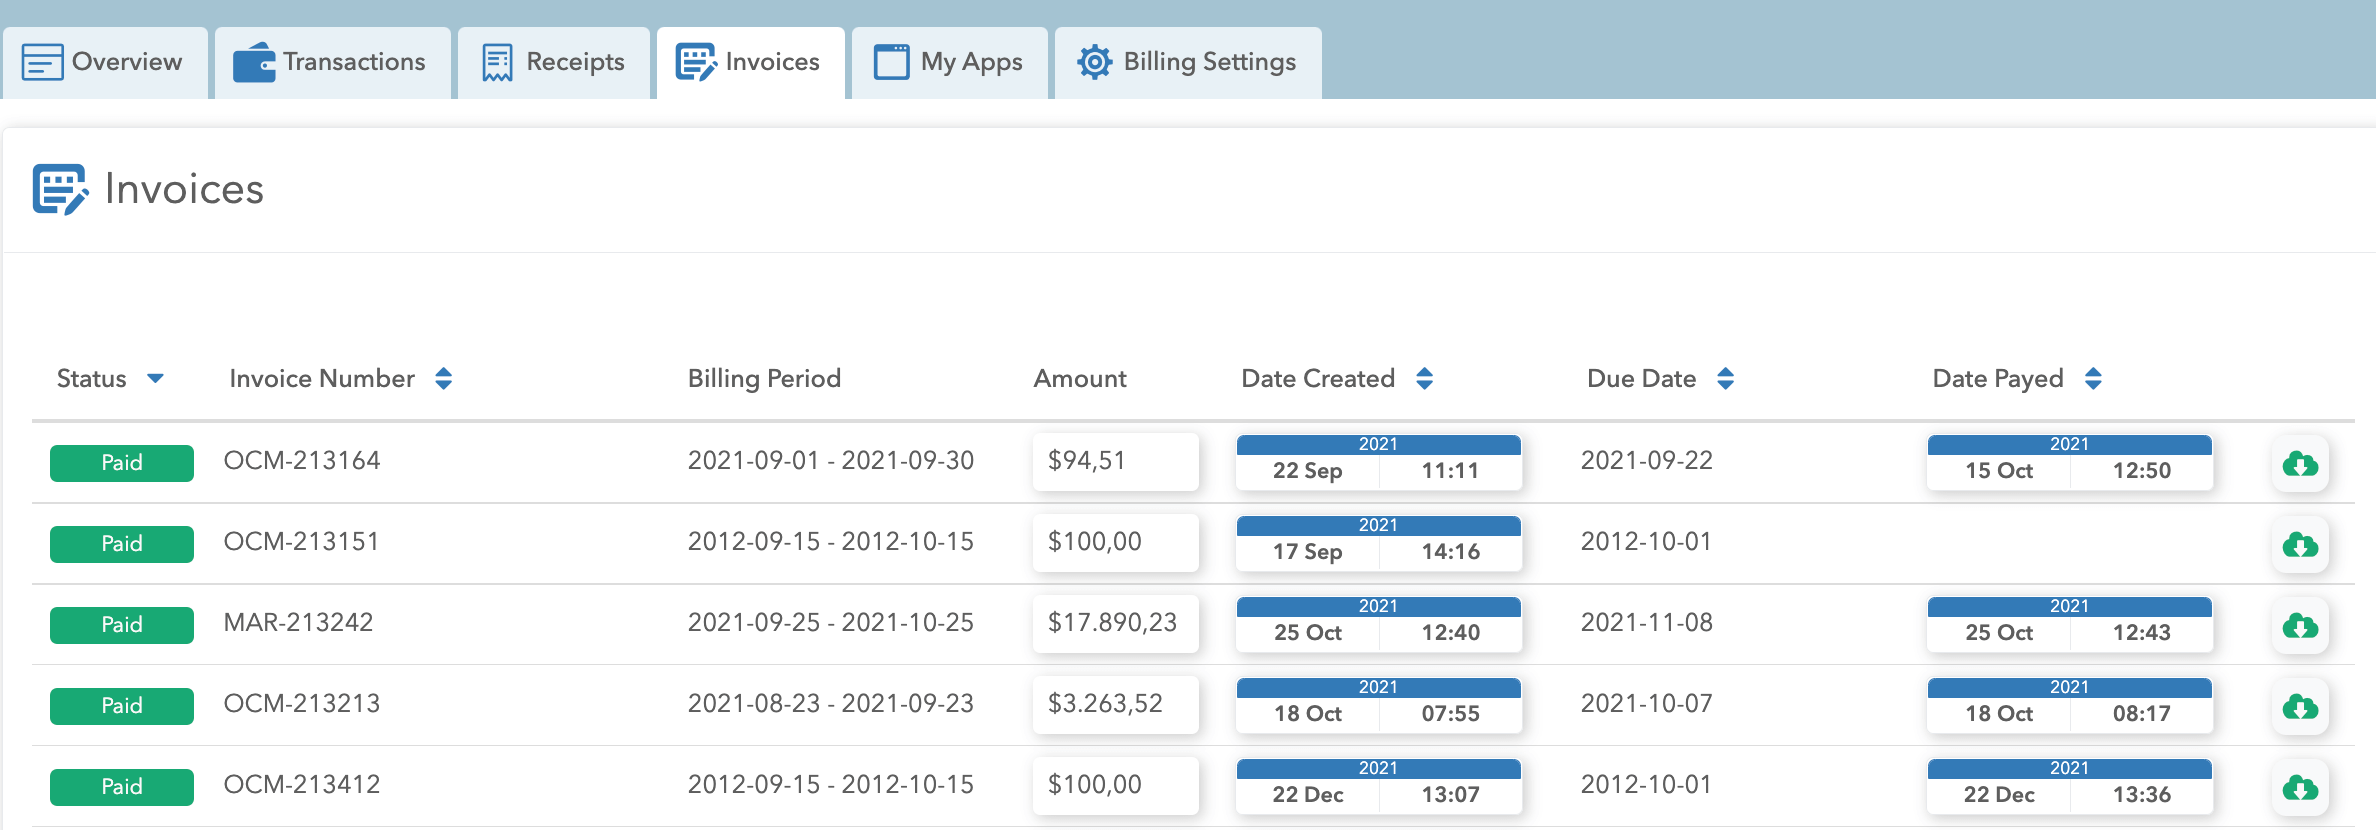
Invoices tab
The Invoices tab contains information about paid and unpaid invoices. For those invoices, we can see information about the status, invoice number, accounting period, amount, date when it was created, date when it expired, and date when it was paid. Also, there is a possibility to download the invoice by clicking on the download button.
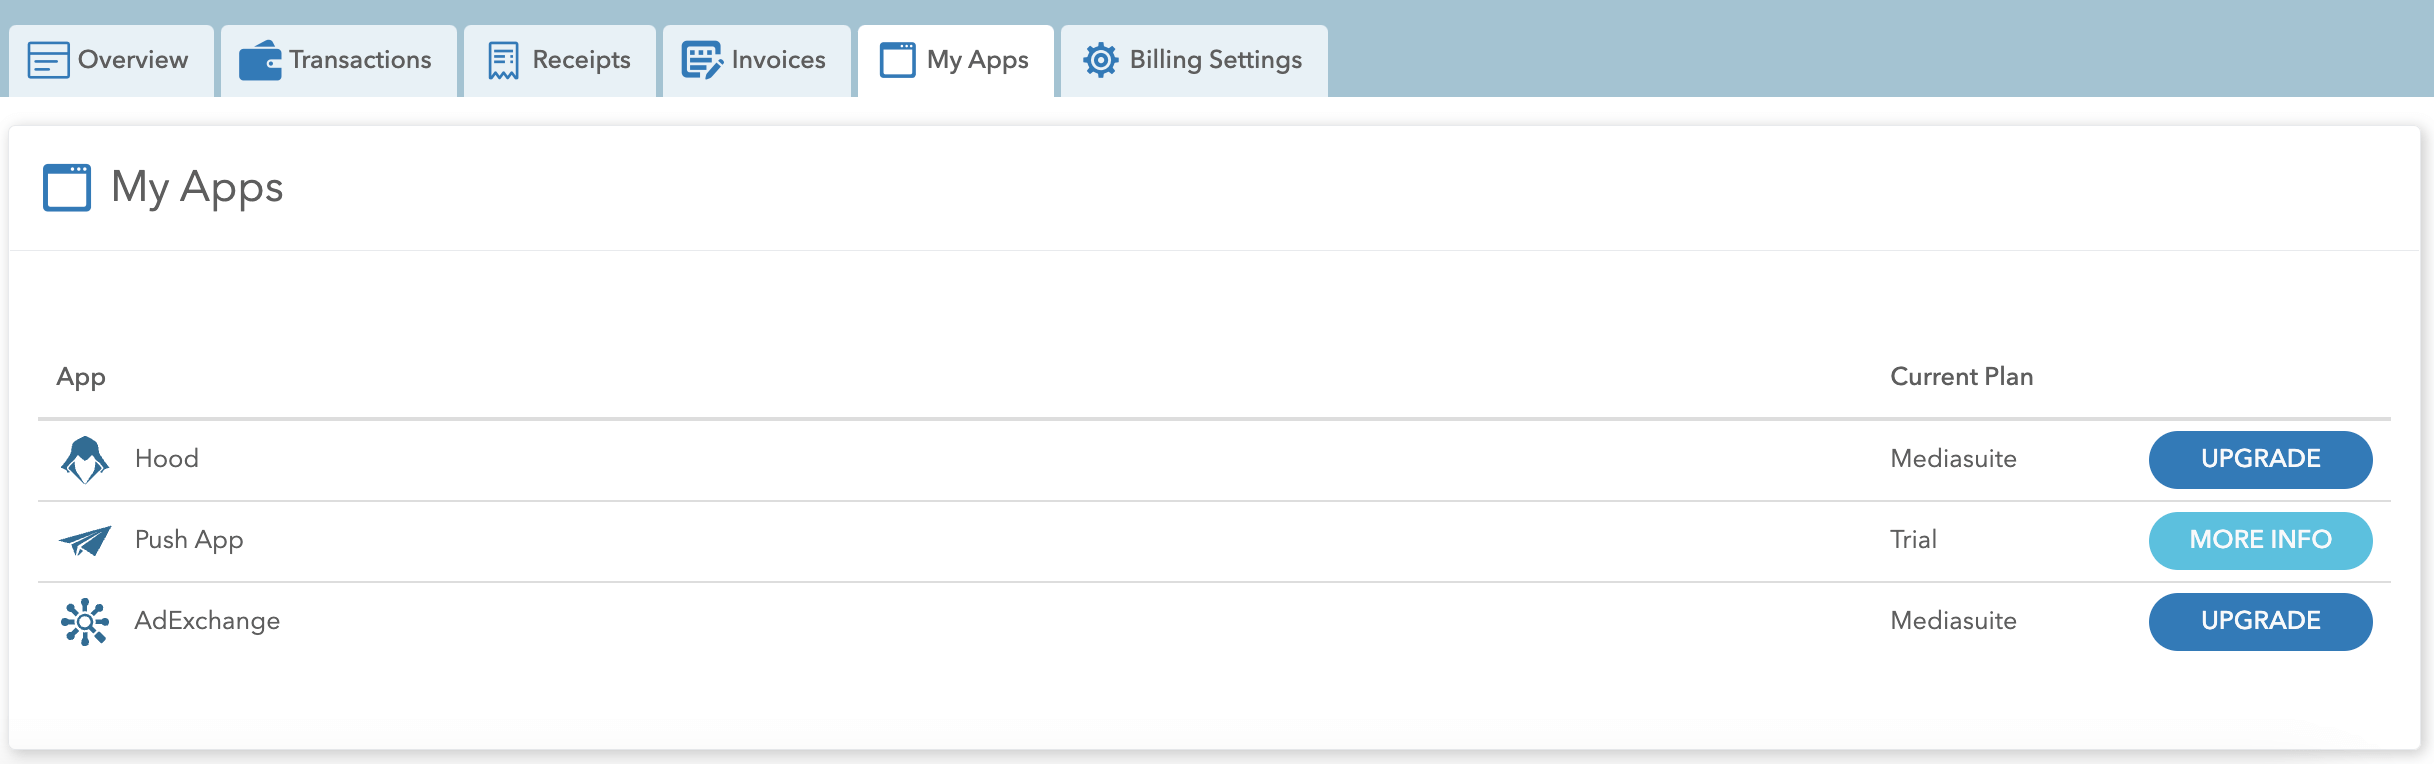
My Apps tab
My Apps tab displays all the apps included in the bundle and the plans that contain the apps shown in the table. On the My Apps tab, we can see all the applications that the company has purchased.
The upgrade button leads to a page where we can upgrade a certain app, that is, to a higher level.
Billing settings tab
On the Billing tab in the Settings app, we can see basic information such as:
- Company Legal Name
- TAX/VAT ID
- Registration Number
- Address
- Postal Code
- City
- Country
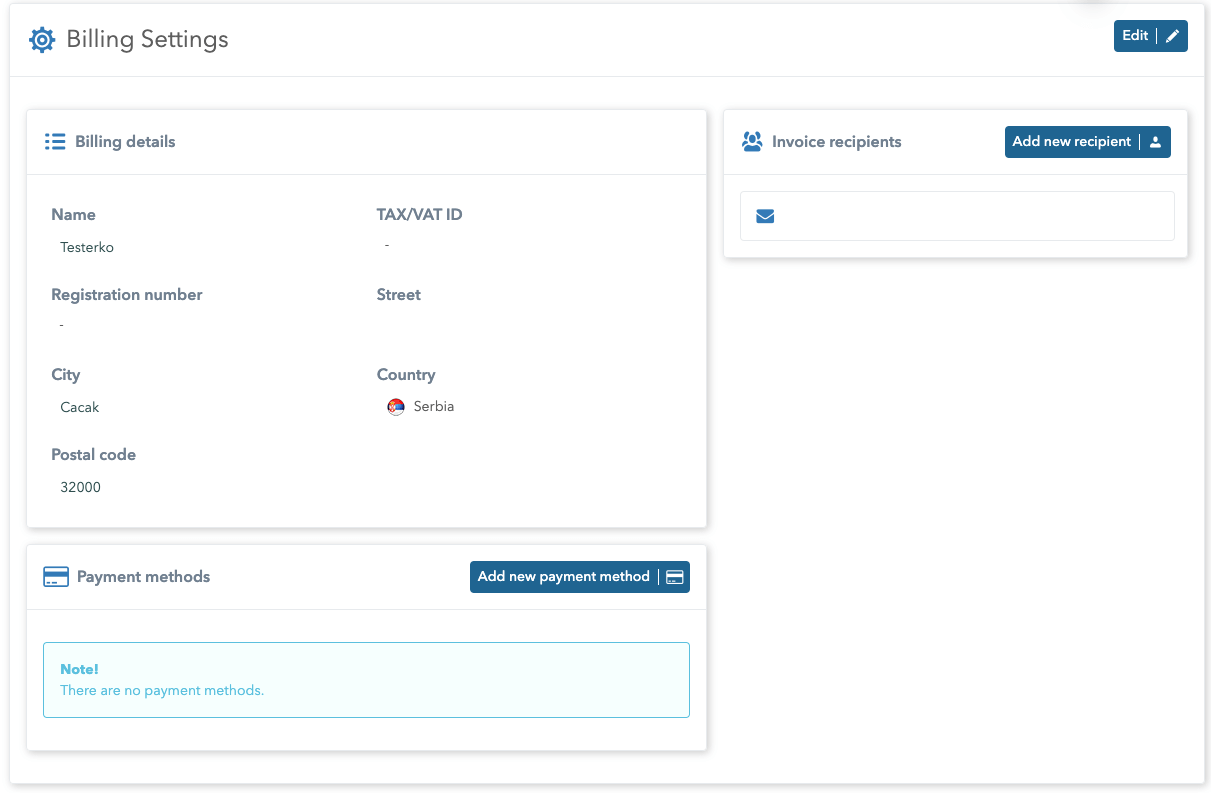
On the right side of the Billing Settings tab are invoice recipients.
Another way to add funds is via Billing Settings, then click on the Add New Payment Method button. To buy another plan, you would have to fill in the billing data (billing details), select a payment method, add funds, and then go to the upgrade plan to use another plan with special benefits.
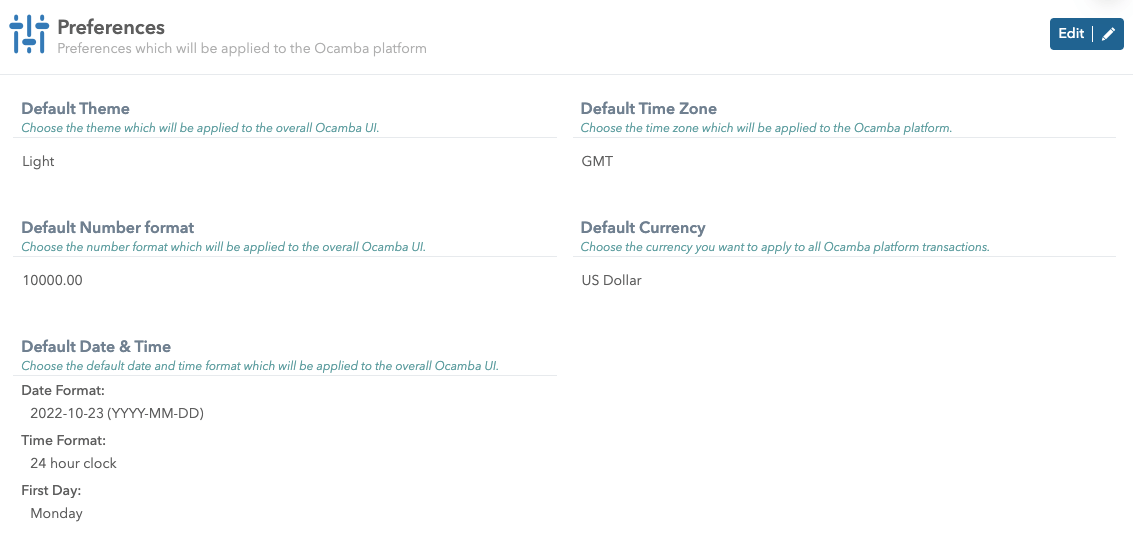
Preferences tab
On this tab it is possible to change information related to preferences:
- default theme,
- default number format,
- default date and time,
- default time zone and
- default currency.
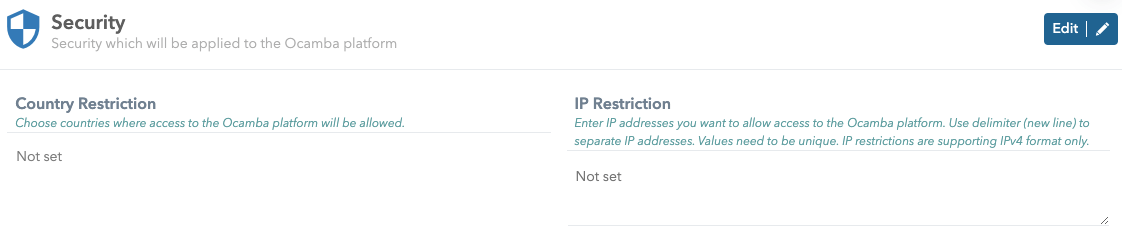
Security tab
The Security tab allows you to add country restrictions and IP restrictions.
- Country restriction - here you can choose countries where access to the Ocamba platform will be allowed.
- IP restriction - here you can enter IP addresses you want to allow access to the Ocamba platform. Use delimiter (new line) to separate IP addresses. Values need to be unique. IP restrictions are supporting IPv4 format only.
Members tab
On the Members tab, it is possible to see all company members with their status, name, e-mail, and time of creation. It is possible to filter and search specific members. More members can be added to the platform by clicking the Invite button.
Adding Users - To successfully add a new account to the platform, the person adding new accounts must have the Role of app admin. Within the members tab, it is possible to add new users by clicking on the invite button. In the new window, fill in the form for adding a user, in which it is necessary to specify e-mail, name, and select a Role for the new user from the drop-down menu (for example, Viewer, Admin, Finance).
Deleting User - To successfully remove a user from the platform, it is necessary for the super admin or admin of the platform to cancel access to the user by deleting it from the members list. The admin can perform this action by following the steps below: Manager -> Members -> click on the delete icon on specific member and confirm.
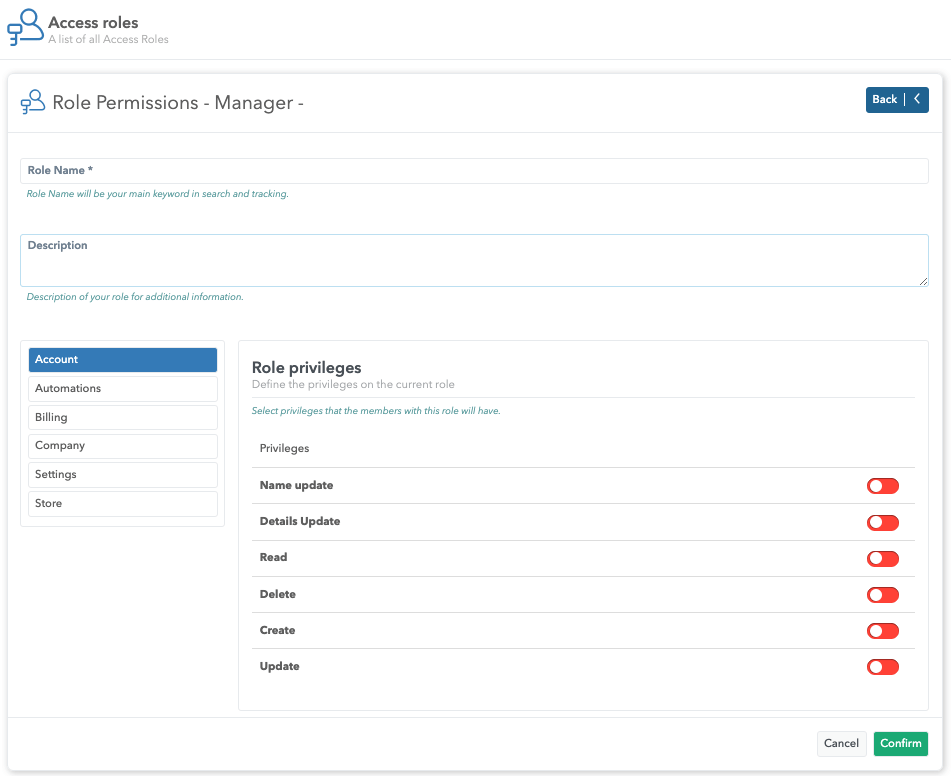
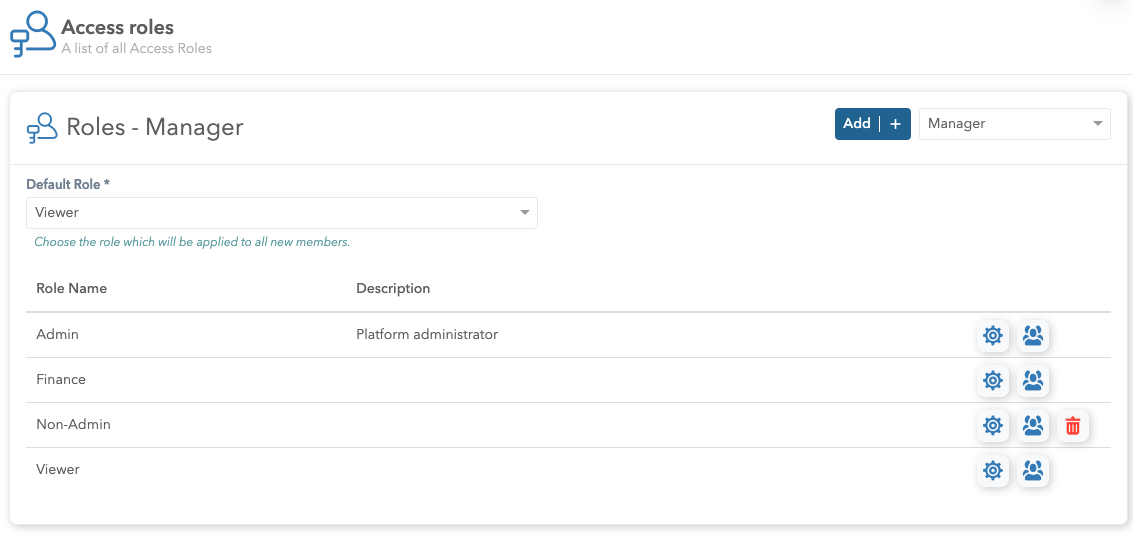
Access tab
On the Access tab, you can see a list of all Roles that have been created, as well as system Roles. By clicking on the options button, it is possible to see additional details about the Role, such as the name, descriptions, and privileges of the Role.
System Roles are Admin, Finance, and Viewer and it is not possible to edit them.
Clicking on the second button (next to the Role options button) allows viewing the list of members for a specific Role. The Default Role that will be applied to all new members can be changed by selecting the desired one from the drop-down list. In addition, it is possible to create new Roles with new privileges by clicking the Add button.
Adding Roles - To successfully add the permissions that are needed, the person adding the permissions must be:
- Platform Admin,
- Adex app Admin,
- Push app Admin,
- Hood app Admin or
- Member with Settings RBAC privileges.
Also, for someone to be assigned a Role from the desired app (Adex/Push/Hood), that user must first be a Member of the app. If there is already a Role that has the desired privileges, it is possible to directly assign that Role to the member if such a Role is suitable, and if there is no Role, it is possible to create a new Role.
Creating a Role - On the Access tab, you can create a new Role (Add+). The next step during creation is to name the Role (in the Role Name field). Select a segment from the offered list, and then on the right side, check the privilege that you want to assign to the Role. After completing the previous steps, it is necessary to confirm by clicking the Confirm button.