SendGrid Email Setup Instructions
Step 1: Setting Up SendGrid
- Create a SendGrid Account
- Go to SendGrid.
- Sign up for an account or log in if you already have one.
- Generate an API Key
- Navigate to the SendGrid Dashboard.
- Go to Settings > API Keys.
- Click on Create API Key.
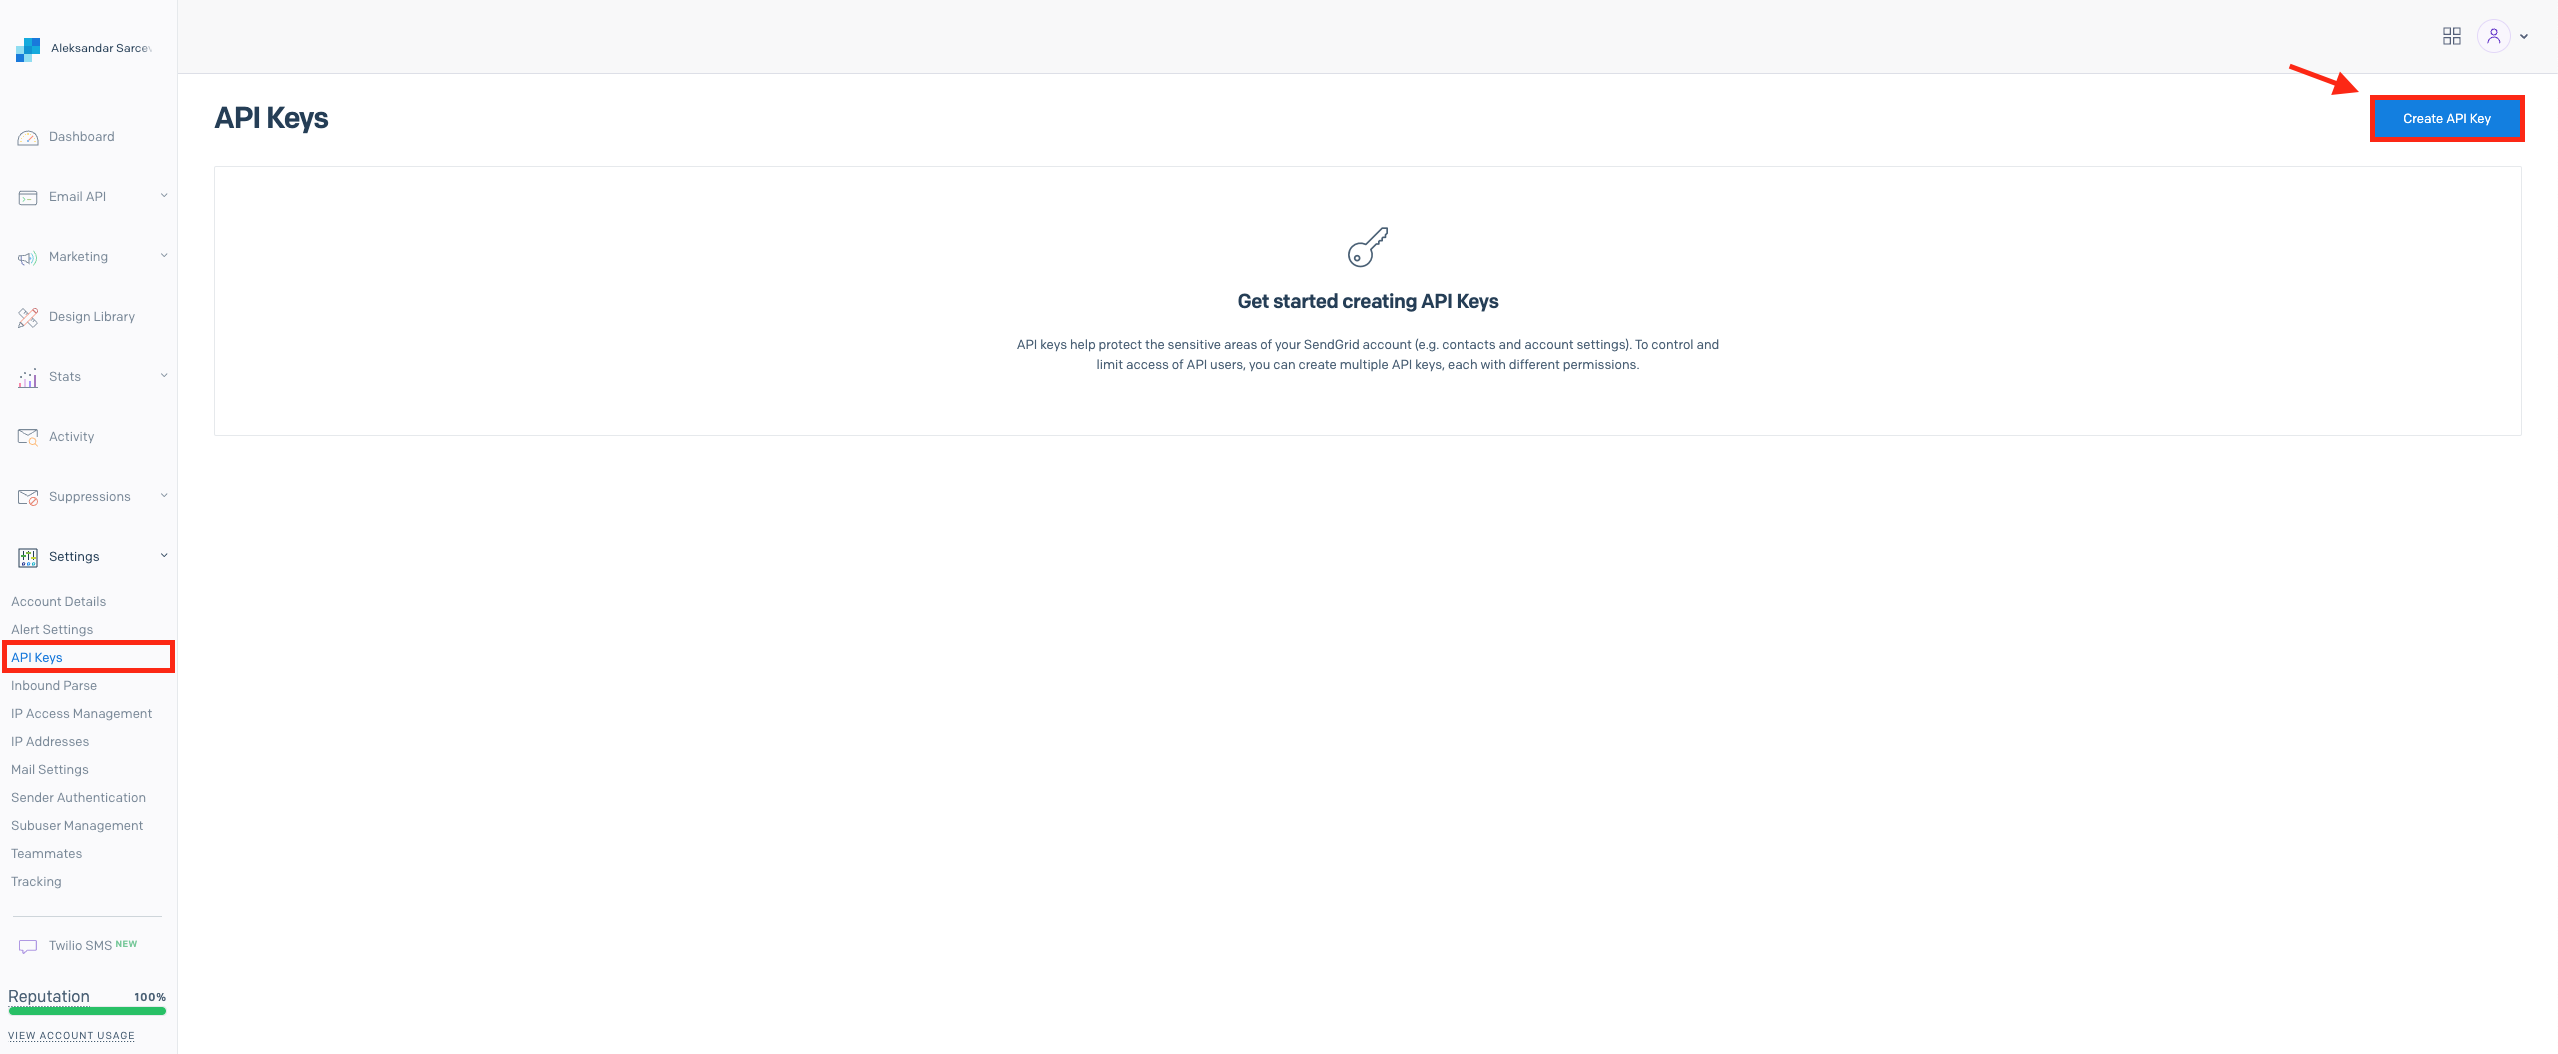
Create new API key button location in SendGrid Settings
- Provide a name for the API key, e.g., “Ocamba Integration”.
- Select Full Access and click Create & View.
- Copy the API key and store it securely.
Step 2: Configuring SendGrid in Ocamba
Access Ocamba Email Settings
- Log in to your Ocamba account.
- Navigate to Hood Settings > Email.
Add SendGrid Integration
- Click on Add New Integration.
- Select SendGrid from the list of email service providers.
- Enter the following details:
- API Key: Paste the API key generated from SendGrid.
- Sender Email: Enter the verified sender email address from SendGrid.
- Sender Name: Enter the name that will appear as the sender.
Click on Validate to confirm the input validation.
Send a Test Email
- Enter recipient email address and click on the Send Test Email.
- Verify that the test email is received at the specified email address.
Step 5: Add Subscribers
- Upload CSV:
- If you have a list of emails ready, select Upload CSV to import email addresses.
- Alternatively, use the Ocamba Email Web Prompt to collect emails from your website.
Import Options
- Dashboard Upload - Upload a CSV of emails and user data or manually add emails.
- Server API: Programmatically add emails server-side.
- SDK Method: Add emails using our client-side SDK, recommended if using our SDKs for push or in-app messaging.
- Email Web Prompt: Use a web prompt to collect email addresses and phone numbers