Scheduled Tasks
Scheduled Tasks allows you to plan and schedule push notifications for your acquired user base.
To access Scheduled Tasks, click on Hood, then choose Scheduled Tasks from the left sidebar.
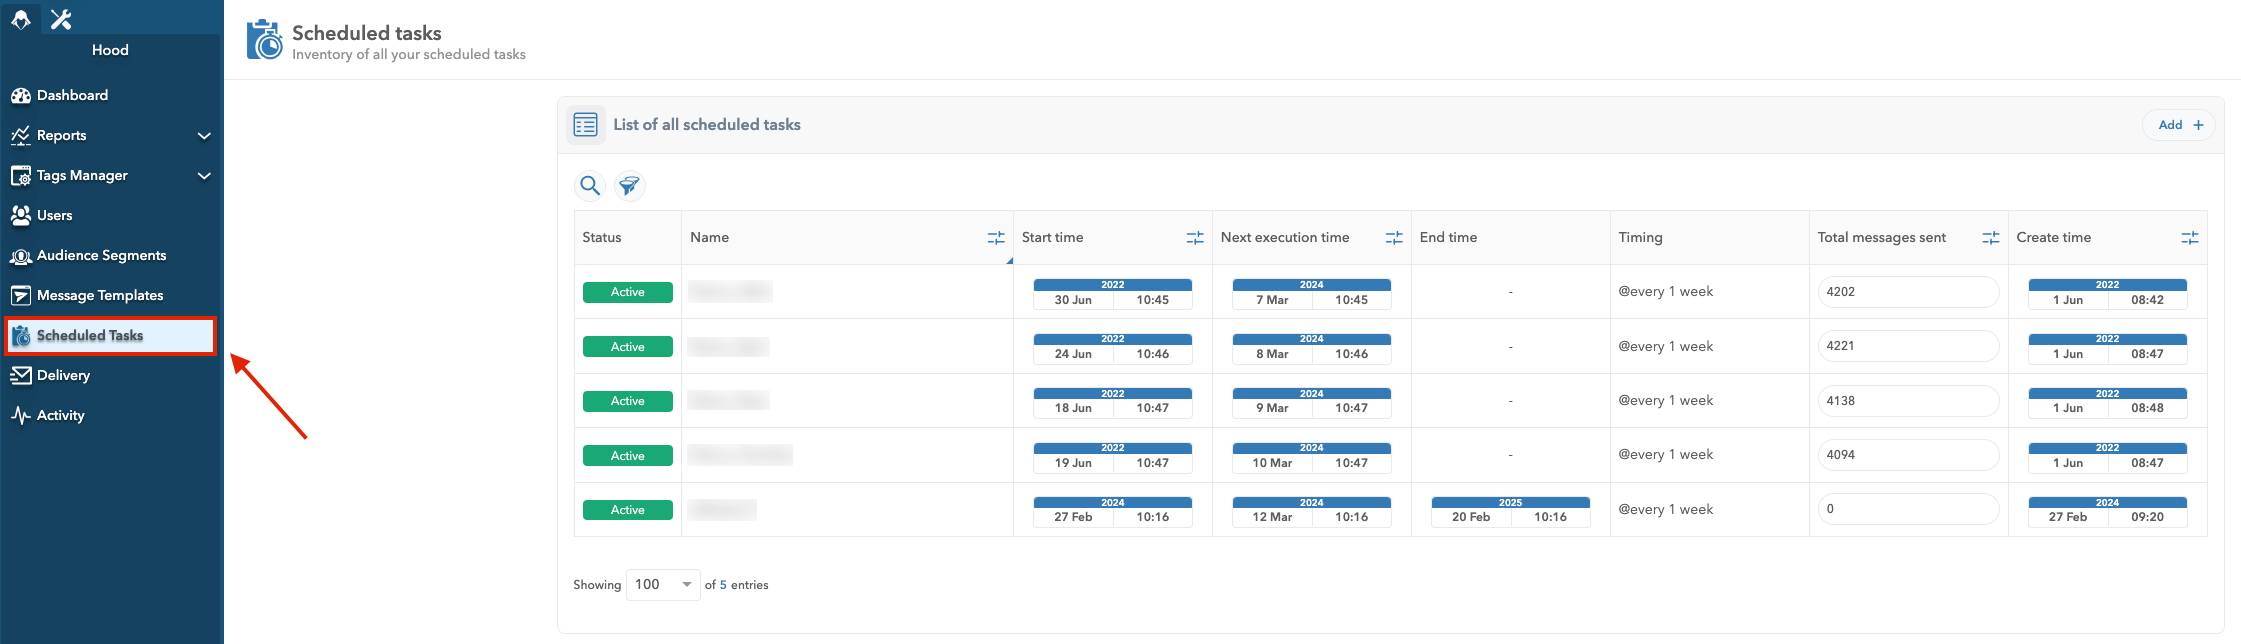
Scheduled Tasks Tab Location
You can send tasks through Cron-based scheduler or by immediate action.
Creating a Scheduled Task
To create a scheduled task, click on the Add button in the top right corner.
Scheduled Tasks Creating a Scheduled Task View
This will open the Task creation wizard, which consists of a 3-step process.
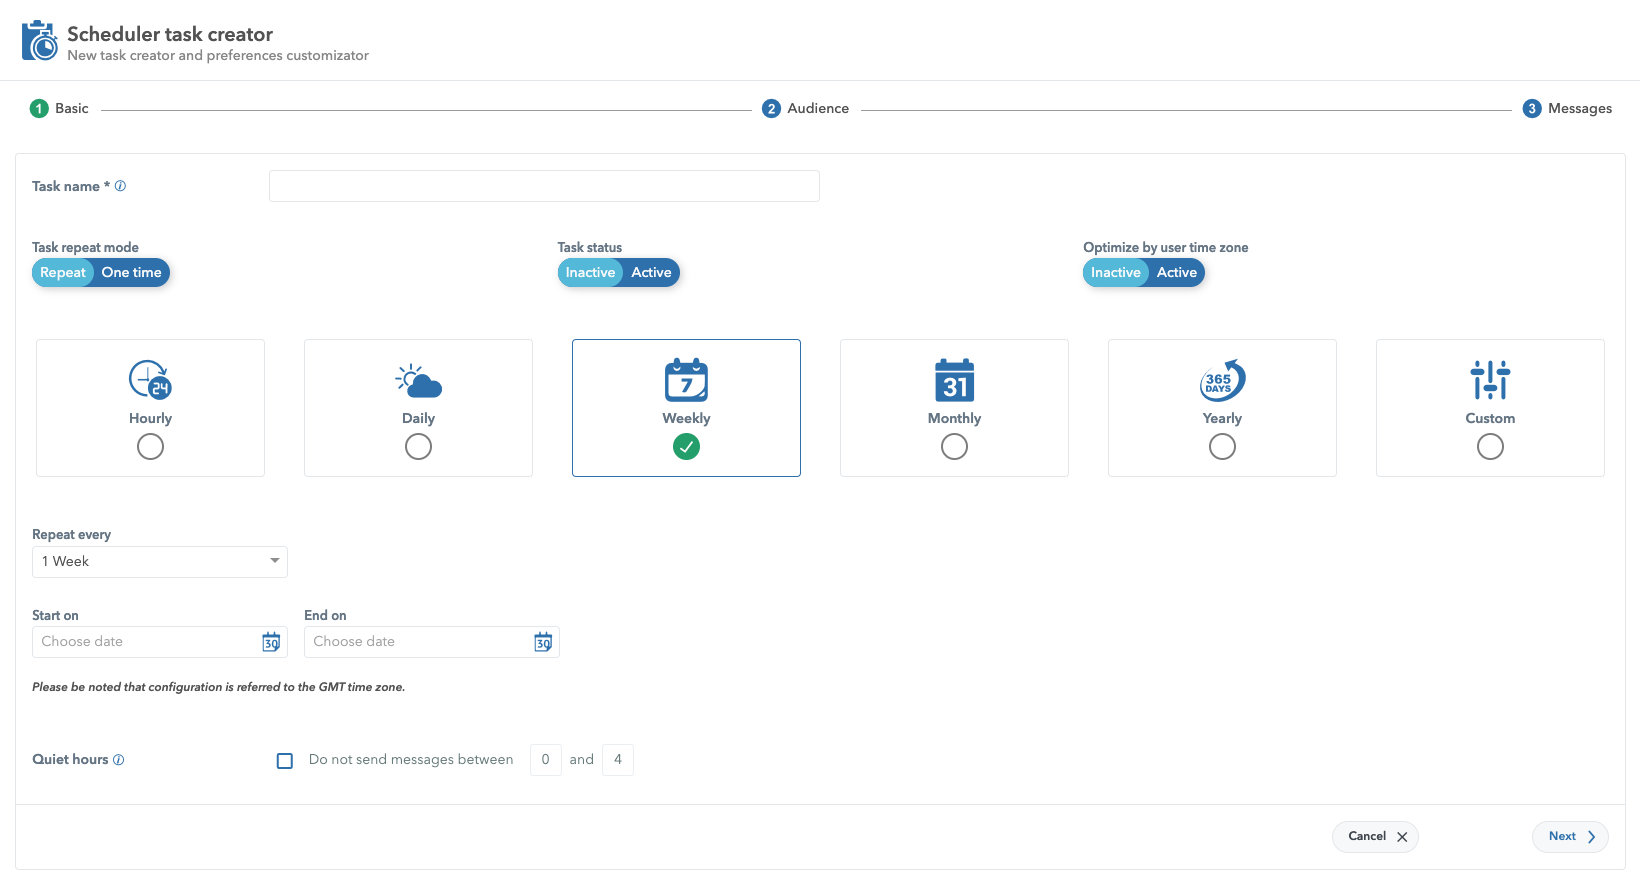
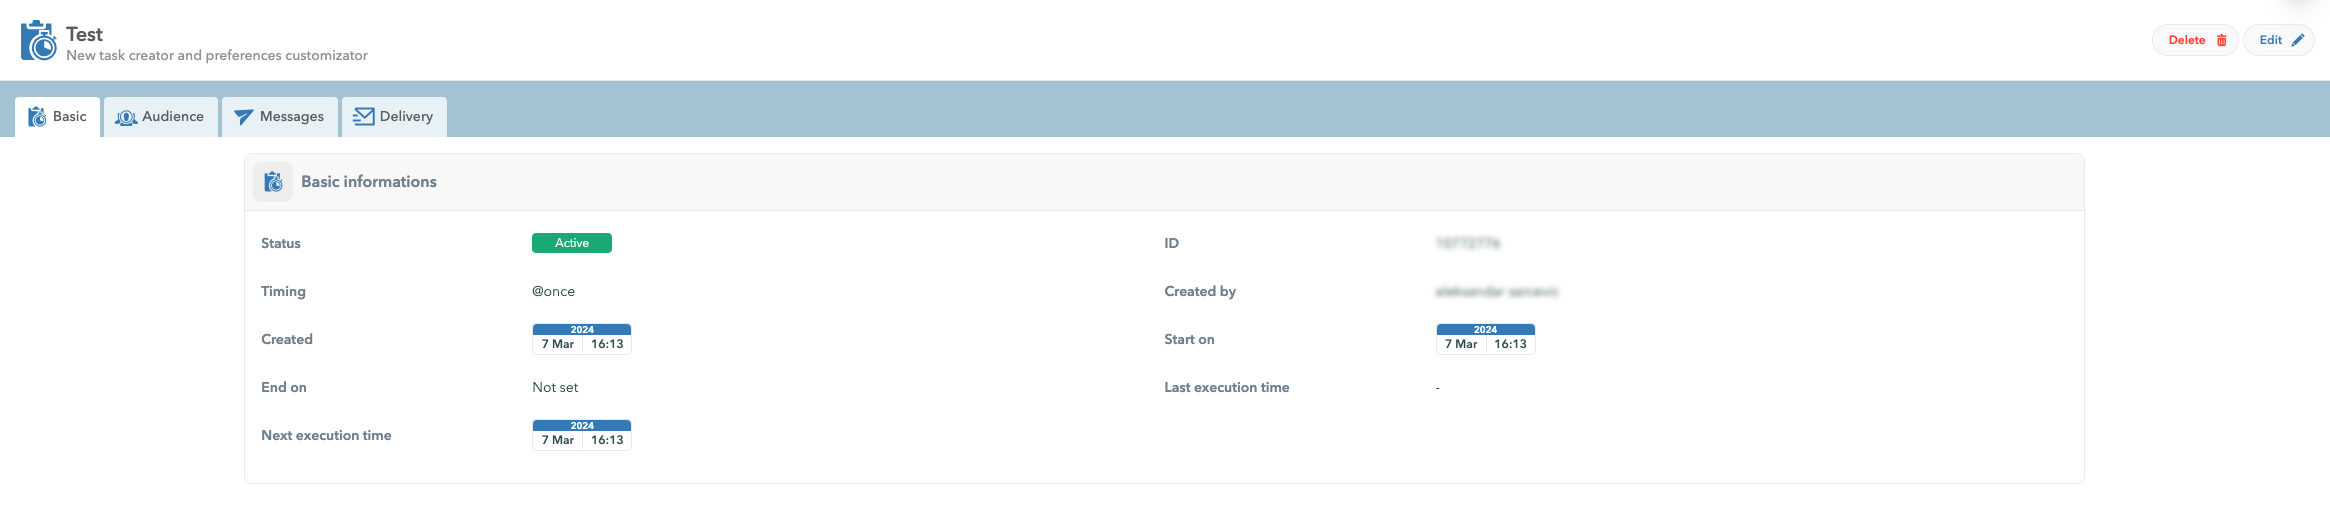
Step #1 - Basic
This option allows you to set up the time frames within which your task will be scheduled for sending.
First, fill out the Task name field.
Scheduled Tasks Creating a Scheduled Task View Weekly Option Selected

If not, here’s what you have to fill out.
Using the Cron-based Task Scheduler allows you to choose between 5 fixed and 1 custom time frame in which the tasks will be sent in a repeat mode.
The 5 fixed time frames for the Repeat mode are:
Hourly
Daily
Weekly
Monthly
Yearly
Custom time frame allows you to customize the time frame in which the task will be executed.
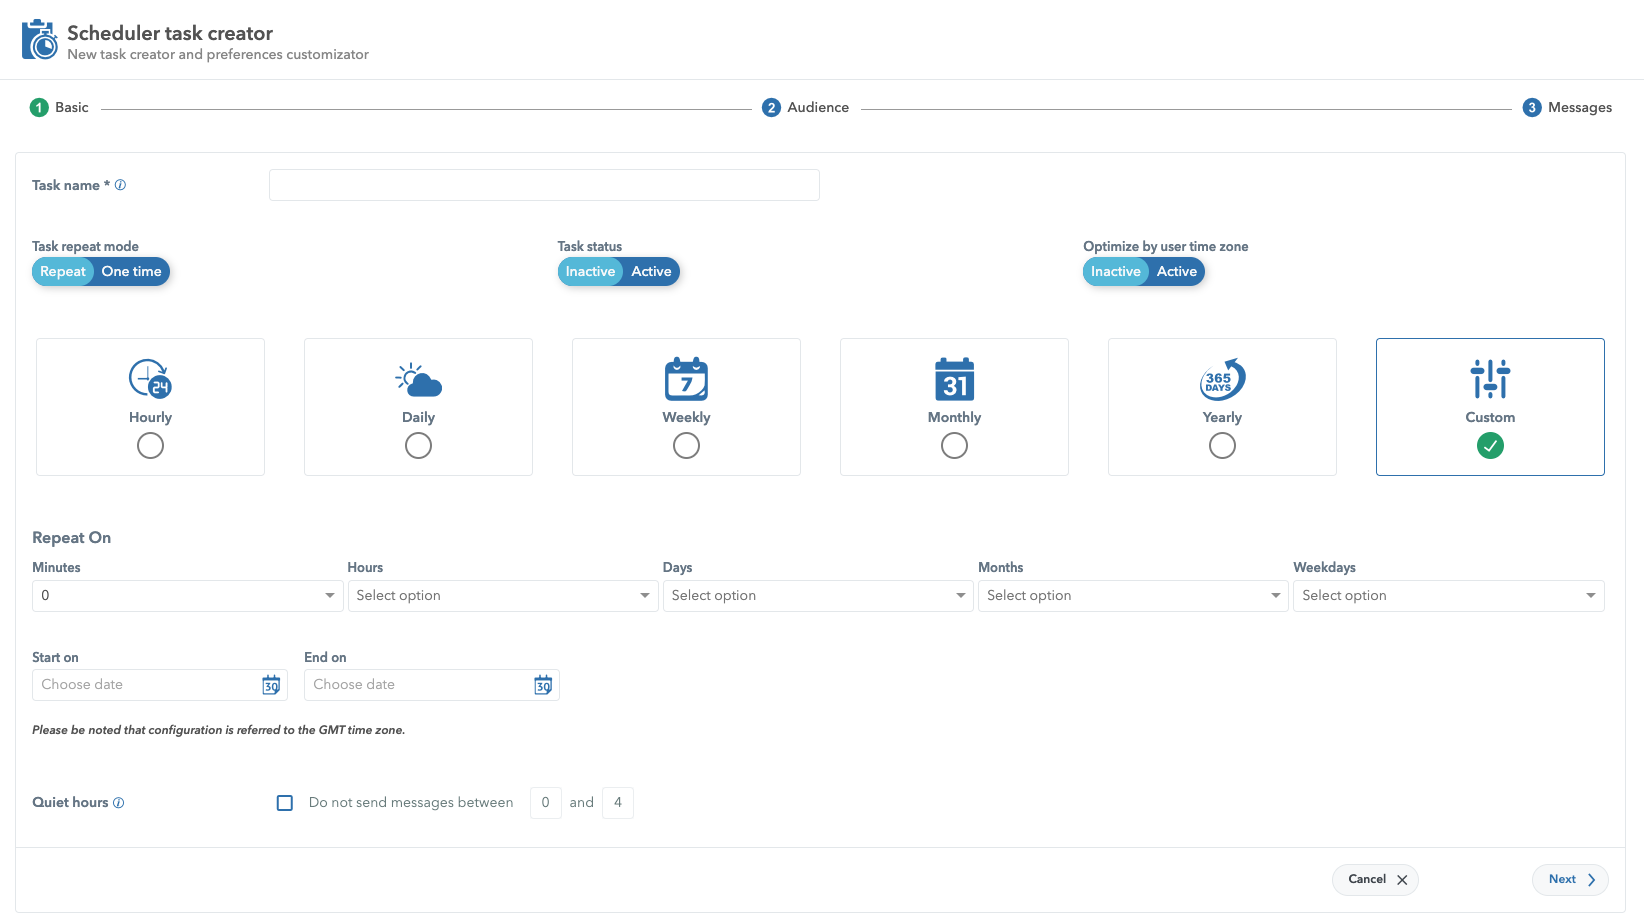
Scheduled Tasks Custom Time Frame Example
The options to specify the Repeat mode for the Custom time frame are:
Minutes
Hours
Days
Months
Weekdays.
There are also the Start On and End On calendar options where you can specify the starting and finishing time of the task that is being scheduled. This option is optional.

Scheduled Tasks Creating a Start On & End On Options
Additionally, you’ll have the option to set Quiet Hours. This option allows you to specify the time frame in which your message recipients won’t receive messages.
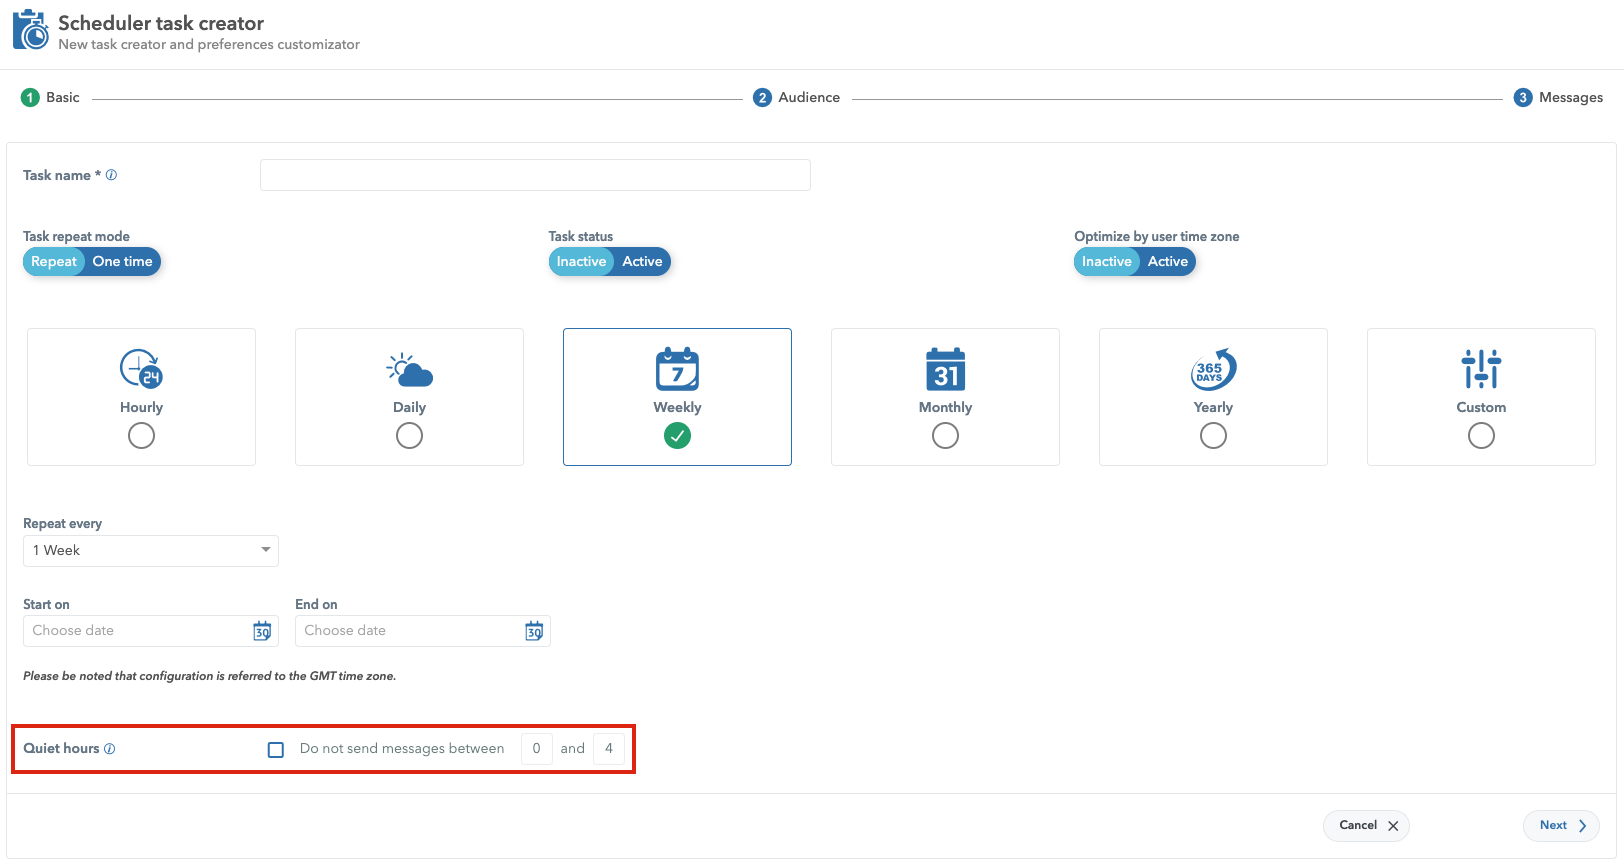
Scheduled Tasks Quite Hours Options Location
Also, you can optimize your notifications by the users’ timezones. Optimize by user time zone are disabled by default.

Scheduled Tasks Optimize By User Time Zone Location
Step #2 - Audience
This is where you can set the audience targeting options.
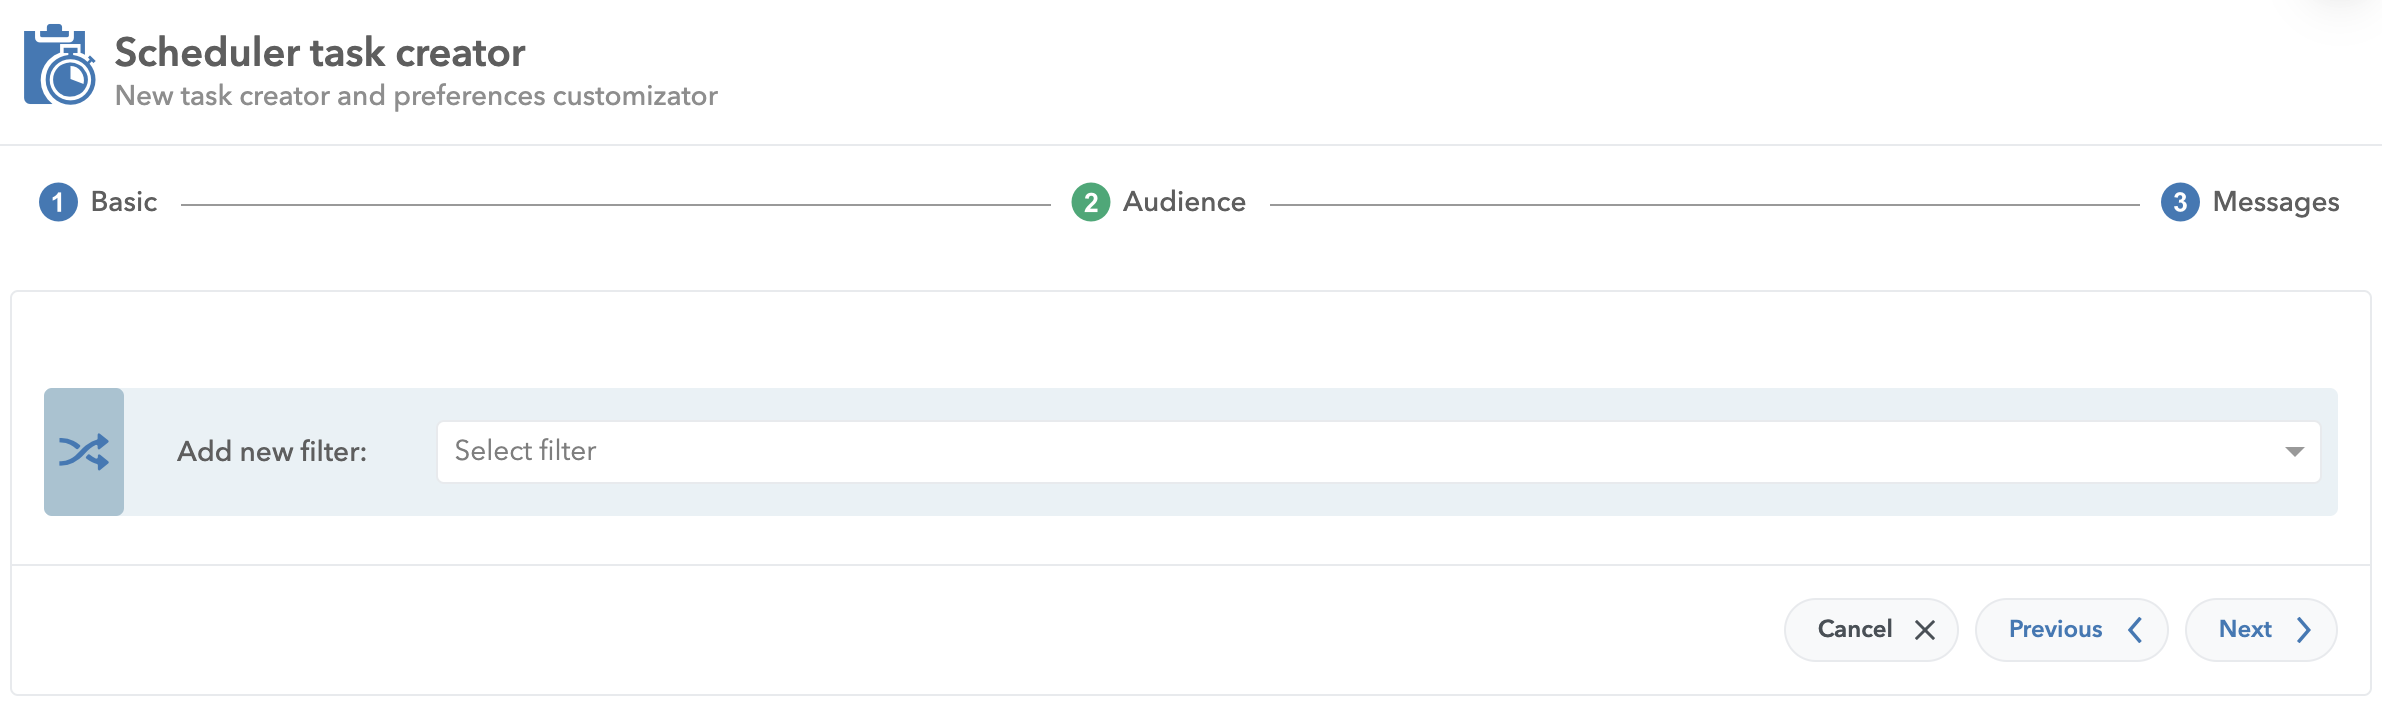
Scheduled Tasks Audience Segments View
Click on the Select filter and you will have a drop-down menu of all audience targeting options available in Ocamba.
Here’s the list of available audience targeting options:
Audience Segments
Countries
Remote User ID
Regions
Languages
OS
Browsers
Account
Applications
Tags
Tag Group
Application Group
User
User Age
User Data
The maximum number of added filters correlates with the number of available audience targeting filters, which is 15. No audience targeting filter can be added twice.
Click Next to proceed to Step #3 to create your message.
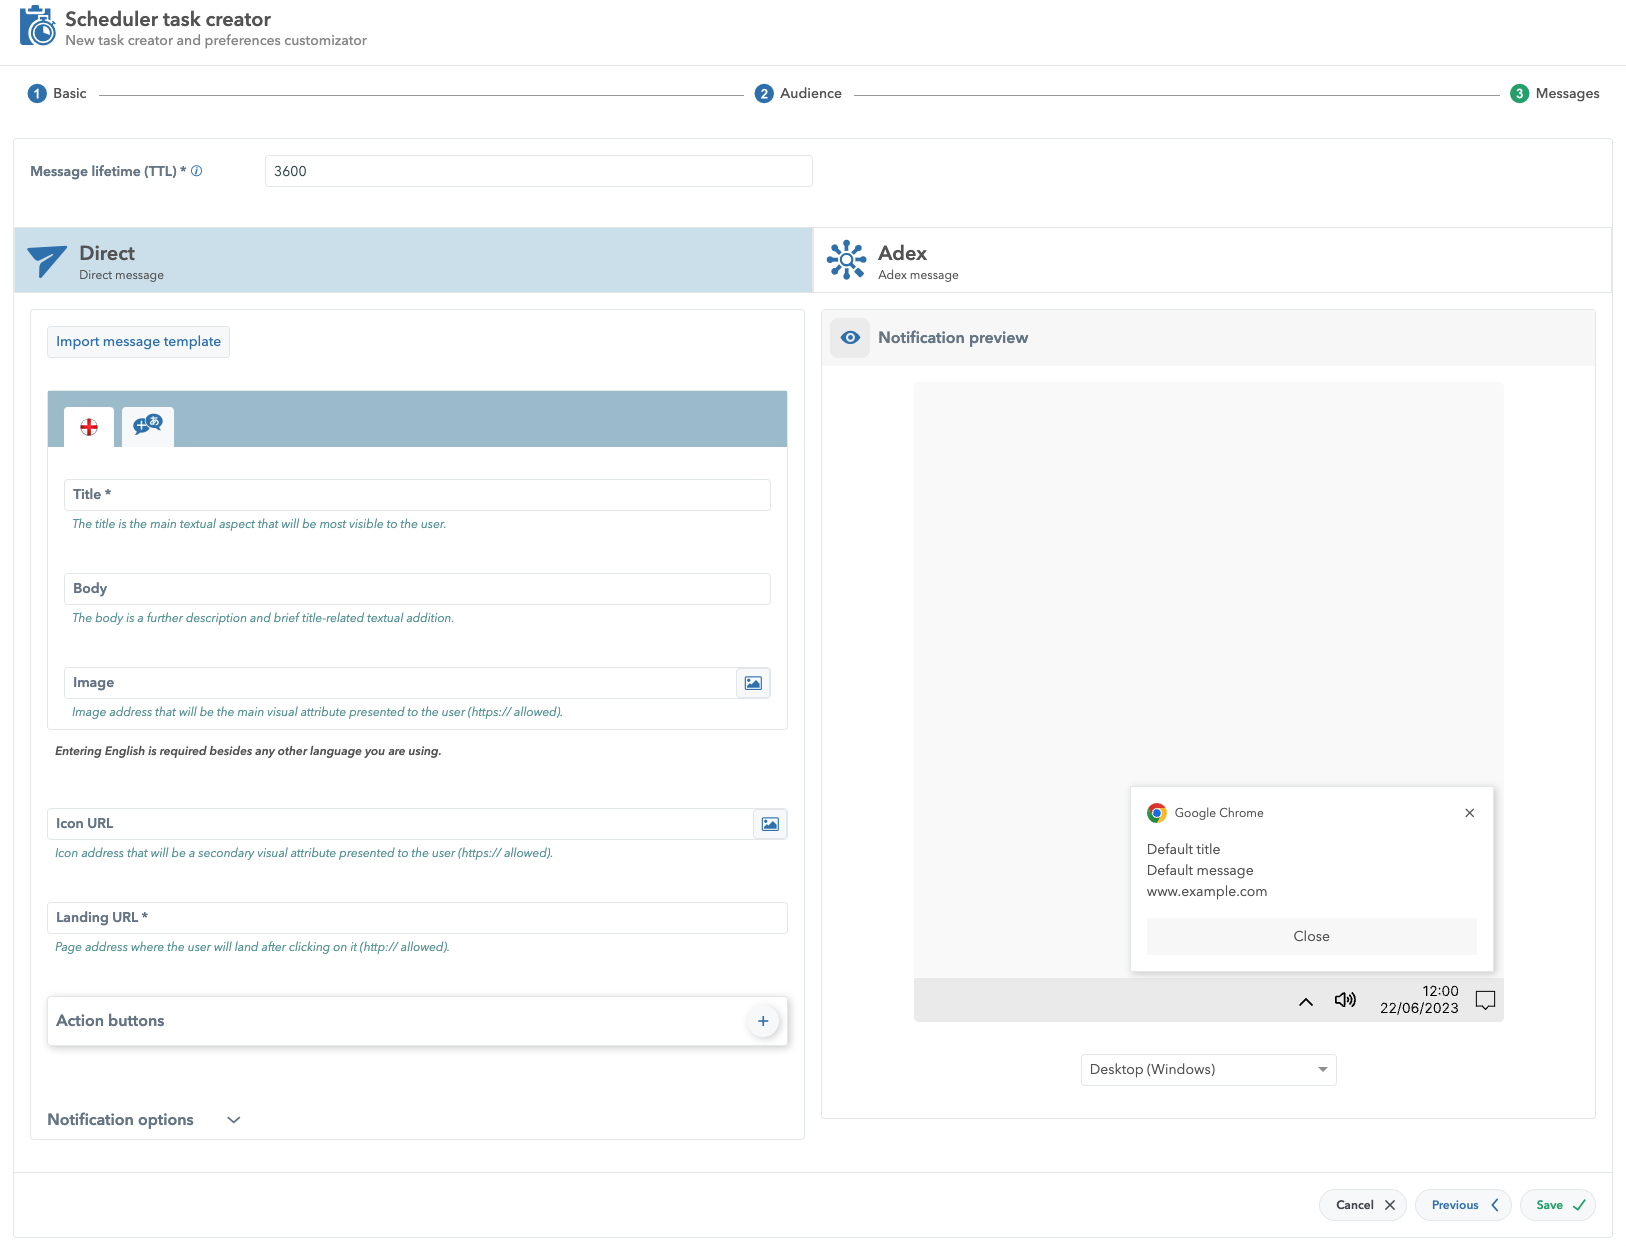
Step #3 - Messages
This is where you can design the message that you want to send to your users.
Scheduled Tasks Message Templates
Message lifetime (TTL) is the time value that shows the duration for which a message remains valid, measured in milliseconds. The default value is 3600 milliseconds.
Then, choose between 2 main engines through which the message will be delivered. The preselected engine will be Direct which is the Hood module.
By proceeding with the Hood module, the message will be delivered to the acquired users in the Hood or to your settings in the audience targeting segment (Step #2).
To create a message, you can either create it from scratch or to import Message Template.
If you select the Message Template option, you will have a drop-down menu of all your messages from the Message Templates tab.
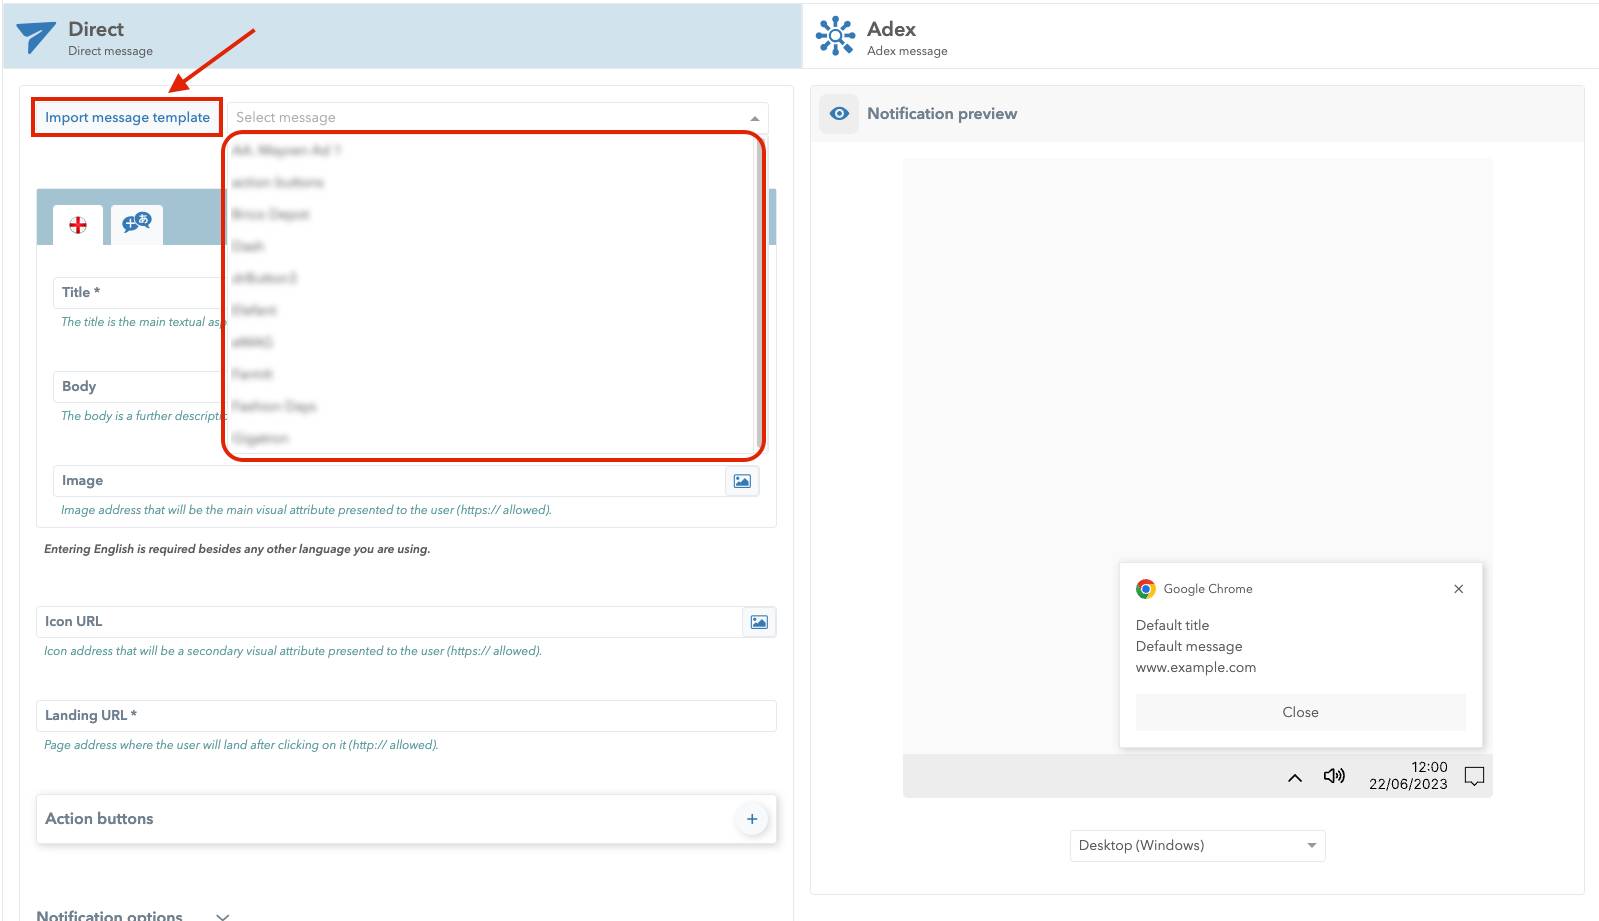
Scheduled Tasks Import Message Templates Option Location
When you choose a pre-created message template, the setup fields will automatically be filled out with the information from that template.
Language options are located right below the Import Message Template option.
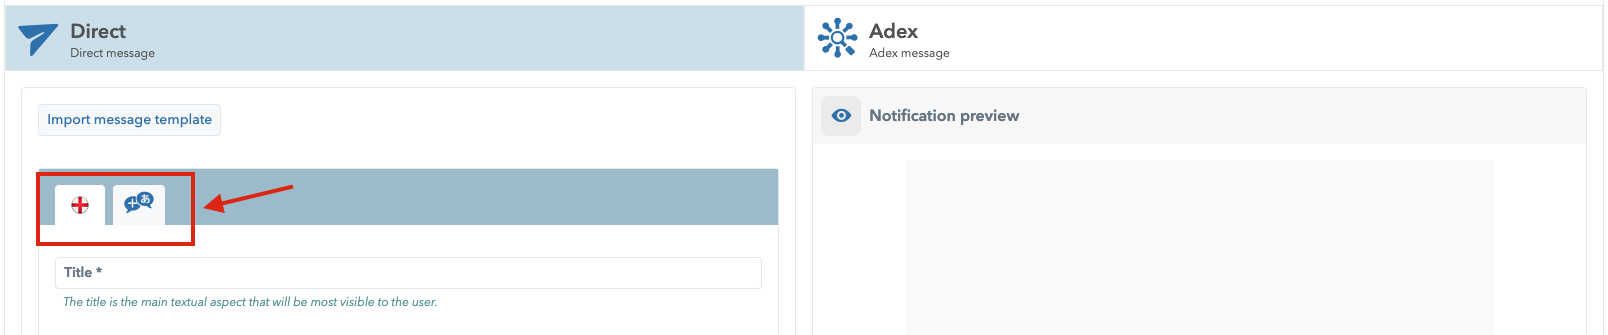
Scheduled Tasks Select Language Options Location
Ocamba’s direct message creation panel supports 39 languages. You can add a maximum of 20 languages per message.
Other message parts are:
Title - This is message title shown to your user. This option is mandatory.
Body - This is the message body shown to your user.
Image - This is the main visual attribute shown to your user.(https:// allowed)
Icon URL - This is the icon address that will be the secondary visual attribute shown to your user. (https:// allowed).
Landing URL - This is the landing page address where your user will land after clicking on it. (http://allowed). This option is mandatory.
Then, there is the Action buttons section.
To add an action button, click on the Add icon in the right corner.
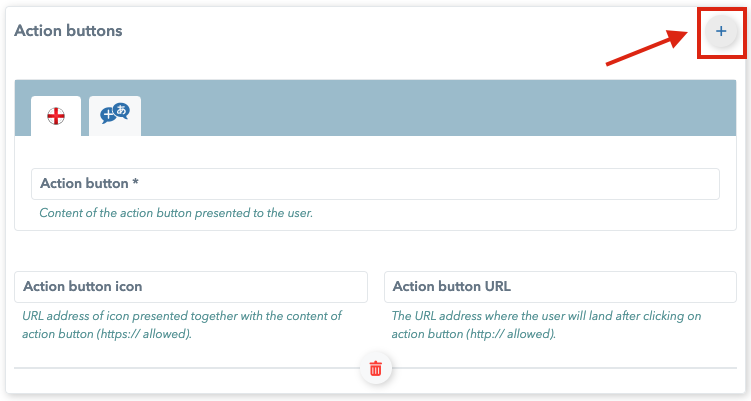
Scheduled Tasks Add New Action Button Location
The maximum number of action buttons is 3 for mobile.
To delete an action button, click on the Bin icon located in the lower middle part of the Action buttons section.
The Notification preview window allows you to see what your message will look like in different environments, such as: Desktop (Windows),Desktop (MacOS), Mobile (Android) and Mobile (iOS).
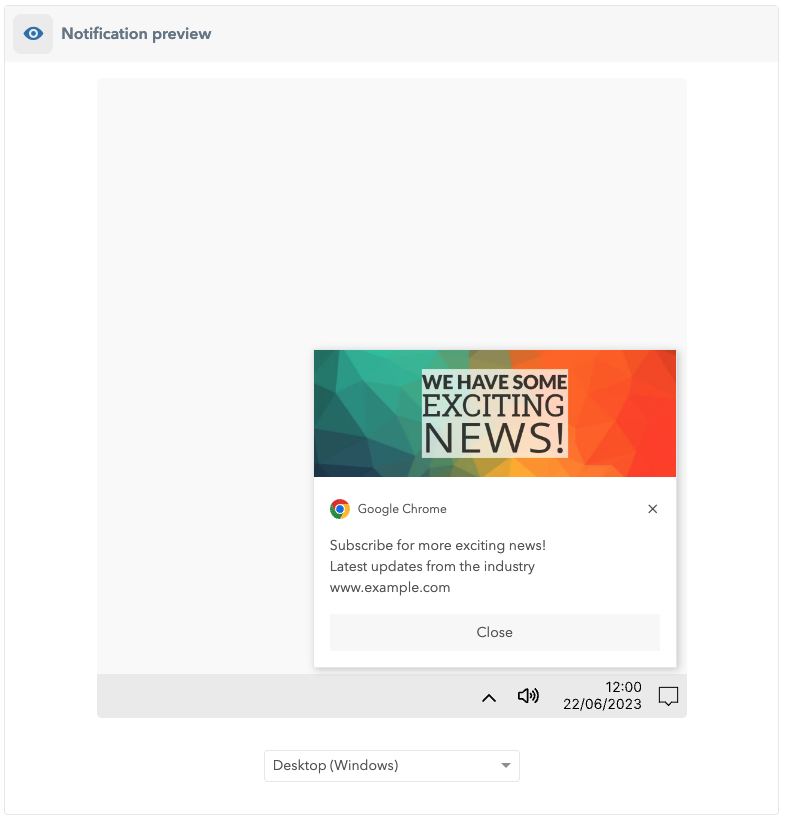
Scheduled Tasks Notification Preview Example
Notification options are not mandatory. They give you additional options to improve message delivery, such as:
Silent
Renotify
Require Interactions
Custom vibration pattern upon receiving a message.
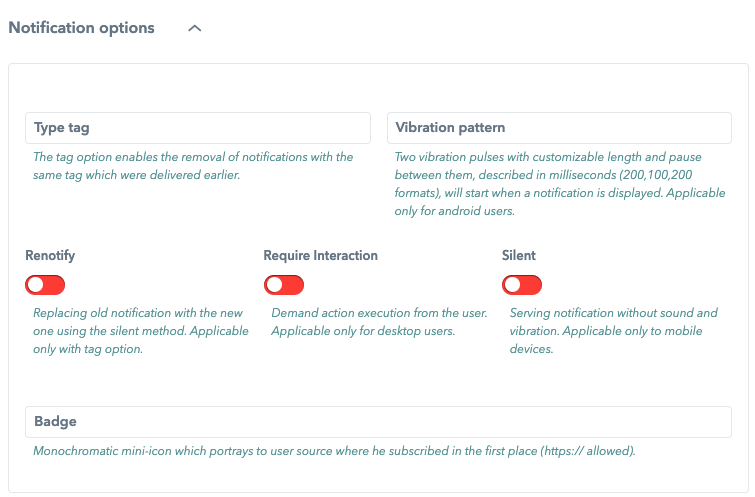
Scheduled Tasks Notification Options
If the task needs to be scheduled through Adex, first choose the Zone. Then, select the Adex option in your Scheduler task creator.

Scheduled Tasks Adex Message Option Location
If you opt for the Adex message, you need to fill out the following fields:
Zones (mandatory): Select the zone previously created in the Adex module.
Accounts: Select accounts previously created in the Adex module.
Campaigns: Select campaigns previously created in the Adex module.
Default campaigns: Select the default campaign previously created in the Adex module.
Number of messages (mandatory): The number of message that will be sent.
Repeat requests on click: If enabled, the message will be repeated after the user clicked on it.
Campaign Groups: Select campaign groups previously created in the Adex > Campaign manager > Groups.
Important Notice - Once you click on the Save button in the bottom right corner, the task will be scheduled and sent.
Scheduled Tasks Creating a Scheduled Task Save Option
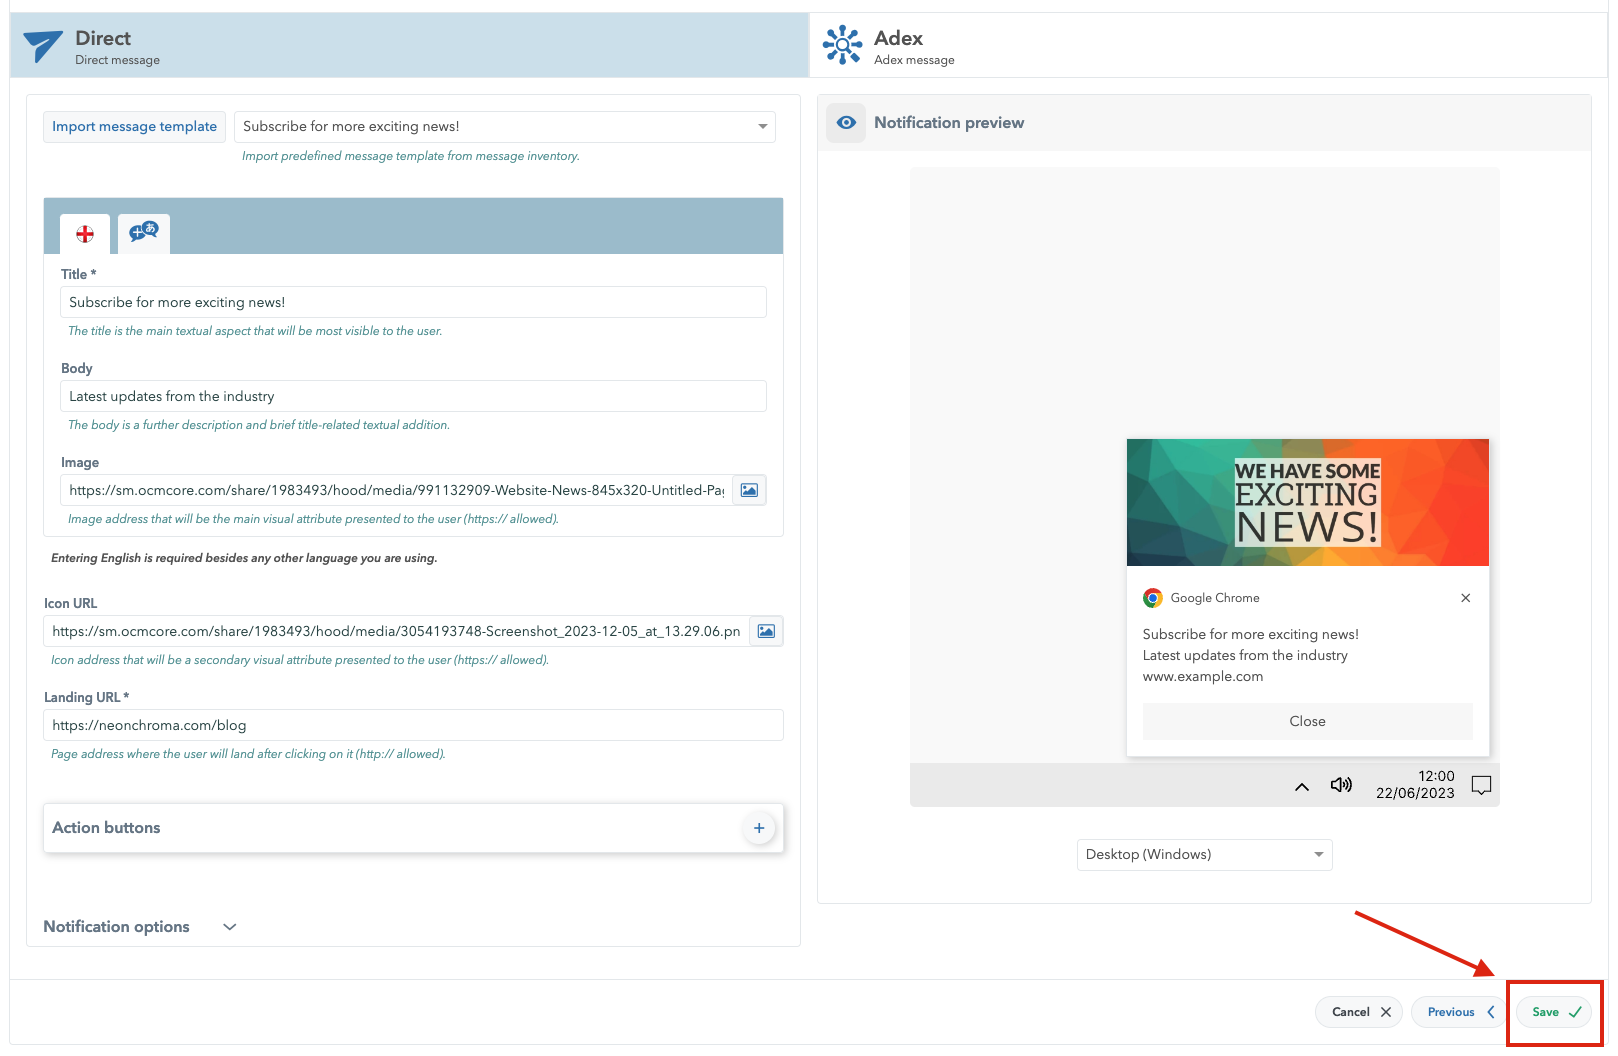
Here’s an example of a scheduled delivery message panel:
Scheduled Task Delivery View