Tags Manager
Tags Manager within the Ocamba platform represents an organized inventory of all your tags.
When you click on Tags Manager in your left sidebar, you will have 2 tabs: Tags and Groups.
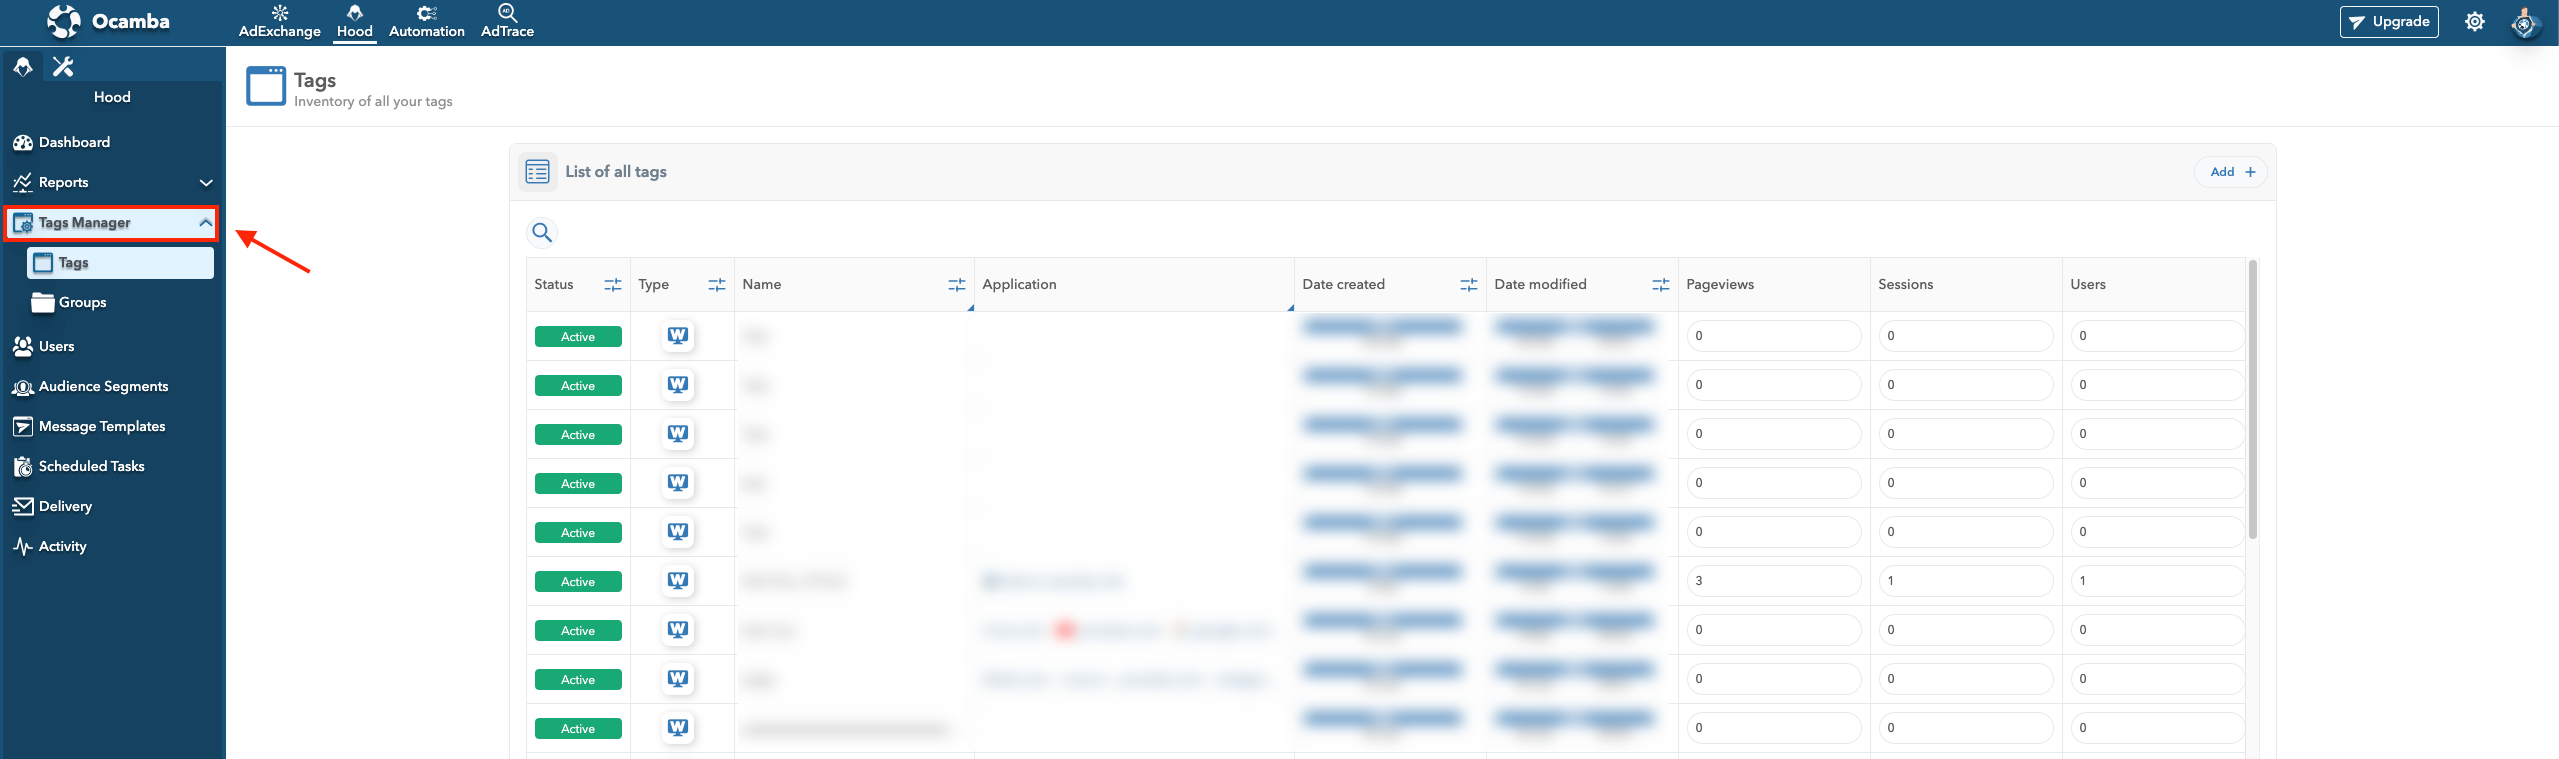
Tags Manager Tab Location
Adding a New Tag
A tag is an identifier that includes one or more apps, such as web, android, and IOS.
To add a new tag, you have to:
Click the Add button in the upper right corner.

Tags Manager New Tag Option Location
Fill out the mandatory fields:
Tag Name
Account
APPs
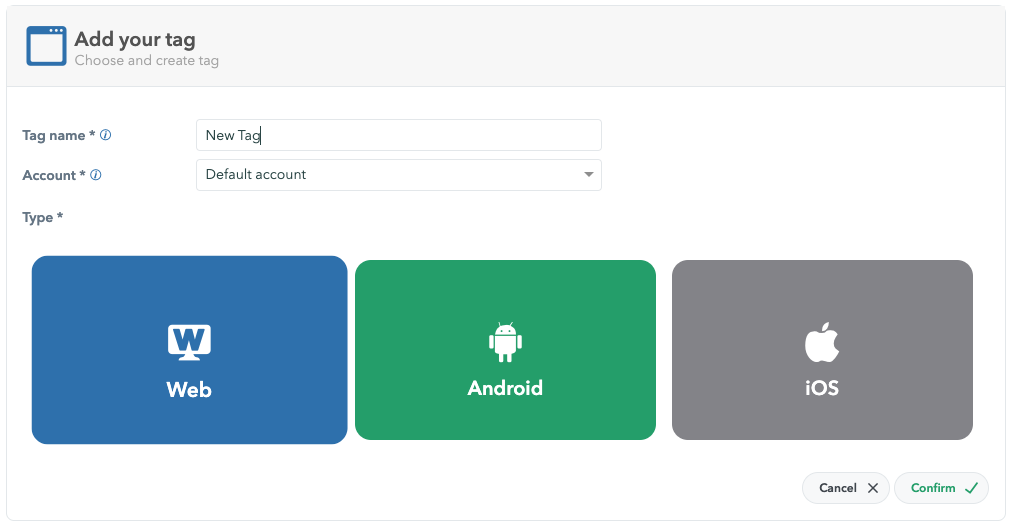
Tags Manager Add New Tag Window Example
If adding a mobile app:
Select app type (Android, or iOS).
Provide the Package Name for Android or Bundle ID for iOS.
Click Confirm to complete the process of creating the tag.
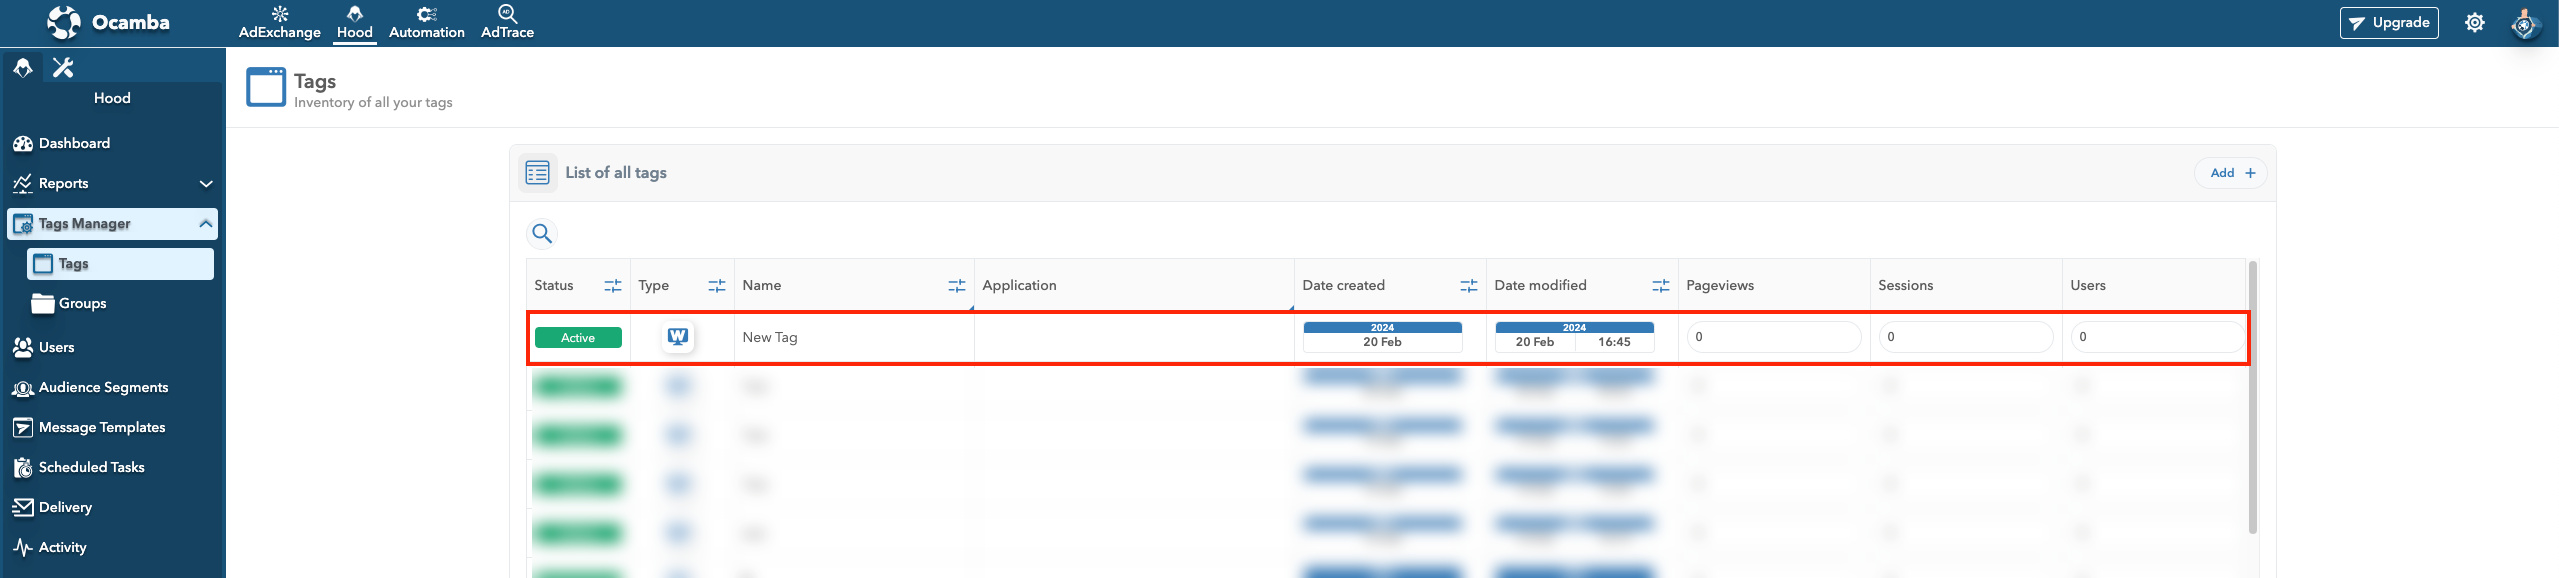
Managing Tags
Once created, tags are displayed in a list with basic information such as Status, Name, APP, Date Created, Date Modified, Pageviews, Sessions, and Users.
Deleting a Tag
To delete a tag:
Click on the tag.
Click the Delete button in the upper right corner.
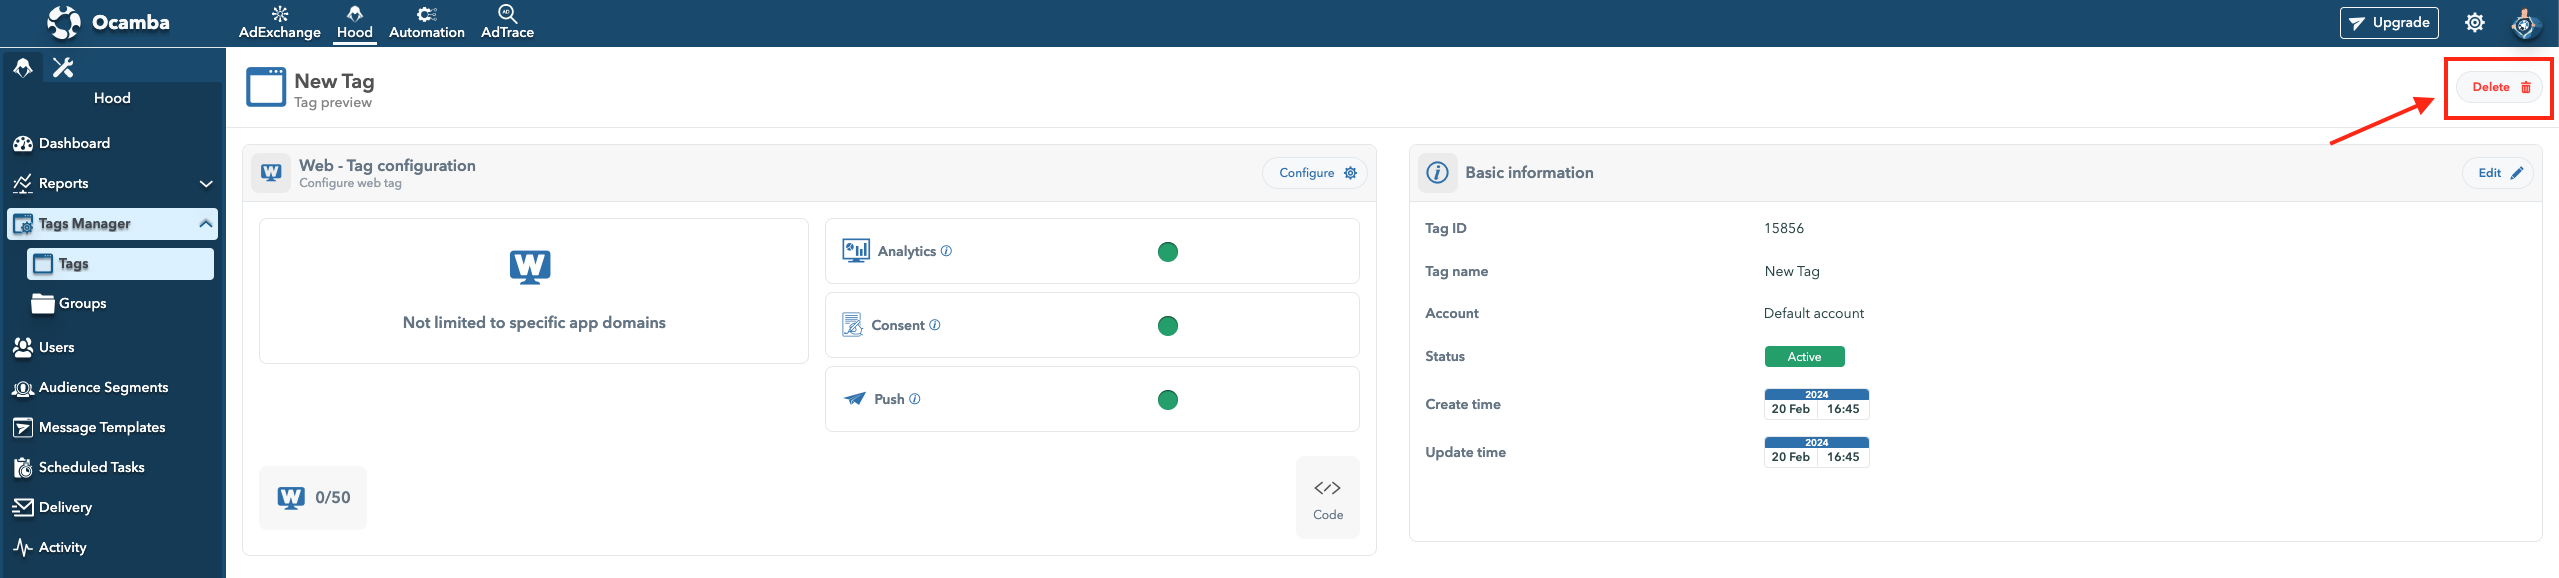
Tags Manager Delete Tag Option Location
Tag Overview
To see your tag’s details, click on the tag’s name to open the tag’s panel. Then, select the Configure option in the right corner.
Added New Tag View Example
Web tag configuration dashboard is divided in 2 sections:
Basic information: Displays basic tag information, including Tag ID, Account, Create Time, Status, Tag Name, Update Time, and a list of all included apps.
Web - Tag configuration: Allows you to configure web apps, add new apps, delete specific apps, and access code snippet for web integration.
- Apps > click Add app > Include app’s name and move the toggle button to the right to enable analytics on all domains under the main domain. Click Confirm to save the changes.

Configure Tag Option Location
Analytics: Collects data about your traffic and tracks user behavior.
Consent: Collects user data when they accept the prompt and become a subscriber.
Push: Displays a consent prompt on the website and enables you to send push notifications.
If you click on the Configure button in the top right corner of the Web - Tag configuration section, ou will access the following options:
Code Snippet
Push Notification Prompts: Click on the tag, then Configure to access prompt configuration setup.
Custom Service Worker Configuration & Path: Defines a service worker path and requires the Push Key for manual setup.
Custom Prompt Configuration: This is where you can add new custom prompt by clicking Add prompt and Edit default native prompt.
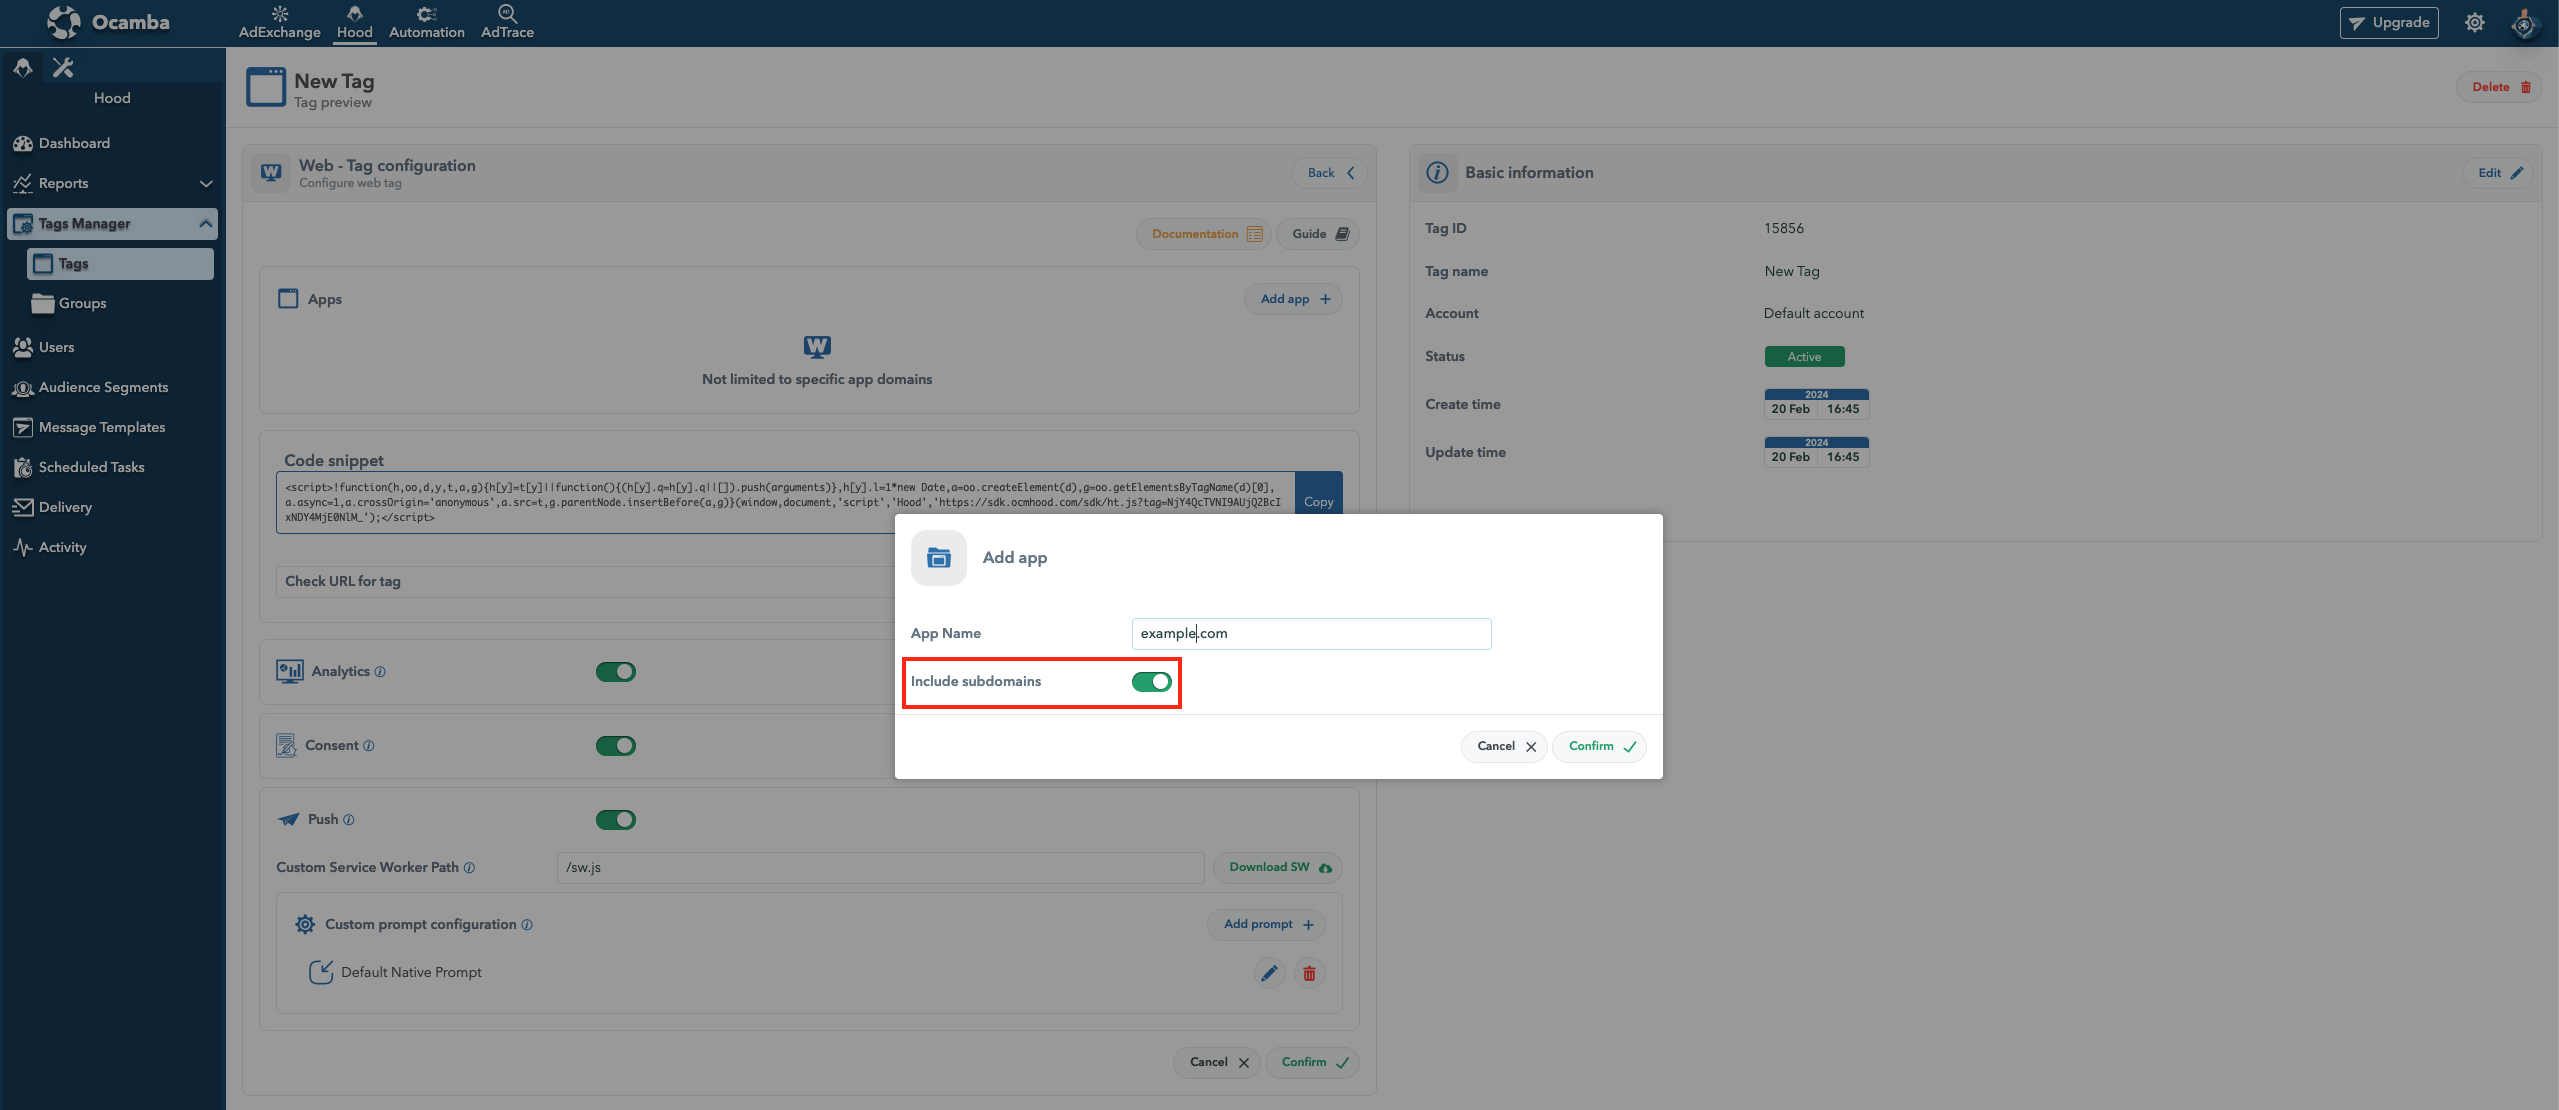
Tags Manager Include Subdomains Option Location
Click Add prompt to open the Custom prompt window.
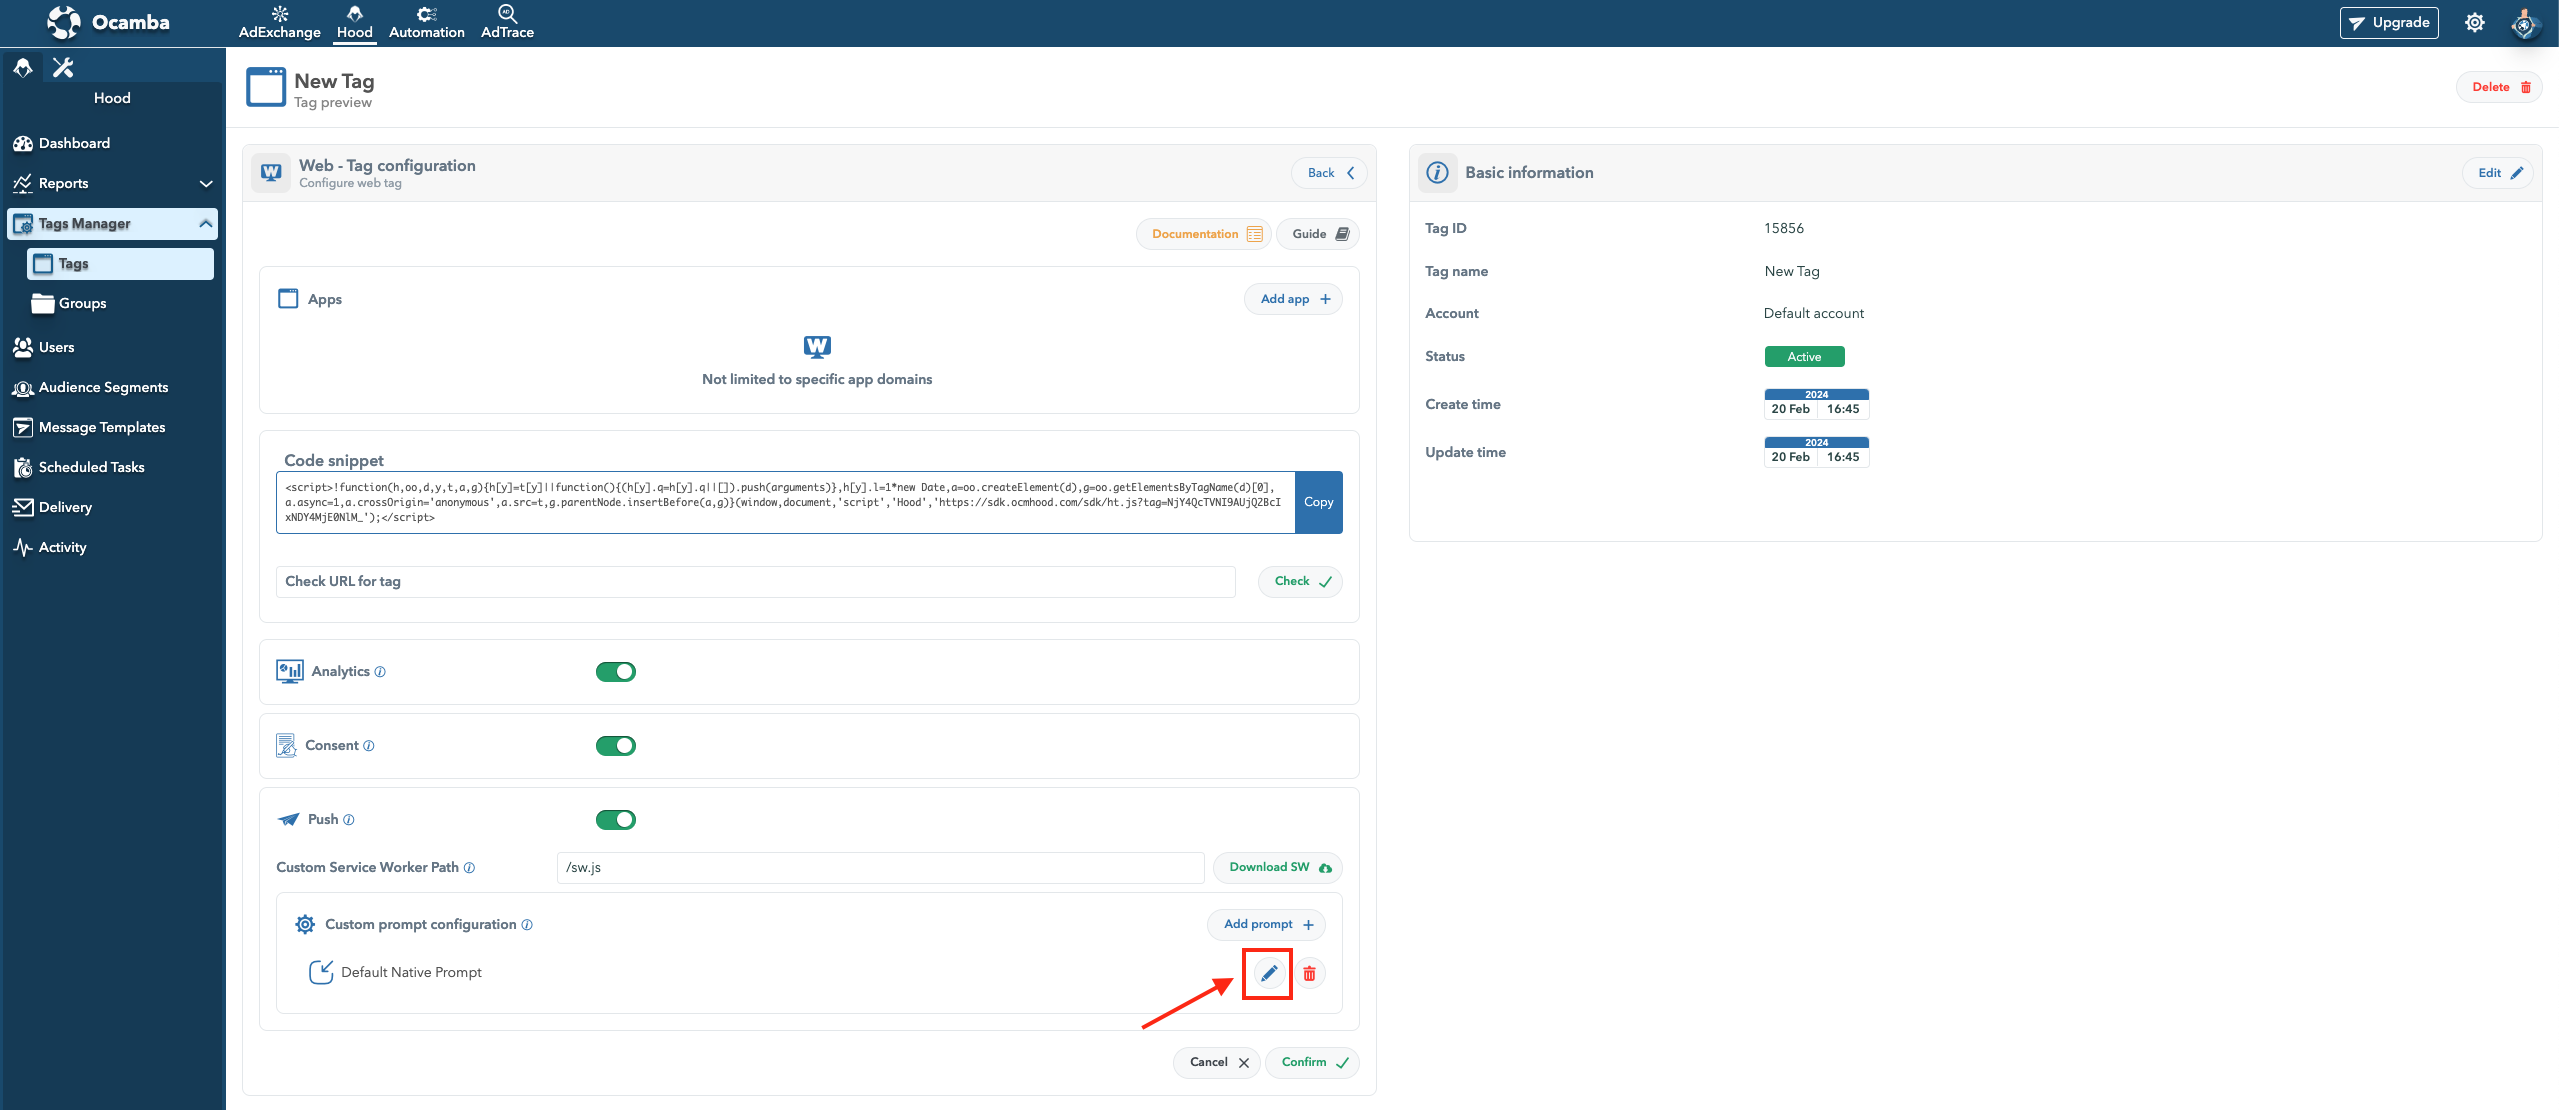
Tag Manager Custom Prompt Edit Option
Custom prompt
Preview: Preview what prompt looks like on different browsers.
Add filters: Filters based on configuration, URL,hostname, query, path, referrer, and window.
Basic information
Prompt type: Select a prompt type.
Prompt name: Set the prompt’s name.
User interaction
On scroll: If enabled, the prompt appears after the user performs the scroll action.
On click: If enables, the prompt appears after the user clicks anywhere on the page.
On custom event: Specify the custom event after which the prompt will appear.
Show after: Specify the numerical value in seconds after which the prompt will appear.
WordPress Integration
Follow these steps to integrate Ocamba into your WordPress website:
Log in to WordPress and download the File Manager plugin.
Activate the plugin and access your file structure.
Create a Hood tag within Tags Manager and add an app and a prompt.
Inside the <head> tag in the code editor, add the code snippet and save.
Download the SDK file and insert it into the root using the File Manager.
Upon visiting the page, a prompt appears, allowing users to choose to allow or block it.
Groups
The Groups section allows you to gather numerous tags in one group.
Within the Groups section, you can find Tags and Applications tabs.

Native Prompt View Settings Example
Tag groups
This is where you can find a list of all tag groups.
You have the option to sort them either by name or by the number of tags, in ascending or descending order.
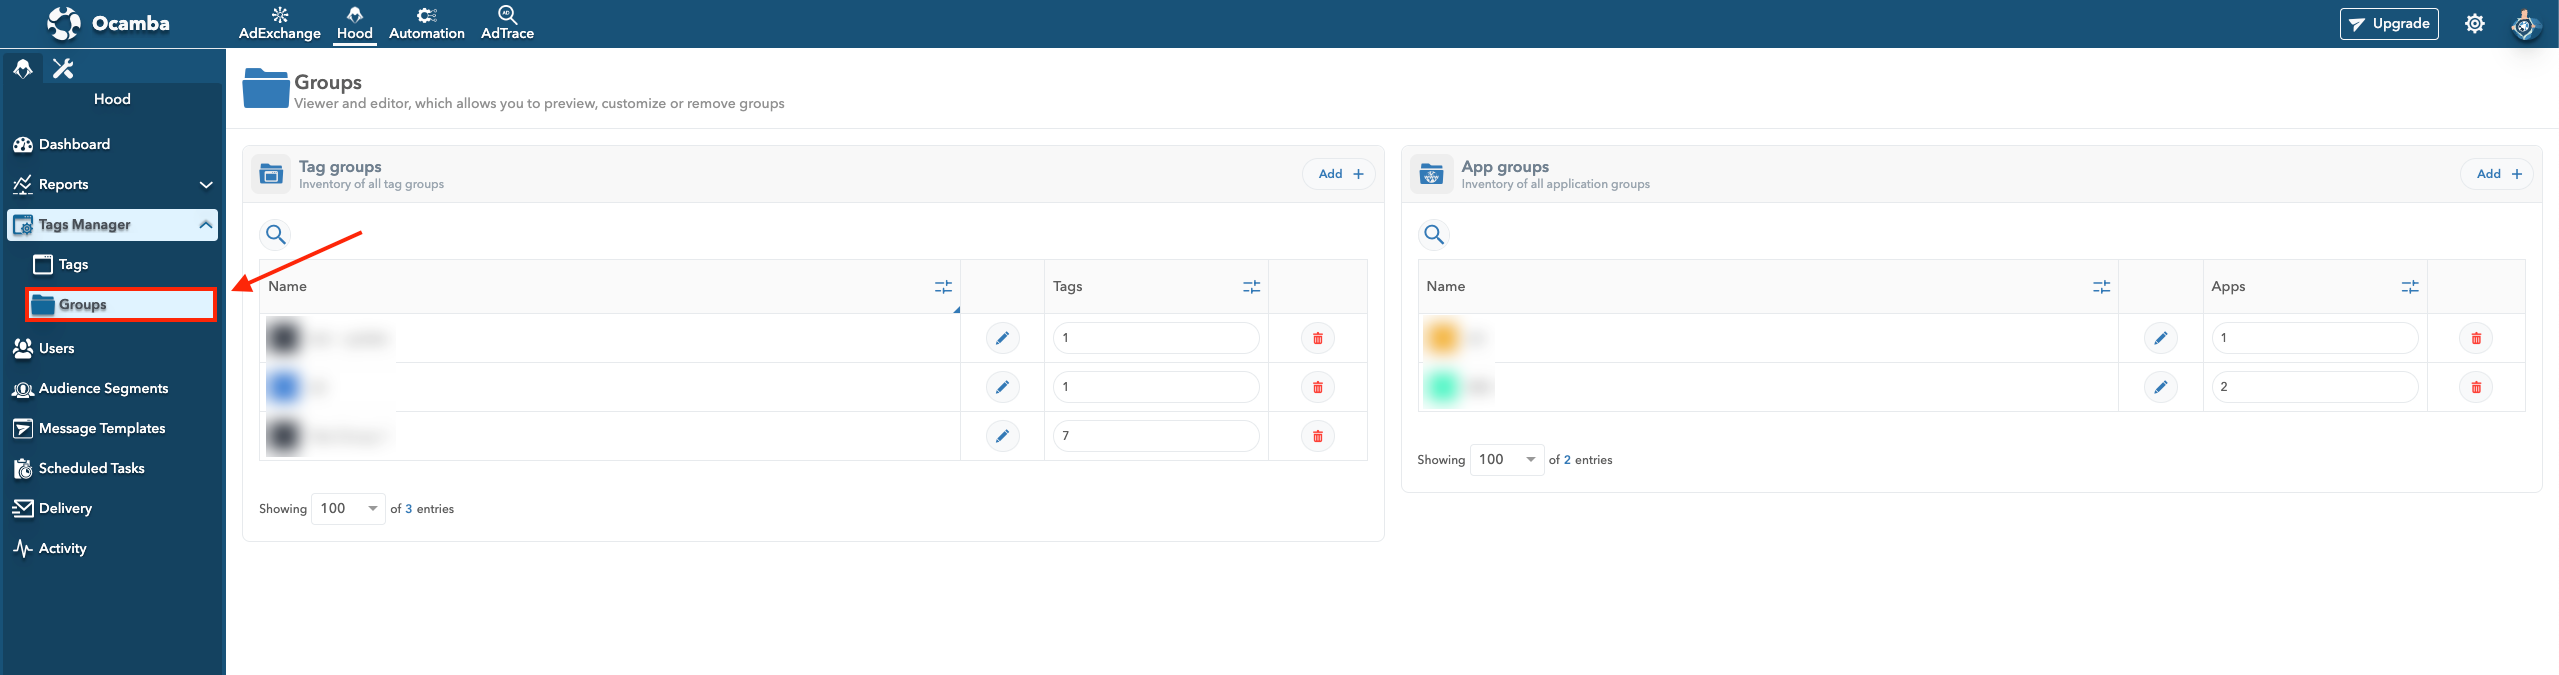
Tag Groups Tab Location
Within Tag groups tab you can assign a number of tags to one group.
Create a Group
To create a new group:
Go to Tags Manager > Groups, click the Add button in the top right corner.
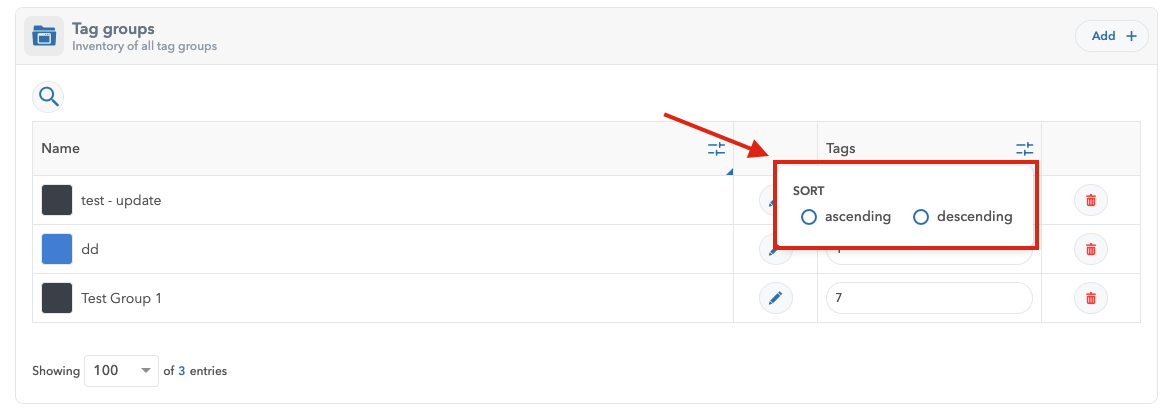
Tag Groups Sorting Options
Create a group name.
Customize the group by choosing a color.
Assign tags to the group.
Click Confirm to finish.
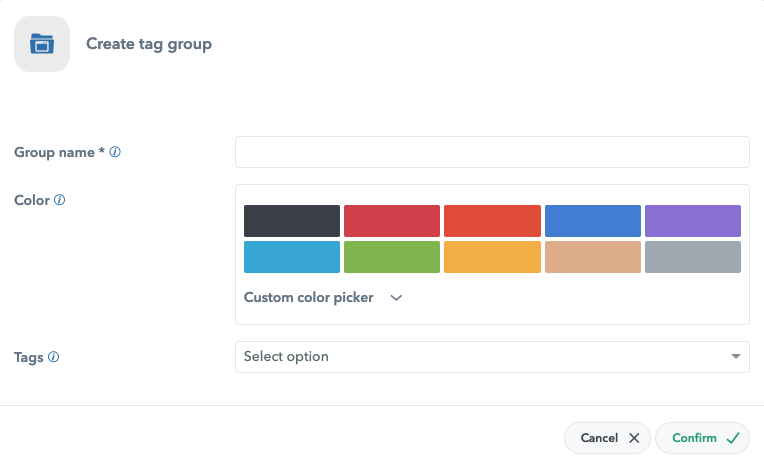
Tag Groups Color and Name Options

Other options
Delete a group: Click the Bin icon next to the group to delete the group.
Search: Click the Search icon.
Edit a group: Click the Pen icon to edit a group.
App Groups
The same principle is used when creating mobile application groups within Tag Manager.
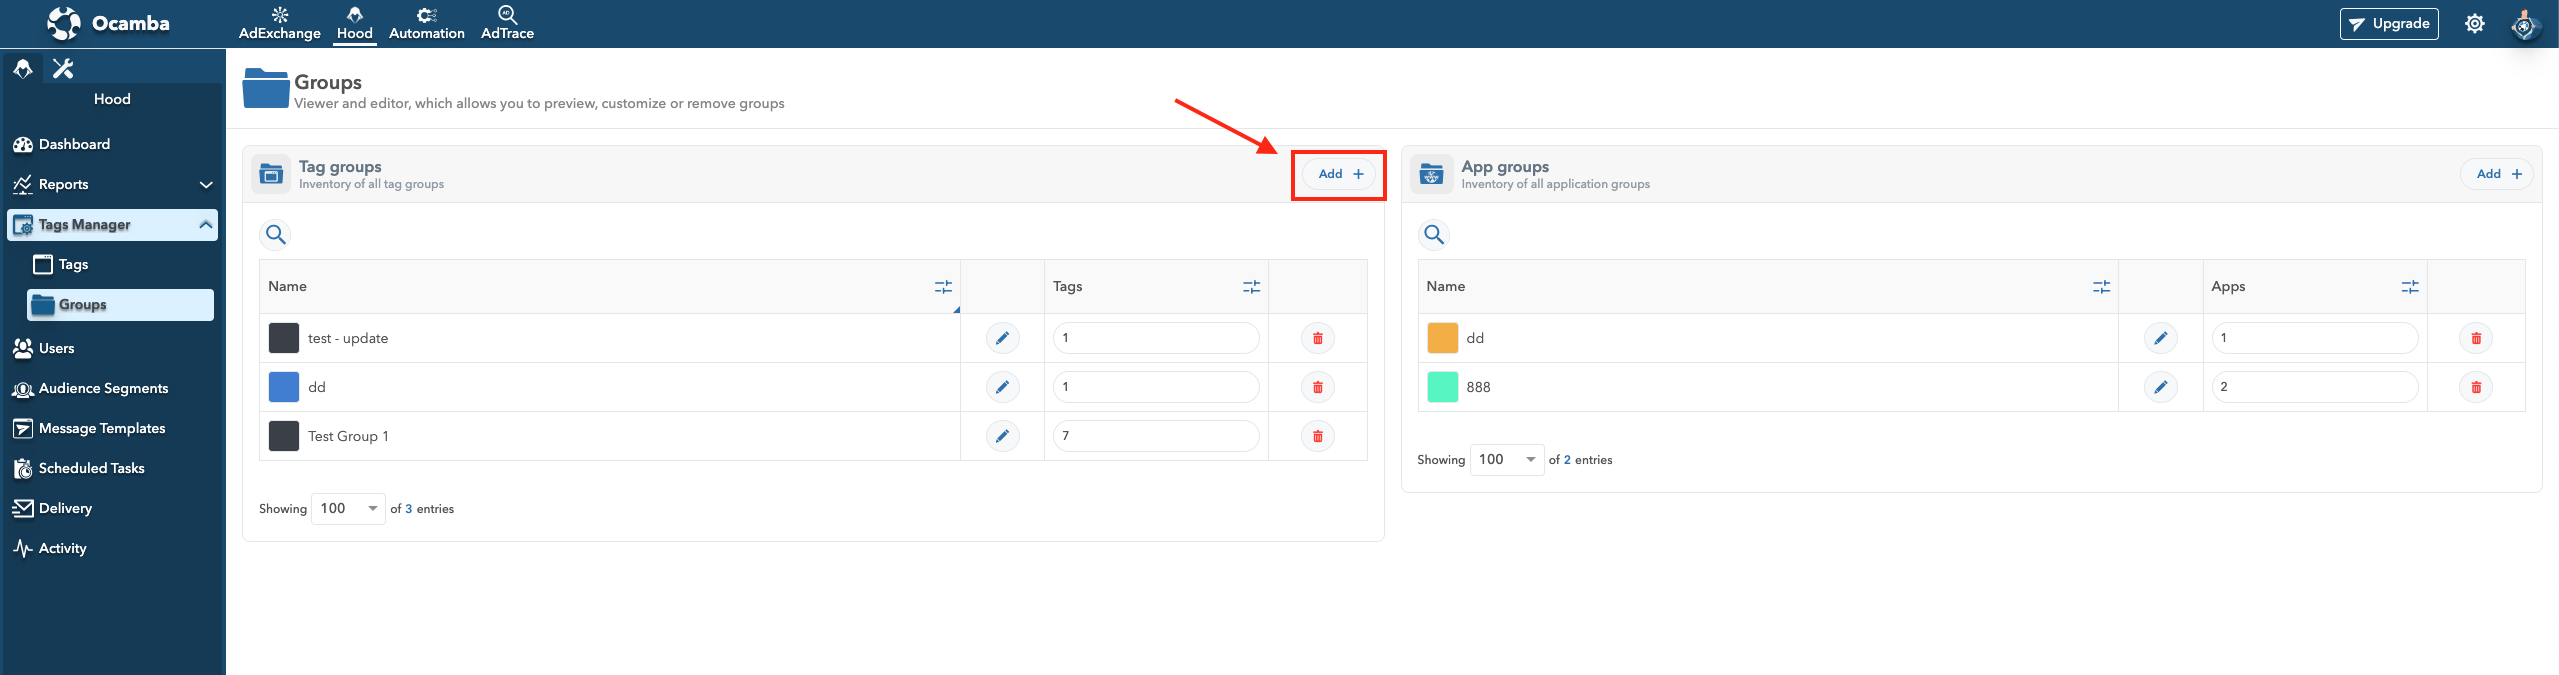
Tag Groups Add New Tag Group Option Location
To assign application domains to Tag Manager group, you must input application domain.
To specify application domain, enter the values in an appropriate format depending on the application type. Use delimiter (New line) to separate elements. Values need to be unique.
Editing a Group
To edit a group, first click on the group that you want to edit.
To add more tags, click on the Assign tags button in the top right corner.
To delete tags, select the tags that you want to remove. Then, select Bulk > Unassigns.
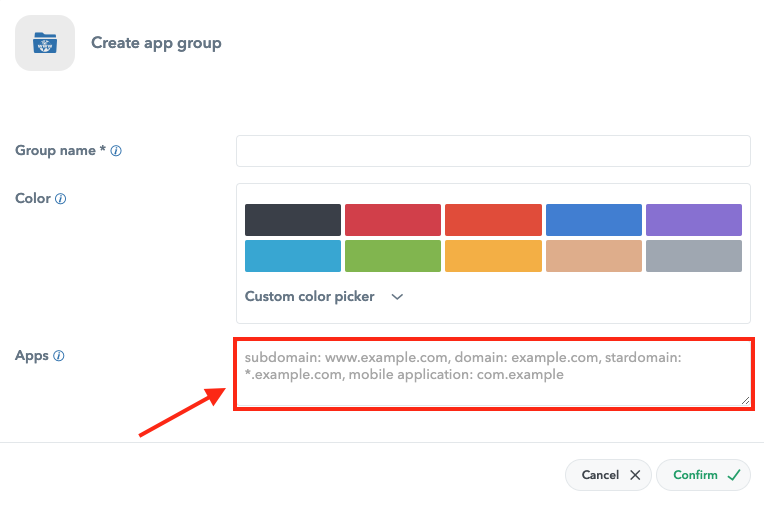
Tag Groups Apps Domain Location
Click Confirm to complete the action.