Scheduled Tasks

Decide how often notifications are sent, when they are sent, when they are not sent, when the campaign starts and ends in terms of date.
This tab gives you a list preview of all your scheduled tasks with its basic info such as status, name, next execution time, timing and the number of total messages sent.
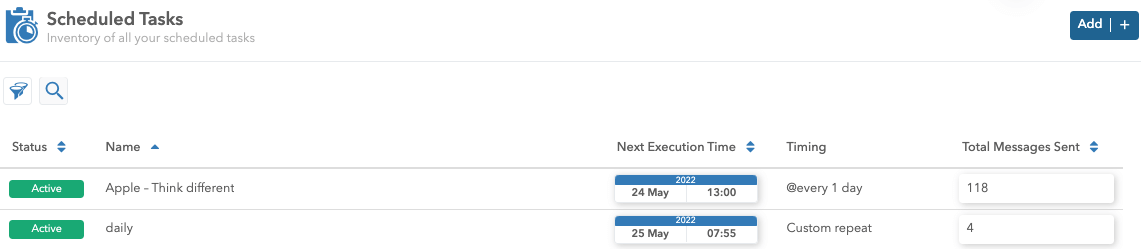
Note: TTL or “Time to live” indicates how long the notification will stay on the user’s phone.
Create a Scheduled Task
Please follow this step by step guide to create a new scheduled task:
1. Go to the Scheduled tasks tab and click on the Add button in the upper right corner.
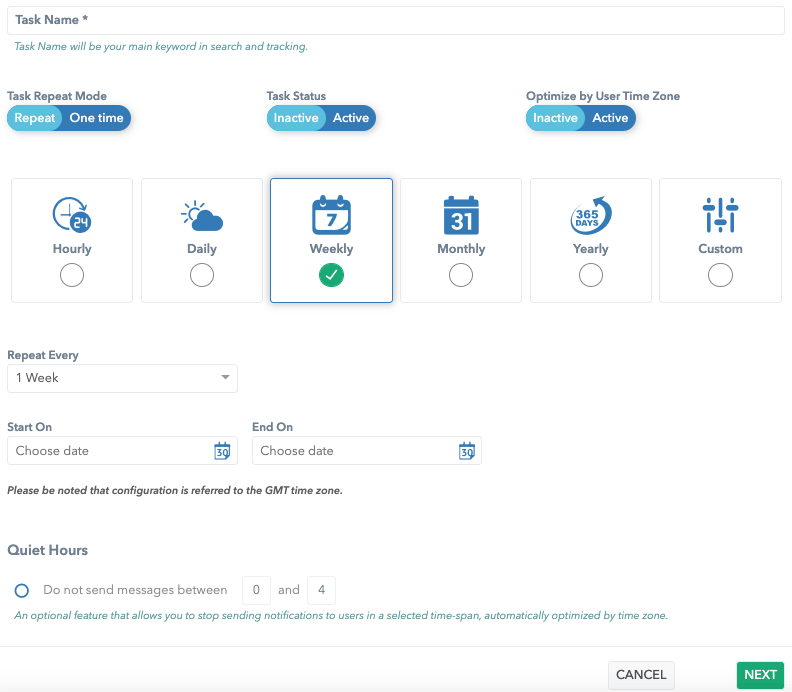
2. Type the task name.
3. Choose the task repeat mode.
4. Choose the task status. It can be Active or Inactive. When the scheduler is finished the status will change to Finished.
5. Optimize the task by user time zone. If this option is active, you broadcast campaigns according to your contacts’ time zone.
6. Choose how often you would like the task to be repeated (availabile only when the task repeat mode is on). Options are: Hourly, Daily, Weekly, Monthly, Yearly and Custom.
7. Choose a start date for your campaign and end date for it.
8. Set up quiet hours (stop sending notifications to users in a selected time span, automatically optimized by time zone).
Note: When you are done with filling in the necessary information, click on the Next button.
9. Select the targeting audience for your task. Targeting is done through the filters option.
Note: When you are done with filling in the necessary information, click on the Next button.

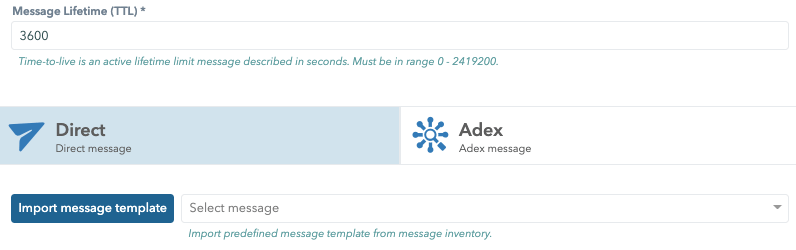
10. Choose or design a message: Direct message or Adex message.
Adex relies on real-time bidding protocol, which means when tasks are scheduled, and the user is woken up, the next step is that the user fetches ad from Ocamba ad servers and optionally external demand servers. Which gives us more BI (like adex click report).
Push direct message doesn’t rely on our Ocamba ad servers, so we cannot collect complete data (like we have on adex click).
Note: If you decide upon the direct message you will have two options: to import a message template or to create a new message.
11. Click on the confirm button.
Note: If you wish to change anything in the new task creation mode, simply click on the Prev button.
If you created a task by mistake, click on the Cancel button.
Automation
Automation helps you send notification with minimum human assistance.
At Ocamba, this can be done in three different ways:
- Scheduled sending - schedule notification for one time sending,
- Periodical sending - schedule notification sending on a regular basis and
- Segment-based automation - send notifications automatically to users of a certain Audience segment.
Scheduled sending
Schedule sending on a particular date and time.
Follow this step by step guide to create a new scheduled task:
1. Create a scheduled task and choose the One time option on the Task repeat mode.
2. Choose the delivery option - will the delivery begin immediately upon the creation of a task or will it begin sending at a particular time. If you click on the begin sending at a particular time, you will be asked to choose a start date from the calendar.
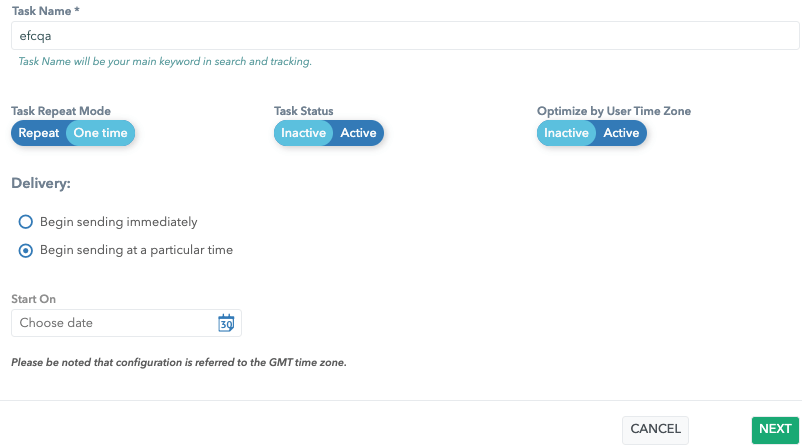
Note: Scheduled tasks are inactive by default. To activate it, click on the Activate toggle on Task Status. Inactivate the task to stop the messages from sending.
Periodical sending is calculated accorinding to the GMT time zone.
Periodical sending
Schedule notifications to be sent on a daily, weekly, monthly, yearly or custom basis.
To schedule a notification in the future, create a scheduled task and choose the Repeat option on the Task repeat mode.
Hourly notification - To send a notification hourly, choose “Hourly" and set a repetition time in the “Repeat every” bracket.
Daily notification - To send a notification daily, choose “Daily" and set a repetition time in the “Repeat every” bracket.
Weekly notification - To send a notification weekly, choose “Weekly” and set a repetition time in the “Repeat every” bracket.
Monthly notification - To send a notification monthly, choose “Monthly” and set a repetition time in the “Repeat every” bracket.
Yearly notification - To send a notification yearly, choose “Yearly” and set a repetition time in the “Repeat every” bracket.
Custom notification - Sending notification base on how you configure “Repeat On” fields (Minutes, Hours, Days, Months and Weekdays).
Valid custom notification examples:
‘0 0 * * *’ - every day at midnight
‘30 7 * * *’ - every day at 07:30
Invalid custom notification examples:
‘0 10,11 * * *’ - every day at 10:00 and 11:00
‘0 4-6 * * *’ - every day at 04:00, 05:00, and 06:00
Note: Periodical sending is calculated accorinding to the GMT time zone.
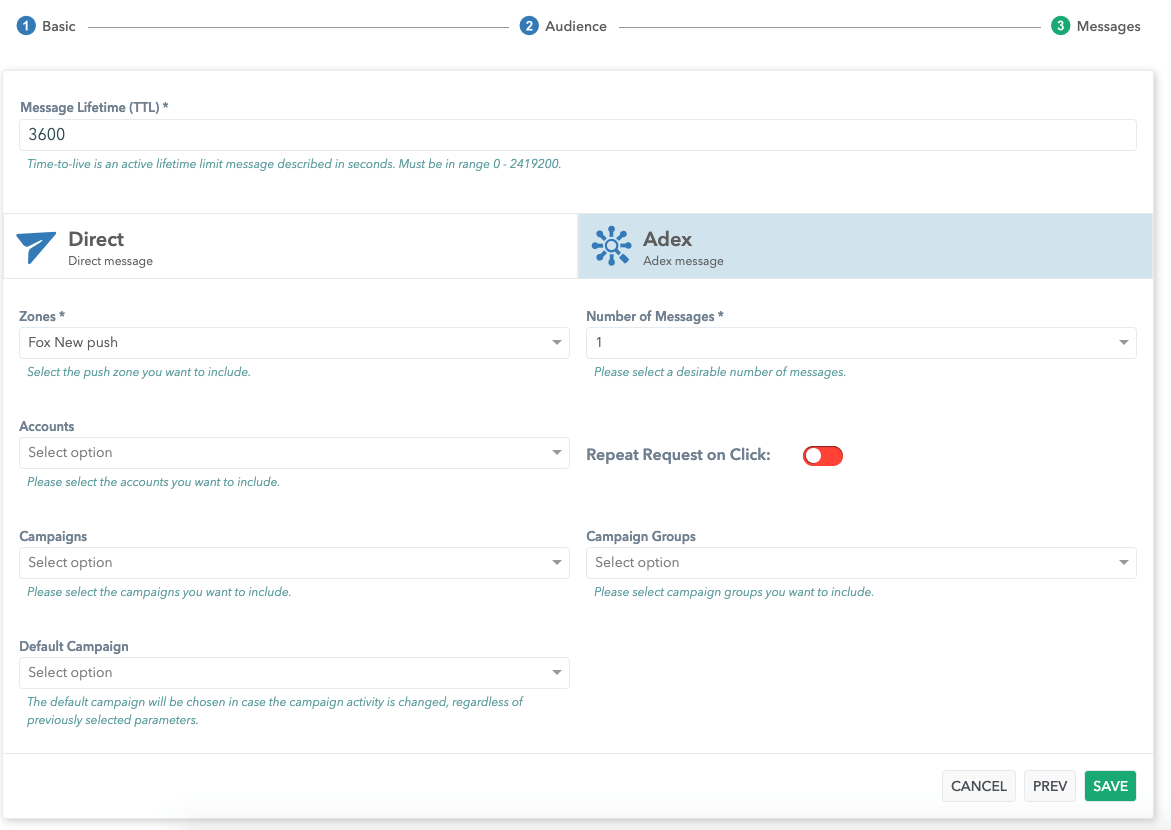
Adex messages
Send an ad through push notification.
To send an Adex message, fill in the information:
Zones - select the push zone you want to include,
Number of message - how many messages you would like to send,
Accounts - from which the money will be allocated for the task,
Repeat request on click - toggle button with on/off function,
Campaigns - select the campaign you want to include,
Campaign Groups - select the campaign groups you want to include and
Default Campaign - the campaign which will be chosen in case the campaign activity is changed, regardless of previously selected parameters.
Segment based sending
Send notifications automatically to the users that meet certain criteria.
How does segment based automation work?
Put users into a particular segment and add it in the targeting via filters:
- Audience Segments
- Countries
- Remote user ID
- Regions
- Languages
- OS
- Browsers
- Account
- Applications
- Tags
- Tag Group
- Application Group
- User
- User Age
- User Data