Web SDK Instructions
To implement web push notifications, you must first configure your website to work with Hood.
Hood’s web push notification system is supported across all major browsers, such as Chrome, Firefox, Edge, Safari, Opera, etc.
Here are the steps to set up your website with Hood:
1. Add New Tag
If you haven’t already, sign up for a free account on ocamba.com
To begin the web SDK setup, click on the Add option in the top right corner.
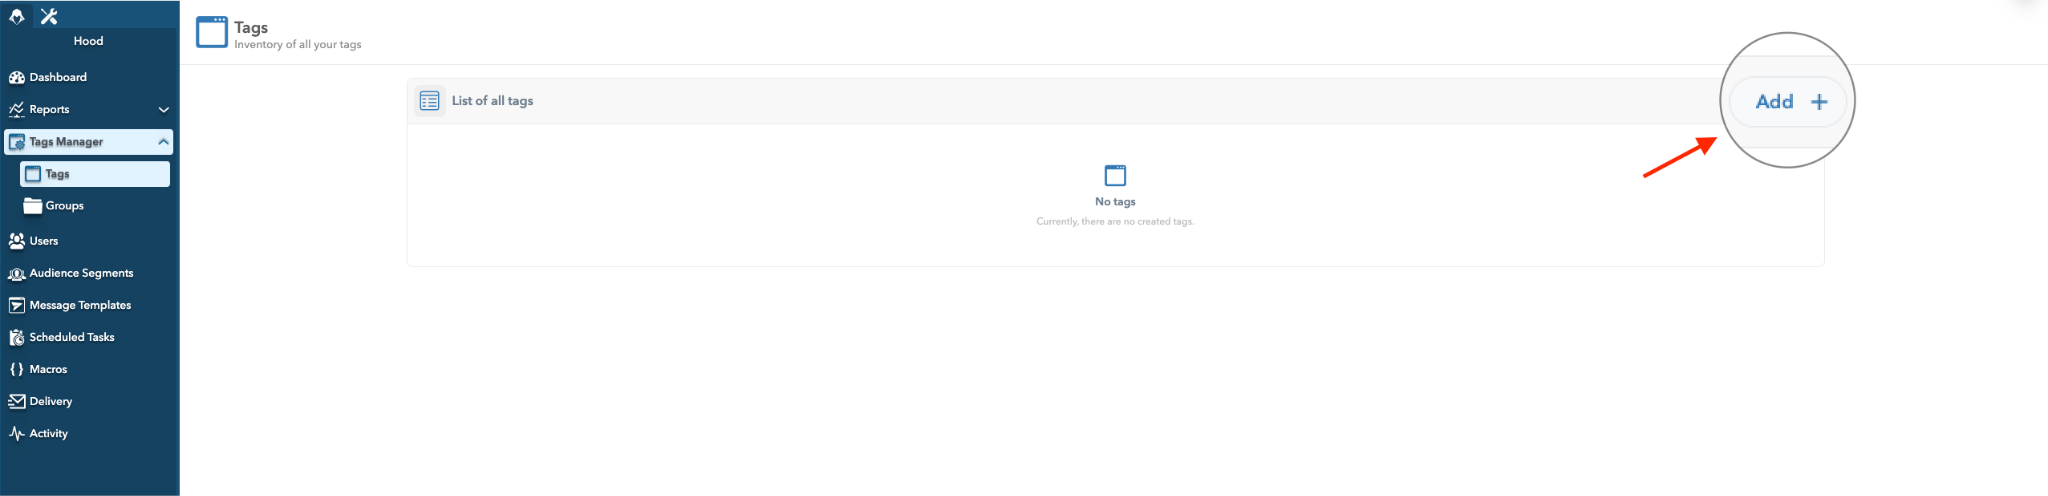
Add New Tag Button Location
The Tag configuration panel will open.
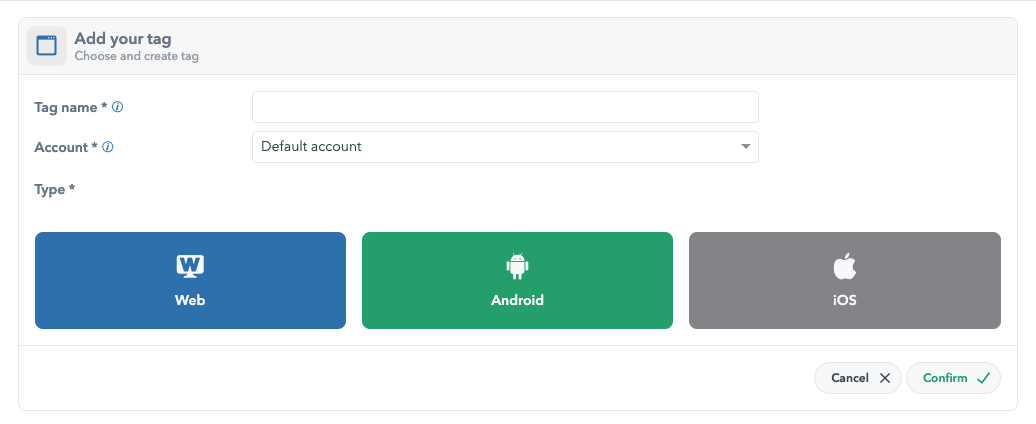
Add Tag Select Type & Name
Enter the Tag name, specify the Account, and then select the Web type.
| Name | Description |
|---|---|
| Tag Name | The tag name will be your main keyword in search and tracking. |
| Account | Assign an account to the tag for efficient tracking. |
| Type | Select between Web, Android, or iOS |
Click Confirm in the bottom right corner to complete adding a new tag.
2. Add New Domain (Optional)
Once you’ve added the Web tag, the Web - Tag configuration screen will appear. Here, you can further customize the settings of your Web tag.
Start by clicking on the Add app button in the Apps field to specify your web configuration domain.
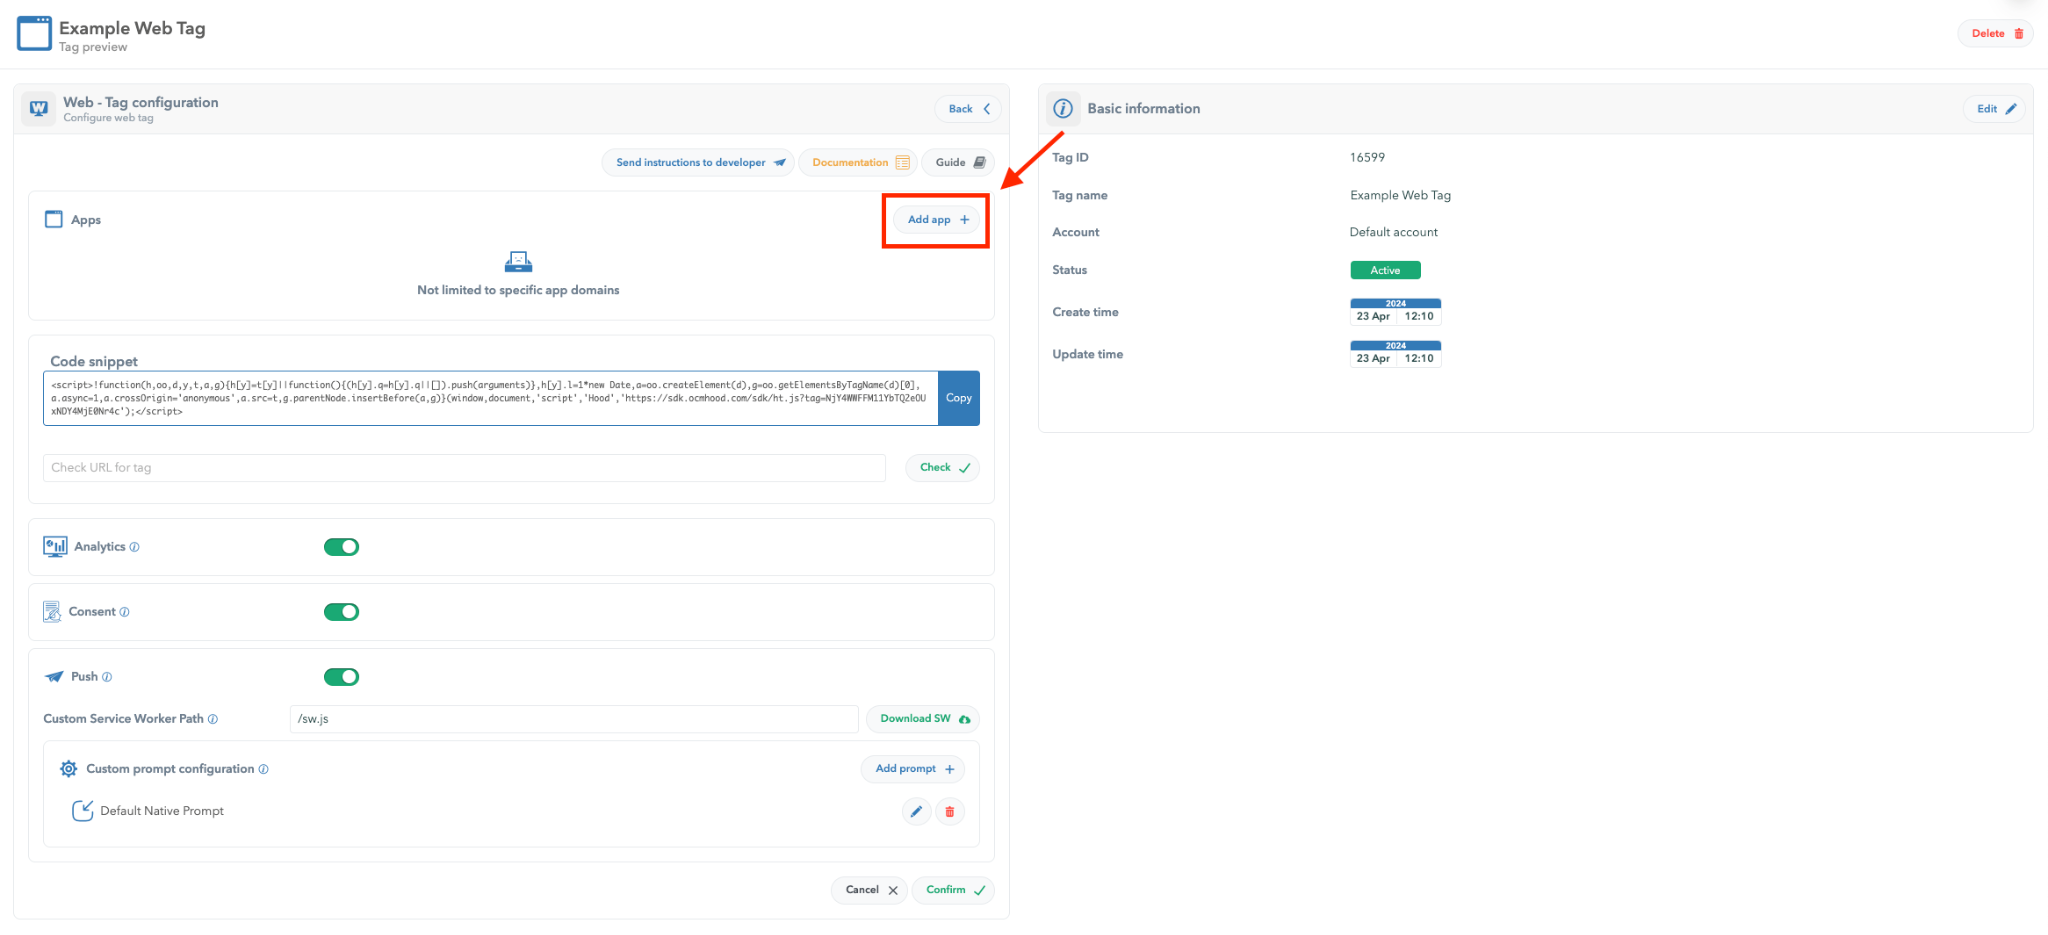
Add New Domain Button Location
3. Copy - Paste the Code Snippet
Copy - paste the code snippet into the main directory of your website.
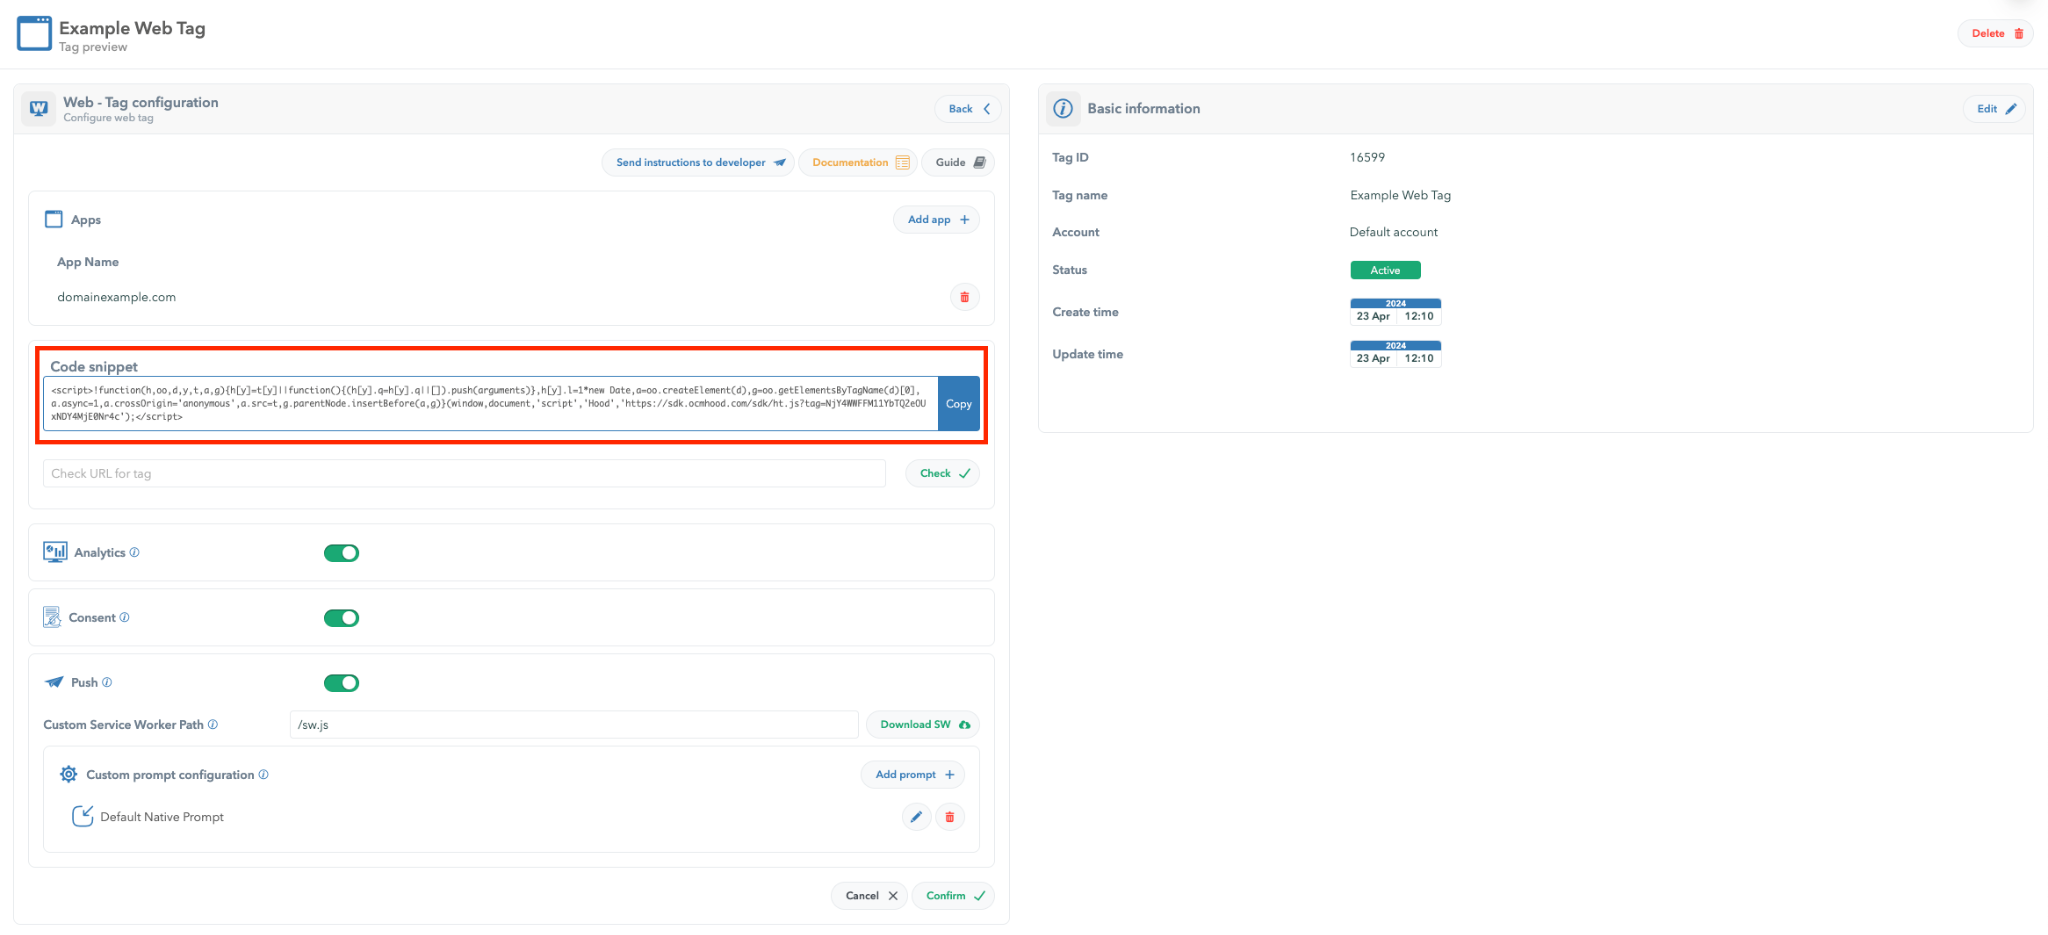
Code Snippet Tag Manager Location
4. Place the Service Worker
Download Service Worker and place it in the root files of your website.
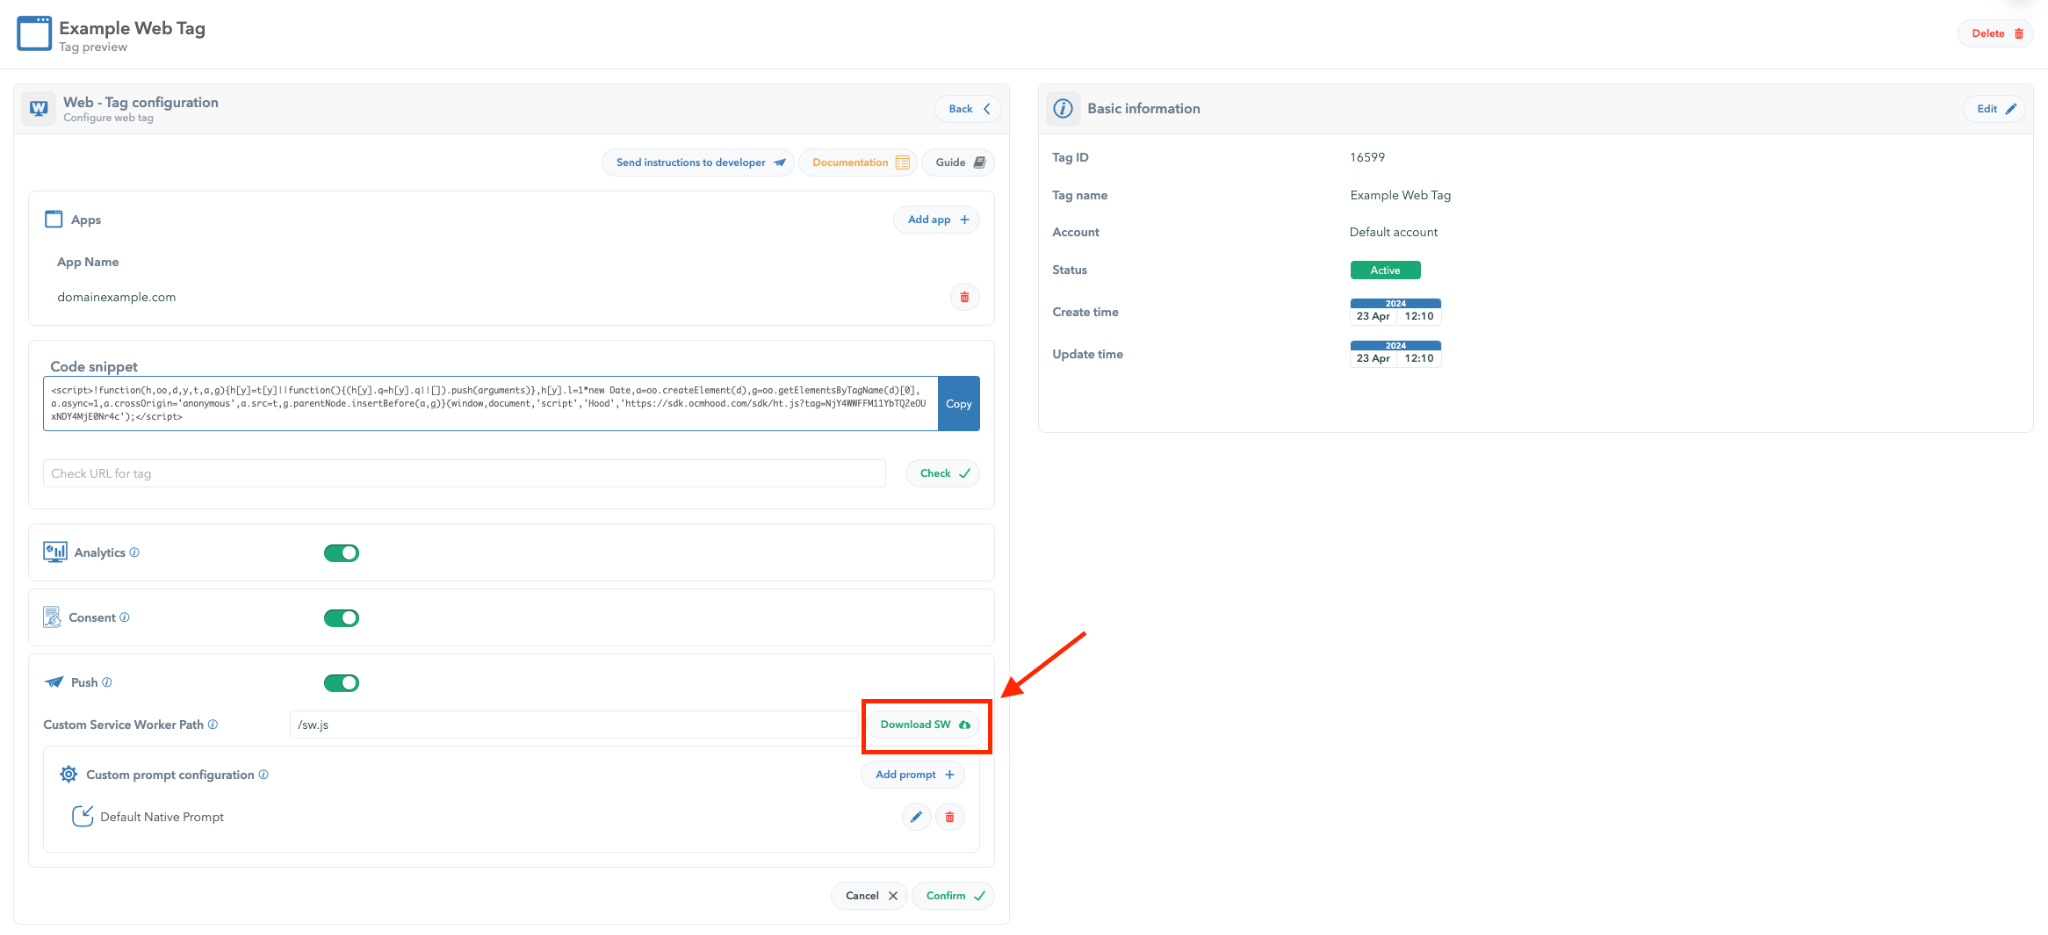
Download Service Worker Button Location
The Hood SDK file must be publicly accessible and should be located at the top-level root of your site.
The Hood SDK will search for the file at https://ocamba.com/sw.js
5. Test Tag Functionality
To see if the code is implemented well, enter the URL of your website below the code snippet field.
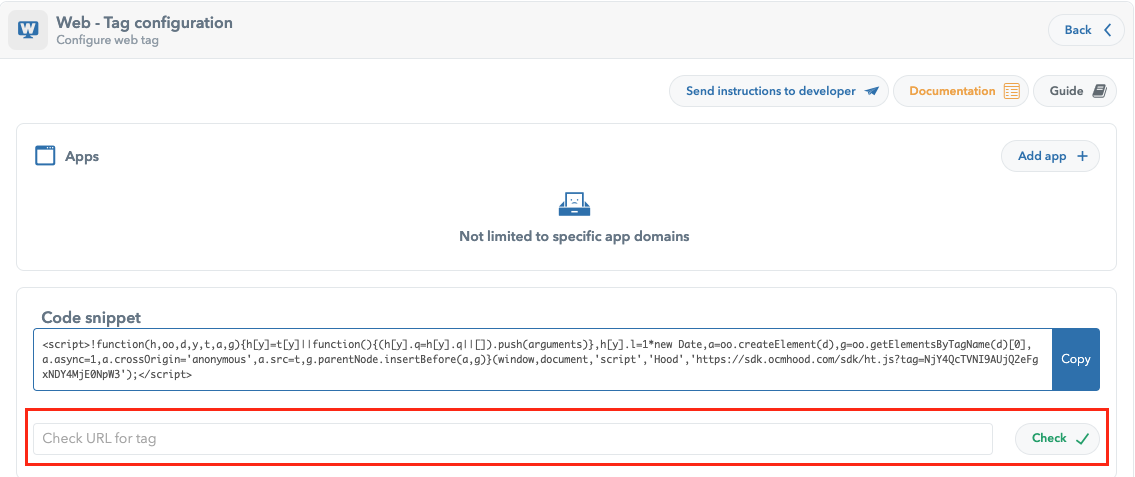
Check URL For Tag Option Location
Once you enter the URL and click on the Check button, the checking process will initiate.
If implemented correctly, you will see the message Hood tag found as shown below.
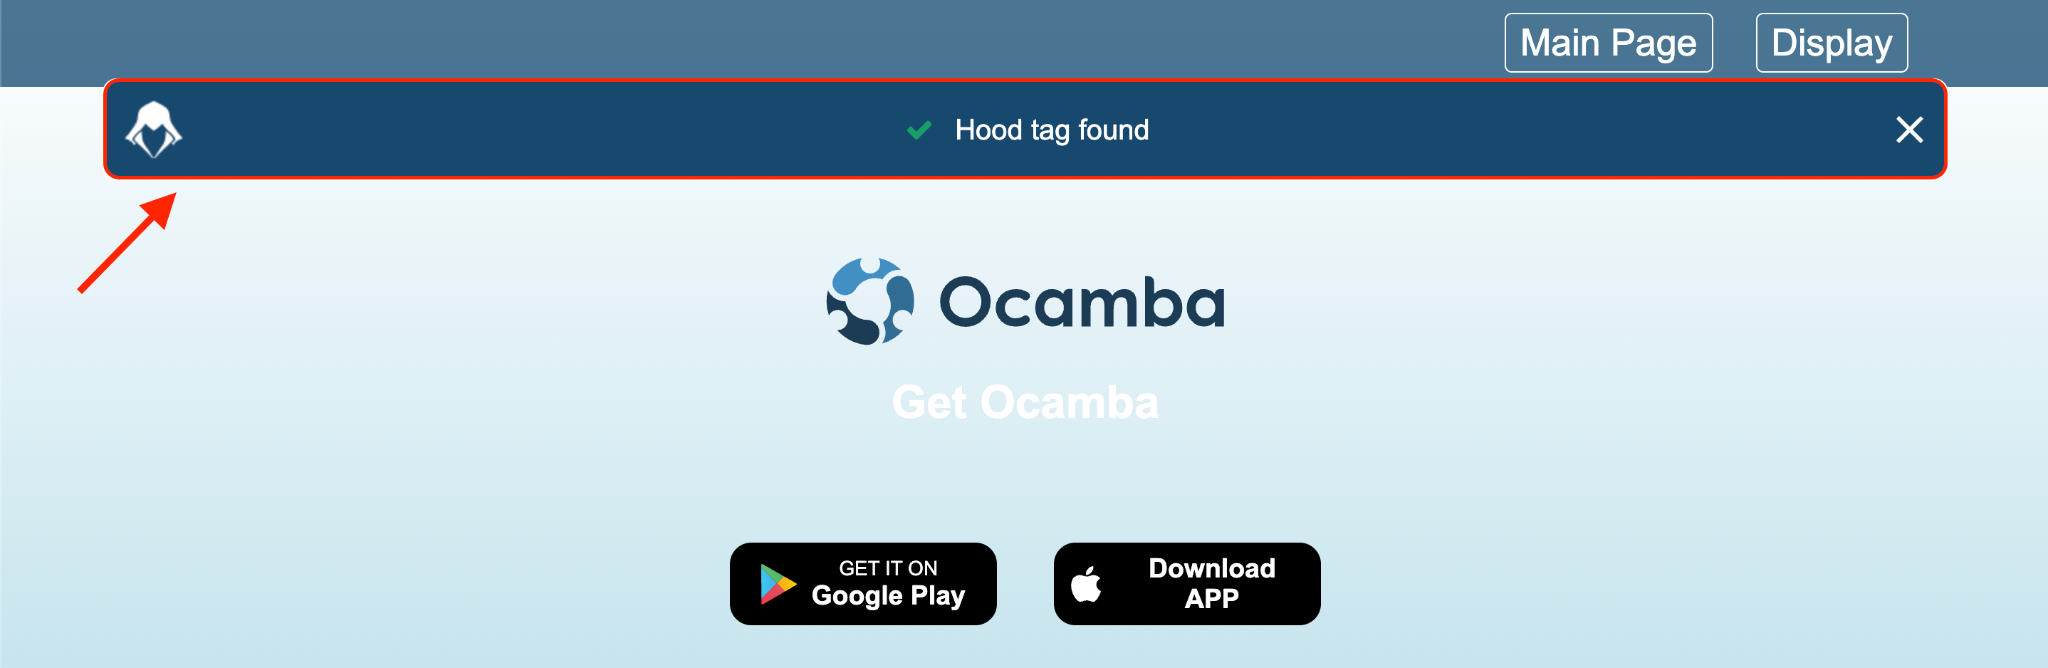
Hood Tag Found Notification Example
6. Select the Type of Prompt
To add and configure Custom prompts that will be shown to the user, first click on the Edit button at the bottom of the Web - Tag configuration page.
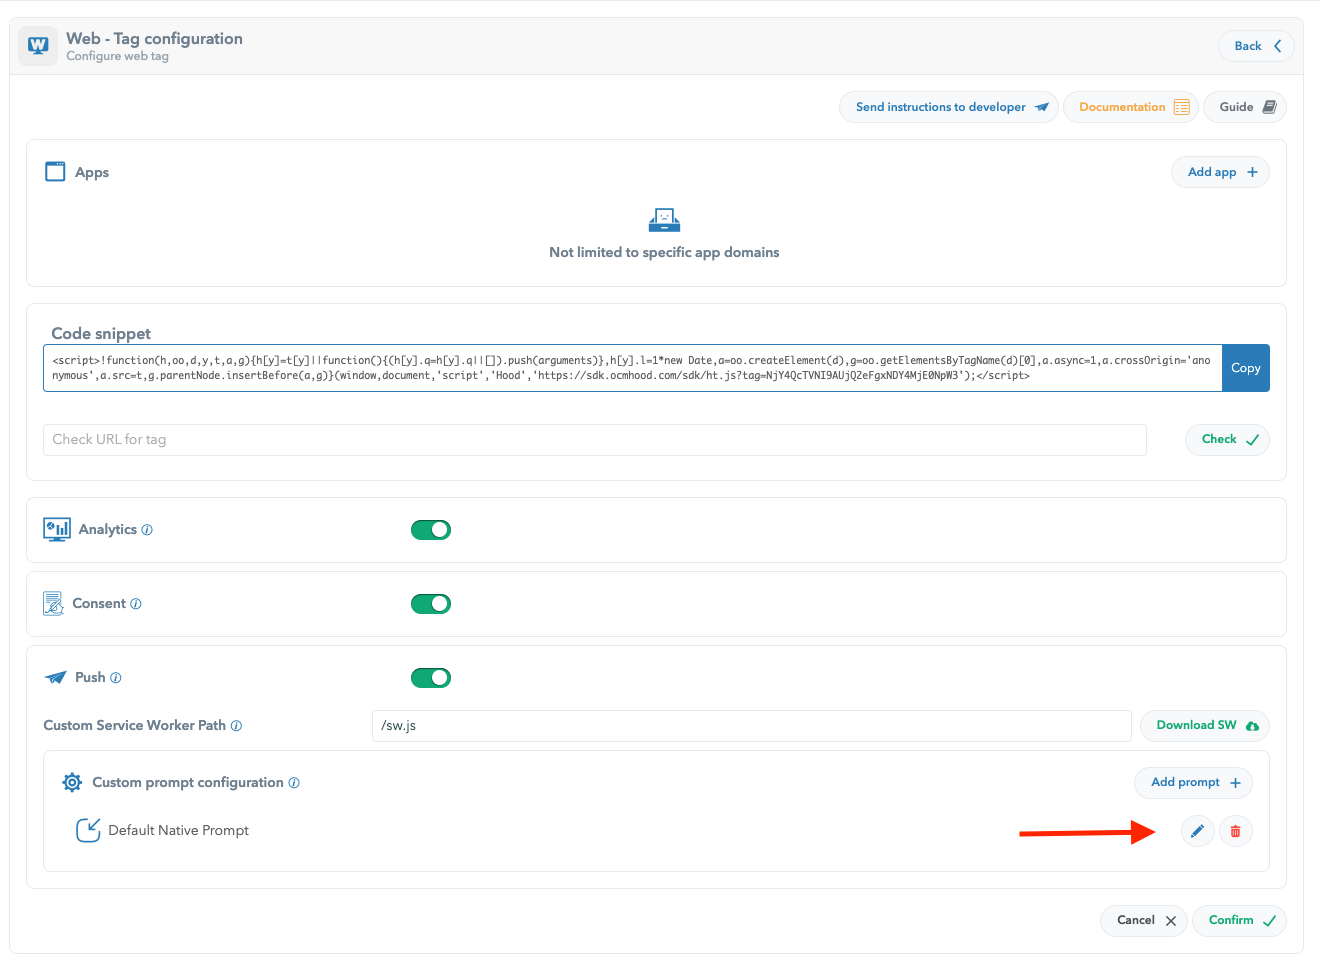
Edit Prompt Button Location
This opens the Custom prompt panel, where you will have all the available prompts to choose from, and options to edit its appearance and user interaction options.

Custom Prompt Setup Window Example
7. See the Web SDK in Action
Once you visit a webpage that has been integrated Hood’s SDK, a subscription dialog will automatically appear.
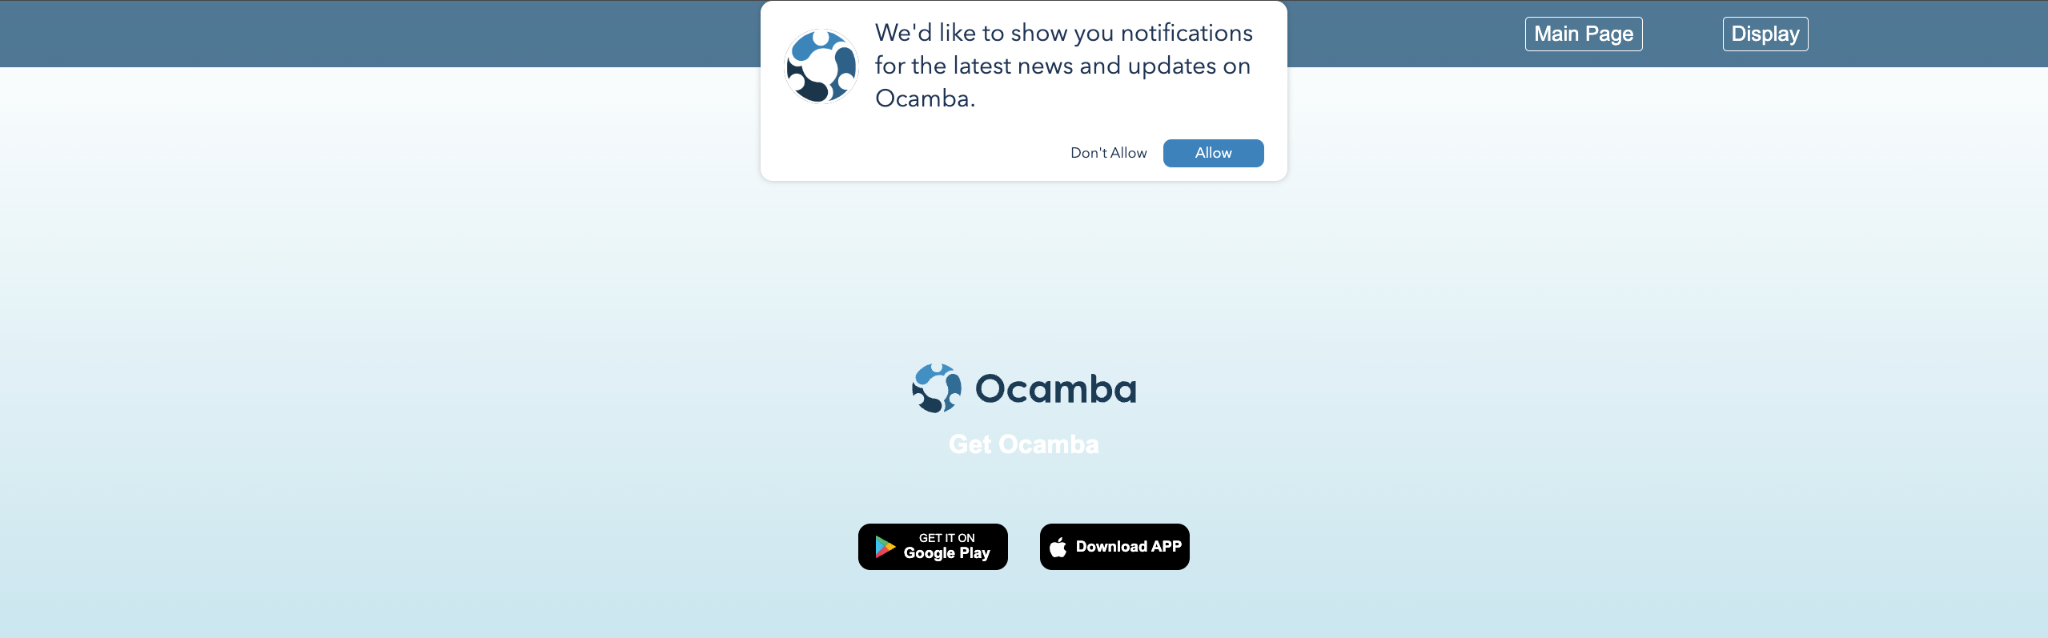
Initial Subscription Prompt Example
After you click on Allow, the native prompt will appear as the final step in the web-based subscription process.
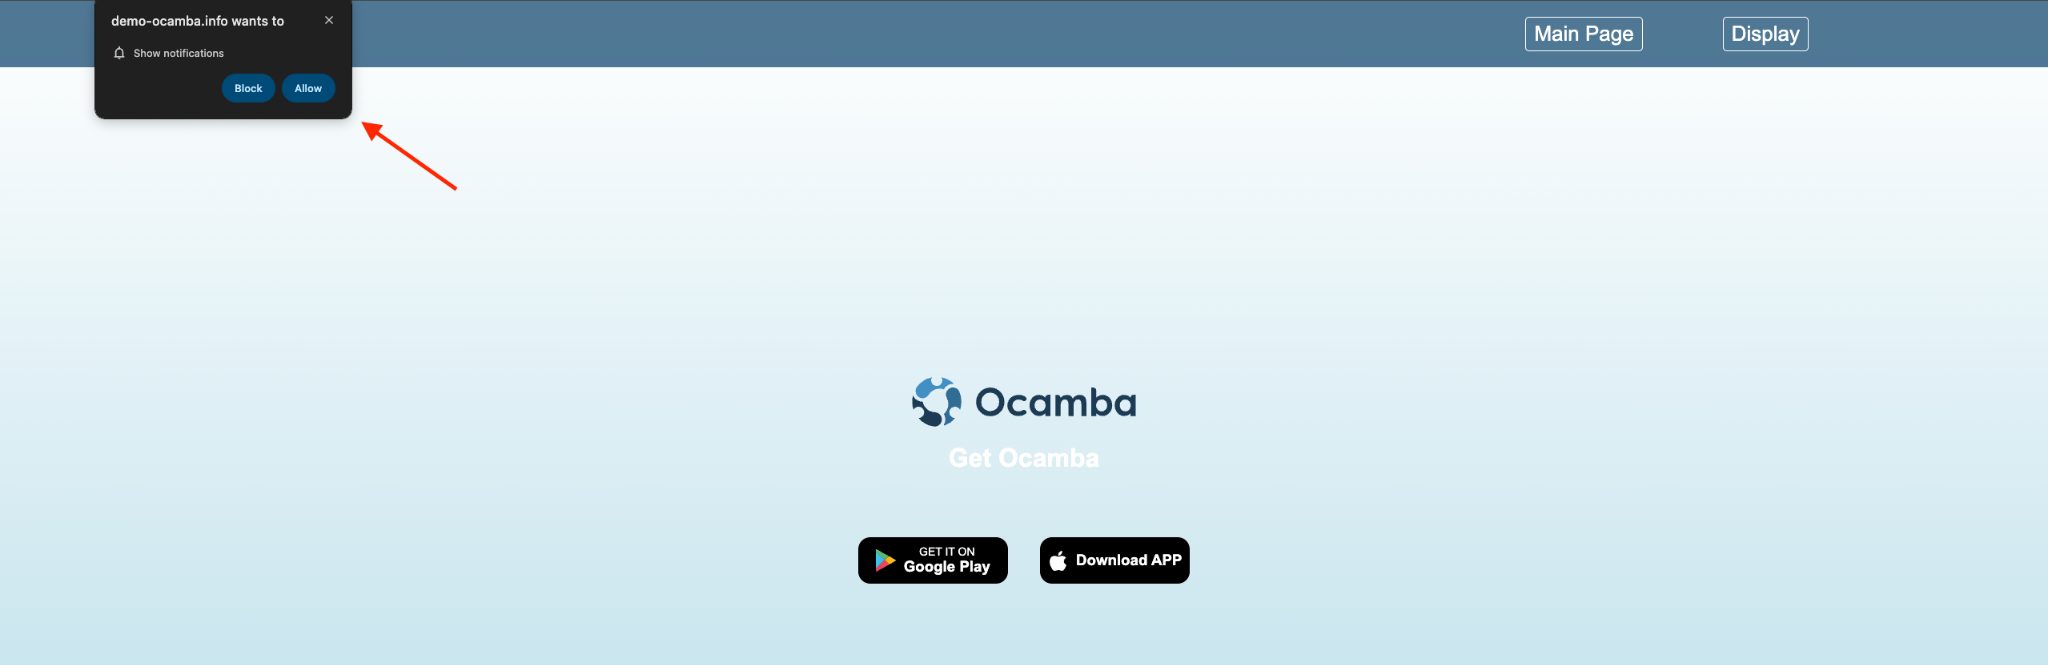
Native Subscription Prompt Example
Only after the user clicks on Allow, the process is completed.