Mailchimp email setup
Follow these instructions to configure and send Mailchimp email messages using HoodEngage.
Requirements
Before starting, ensure you have:
- A Mailchimp account
- Mailchimp (formerly Mandrill) Transactional Email Plan added to your account
- An Ocamba Account
- A domain you own and access to your DNS provider
Step 1: Configure your domain for email
1.1 Add your domain in Mailchimp
- Go to the Mailchimp Transactional Email tool (formerly Mandrill)
- Navigate to Settings > Domains > Sending Domains
- Add your domain if you haven’t done so already
1.2 Get DNS settings
- Once your domain is added, click View DKIM/SPF Setup Instructions to get the DNS settings
- Optionally, verify your domain by clicking View details and receiving an email to your domain
1.3 Update DNS records
- Follow Mailchimp’s instructions to update your DNS records with your domain host
- Wait for DNS changes to propagate (this may take up to 48 hours)
- Mailchimp will email you once your domain is verified
Step 2: Create API key
2.1 Generate API key
- In Mailchimp’s Transactional Email Tool (formerly Mandrill), go to Settings
- Click + New API Key
- Optionally, name your API key something recognizable like “Ocamba API Key”
- Once the API key is created, copy it to your clipboard
- Also note your SMTP Username
Step 3: Configure Mailchimp in HoodEngage
3.1 Access email settings
Use this shared guide to access HoodEngage Settings > Email: Email configuration basics
3.2 Add new email configuration
In the Add email configuration form, complete the following Mailchimp-specific fields:
- Fill out the integration name
- Switch the toggle button to Active
- Choose Mailchimp as provider
- Paste in the API key and SMTP Username you copied earlier
- Add the default name and email address you want your emails to come from
- Click Validate to verify your configuration
Step 4: Set as default (optional)
To set your Mailchimp configuration as default:
- Go to the email configurations overview
- Click on the Set as default button next to your Mailchimp configuration
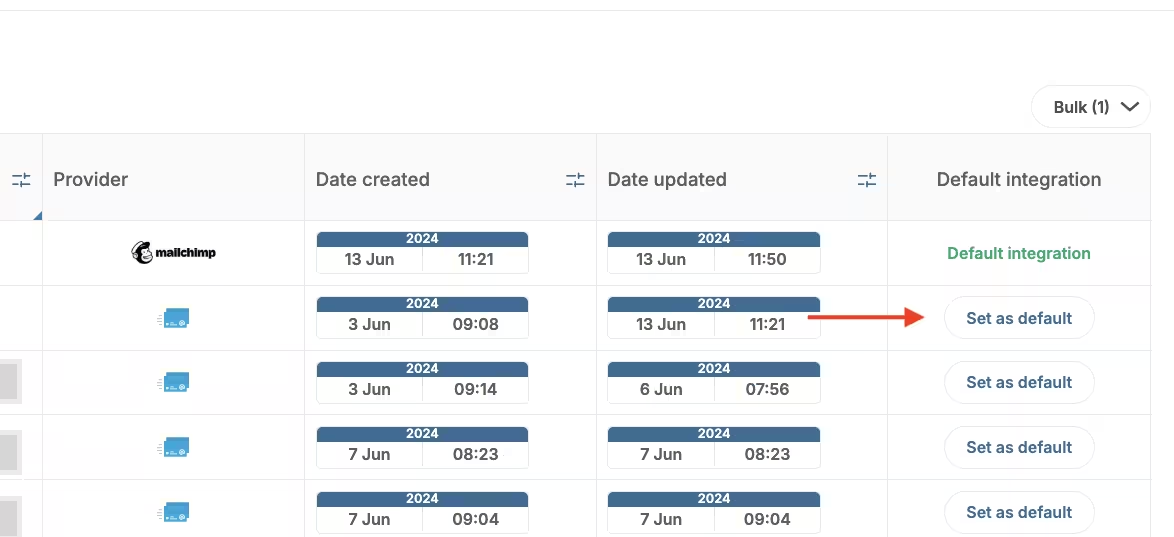
Email configuration - Set as default
Setting a configuration as default means it will appear first as an option when sending emails in Campaigns.
Step 5: Add subscribers
You can add email subscribers using several methods:
- Dashboard Upload — Upload a CSV of emails and user data or manually add emails
- Server API — Programmatically add emails server-side
- SDK Method — Add emails using our client-side SDK (recommended if using our SDKs for push or in-app messaging)
- Email Web Prompt — Use a web prompt to collect email addresses and phone numbers
Step 6: Send a test email
- In HoodEngage, navigate to Messages > Email
- Select New Email
- Add a subject line
- Click Send Test Email
- Input your email address and press Send Test Message
An email should arrive in your inbox shortly, confirming your setup is complete!
Troubleshooting
API Key validation fails
Cause: The API key may be incorrect or expired.
Fix:
- Double-check you copied the entire API key without extra spaces
- Verify the API key is from the Transactional Email tool (Mandrill), not regular Mailchimp
- Generate a new API key if needed
Domain not verified
Cause: DNS records haven’t propagated yet.
Fix:
- Wait up to 48 hours for DNS propagation
- Verify you added the correct TXT and CNAME records
- Use a DNS lookup tool to check if records are visible
Emails not being delivered
Cause: Domain verification incomplete or sender reputation issues.
Fix:
- Ensure your domain is fully verified in Mailchimp
- Check Mailchimp’s sending activity for bounces or blocks
- Verify your sender email matches your verified domain