Web SDK instructions
To implement web push notifications and modals on your website, you must integrate the HoodEngage Web SDK.
HoodEngage’s web push notification system is supported across all major browsers, such as Chrome, Firefox, Edge, Safari, Opera, etc.
Where to find Site setup and the Instructions tab
- In the left sidebar of Hood, click Site Setup.
- At the top of the configuration screen you will see several tabs: Performance, Configuration, Tags, Push, Modals & Forms, Analytics, Variables, and Instructions.
- Click the Instructions tab to open the integration steps and copy the code you need.
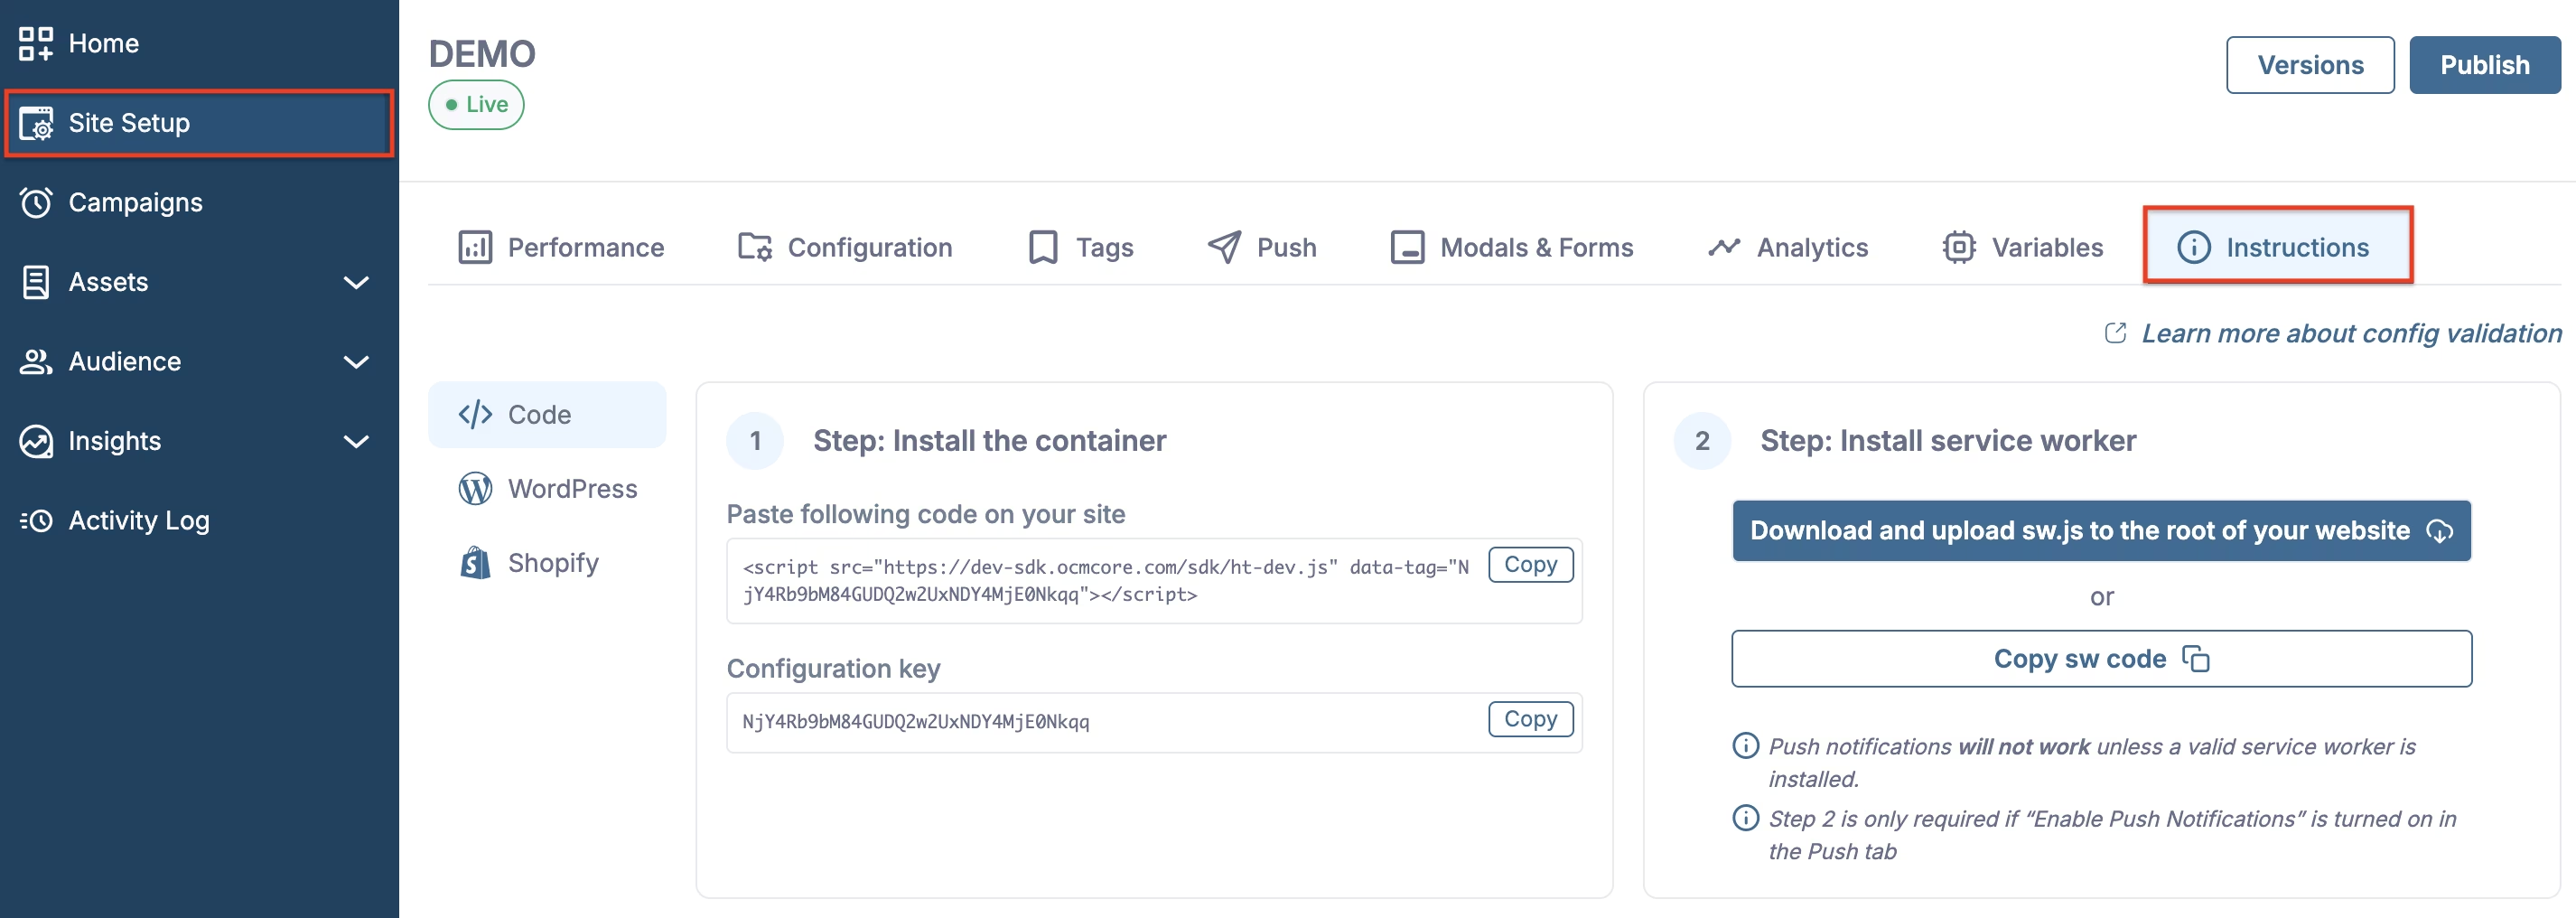
Site setup - Instructions tab
Step 1: Install the container
This step embeds the HoodEngage SDK on your site so it can load your configuration and run modals, tags, and (when enabled) push.
Paste the following code on your site
In the Instructions tab you’ll see a grey code block with a<script>tag. Copy it and paste it in the<head>(or before</body>) of every page where you want HoodEngage to run. Use the Copy button next to the code block to copy it in one click.Configuration key
Below the script you’ll see the Configuration key for this configuration. You can copy it with the Copy button next to it. You need this key if you load the SDK manually or use it in custom integrations.
Step 2: Install the service worker
The service worker is required for web push notifications. It must be installed only if you use push.
Download and upload sw.js to the root of your website
Use the blue Download and upload sw.js to the root of your website button to download the service worker file. Upload the downloadedsw.jsto the root of your site (e.g. so it is available athttps://yourdomain.com/sw.js).Or copy the service worker code
If you prefer to manage the file yourself, use the Copy sw code button to copy the service worker code, then create a file namedsw.jsin the root of your website and paste the code into it.
Important:
- Push notifications will not work unless a valid service worker is installed. Make sure
sw.jsis deployed to your site root and accessible. - Step 2 is only required if “Enable Push Notifications” is turned on in the Push tab of your configuration. If you use only modals, tags, or analytics, you can skip this step.
The HoodEngage SDK file must be publicly accessible and should be located at the top-level root of your site. The HoodEngage SDK will search for the file at https://ocamba.com/sw.js
Configuration tabs in Site setup
Within the Site Setup page, you’ll find several tabs: Performance, Configuration, Tags, Push, Modals & Forms, Analytics, Variables, and Instructions. The following sections explain the purpose of each tab.
Performance
The Performance tab shows key metrics for that configuration over a chosen period. Use the date range and the By hour (or other) granularity at the top right to filter the data; use the refresh control to reload.
The dashboard displays metric cards in a grid. You can track: Push Subscribers (users subscribed to push), Push Allows, Modal Closes, Prompt Closes, Prompt Views, Modal Views, Modal CTA Conversion, Modal CTA, Push Show, Push Block, Push Block Auto, Push Block Silent, and Prompt Denies. If there is no data for the selected period, each card will show “No data to display.”
Configuration
Control Configuration Status with the toggle (e.g. to set the configuration Live or not), and manage which domains can use this configuration. Use Add Domain to add allowed domains. By default, your tag works on any domain where it is installed; for better security and control, we recommend adding the domains you use - once added, events from other domains are ignored.
Tags
In the Tags tab you create and manage tags for this configuration.
Creating a tag
- Click Add tag. The tag creation screen opens.
- Use Select category and Search to find a tag type, then pick one (e.g. Custom Code, Google Analytics 4, Google Analytics Universal, Adobe Analytics, Yandex.Metrica, Microsoft Clarity).
- Set the tag Name and Group.
- Configure Activation Triggers (the profile or system event that must occur before the tag runs - use the gear icon to add them) and Render Conditions (when the tag may be considered for execution - use the gear icon to add them).
- Set Render into (Head, Body or Element) and Render action (Append, Prepend or Replace) as needed.
- Click Confirm to save the tag or Cancel to close without saving.

Add tag
Push
In the Push tab you configure push notification behaviour for this configuration.
Use the toggles to enable or disable Show Push Subscription Prompt, Auto Resubscribe, and Suppress prompt on related subdomains once profile subscribes.
Set Custom Service Worker Path (e.g. /sw.js) if needed. Use Push API Key to copy the API key and Add Push Prompt to create a new push prompt.
The list below shows your prompts: you can reorder them (drag by the grip icon), turn each on or off with the toggle, and edit with the pencil icon. For more on Push prompts, see Push permission prompts.
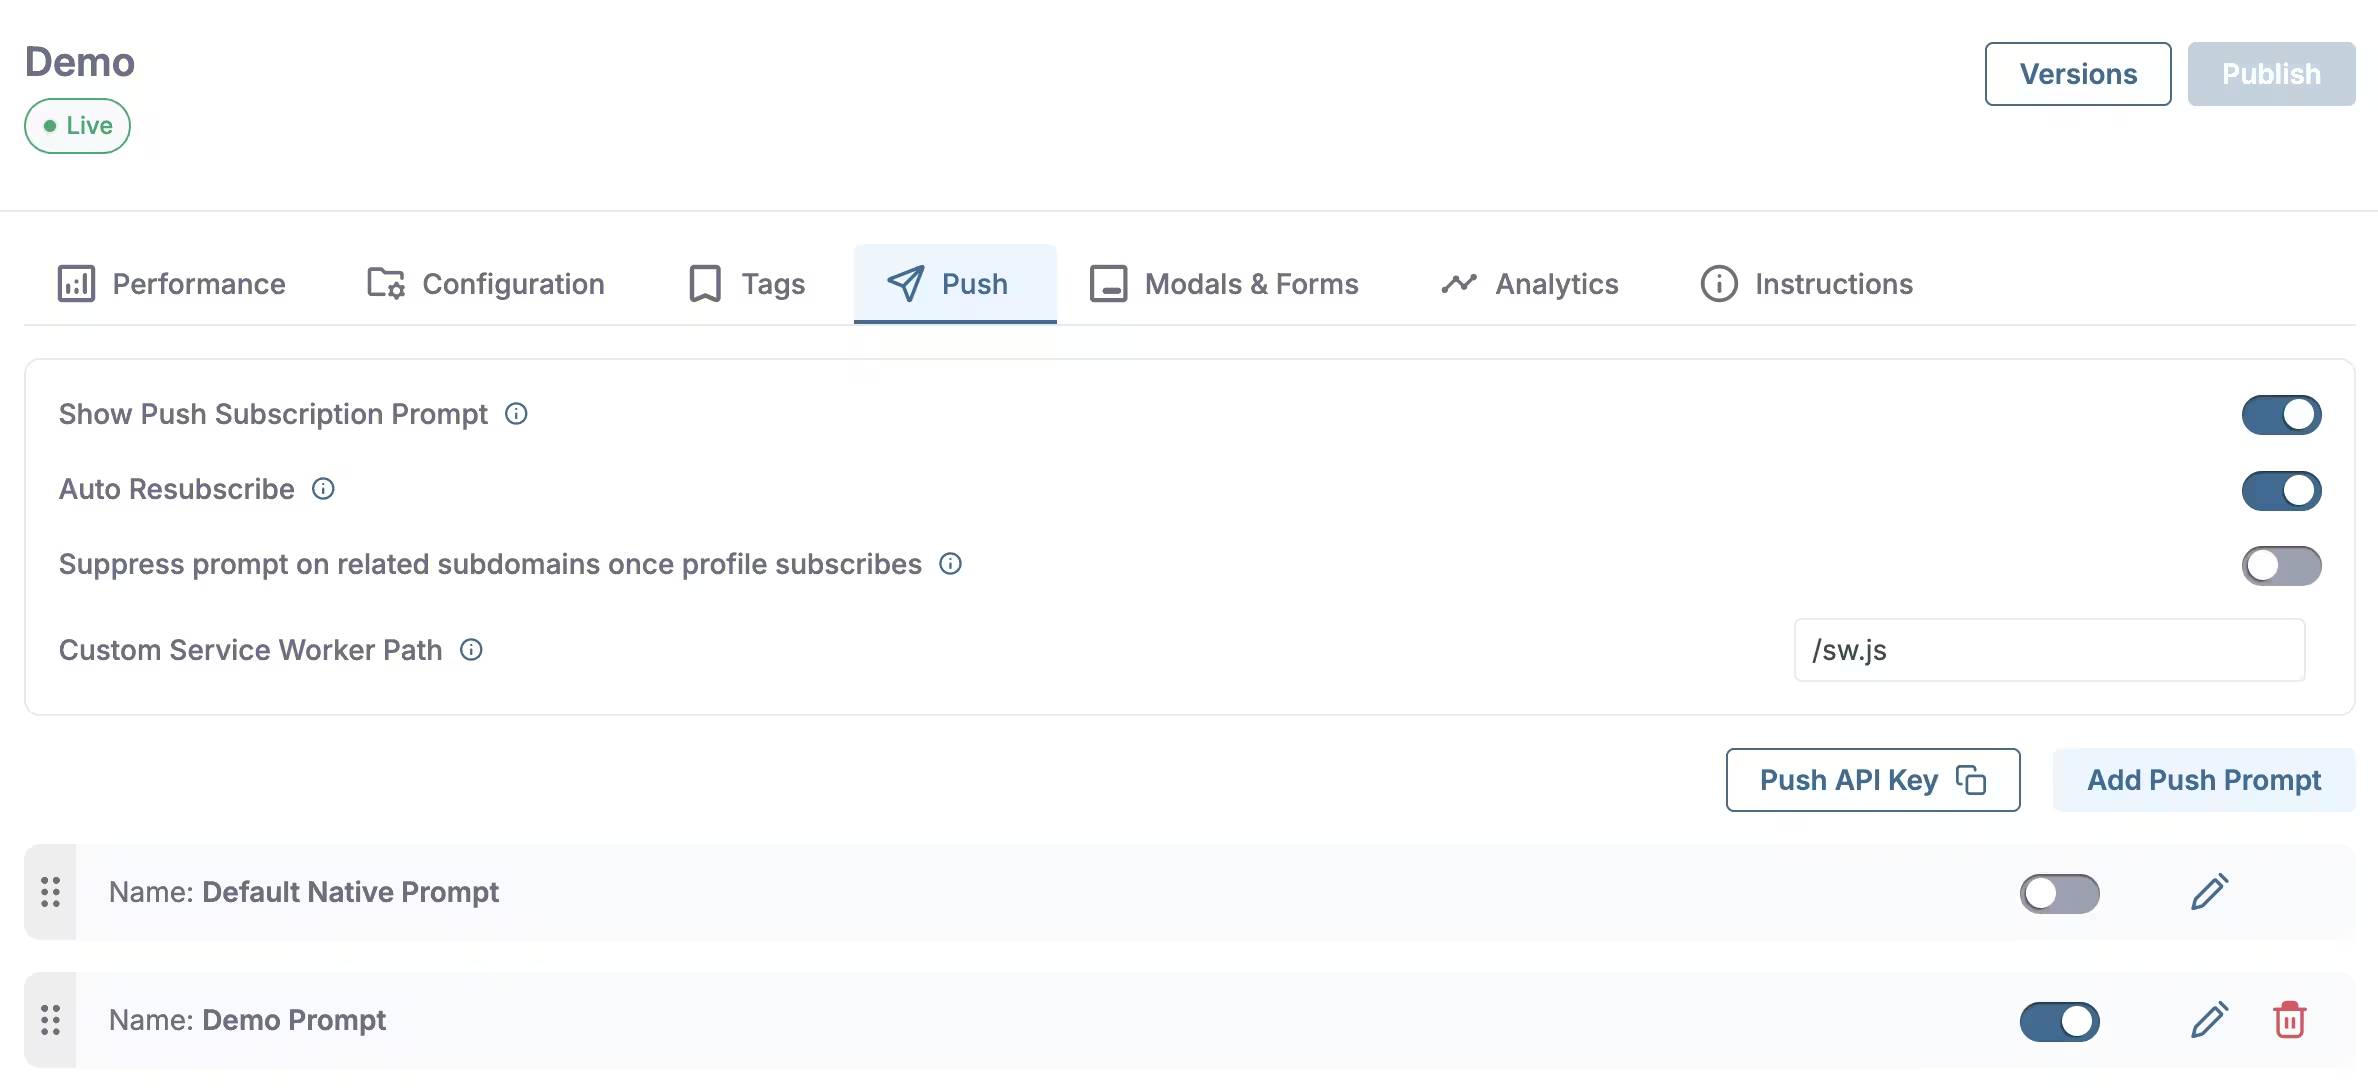
Push tab
Modals & Forms
In the Modals & Forms tab you manage modals and forms for this configuration.
Use the Enable Modals & Forms toggle to turn the feature on or off, and Add Modal to create a new modal.
The list shows your modals: reorder them by dragging the grip icon, turn each on or off with the toggle, and use the pencil icon to edit or the trash icon to delete.
For additional details about modals, see the Modals documentation.
Managing more than 50 modals may impact load performance; consider splitting them across multiple configurations.
Modals in the same group will execute only the first matching one.
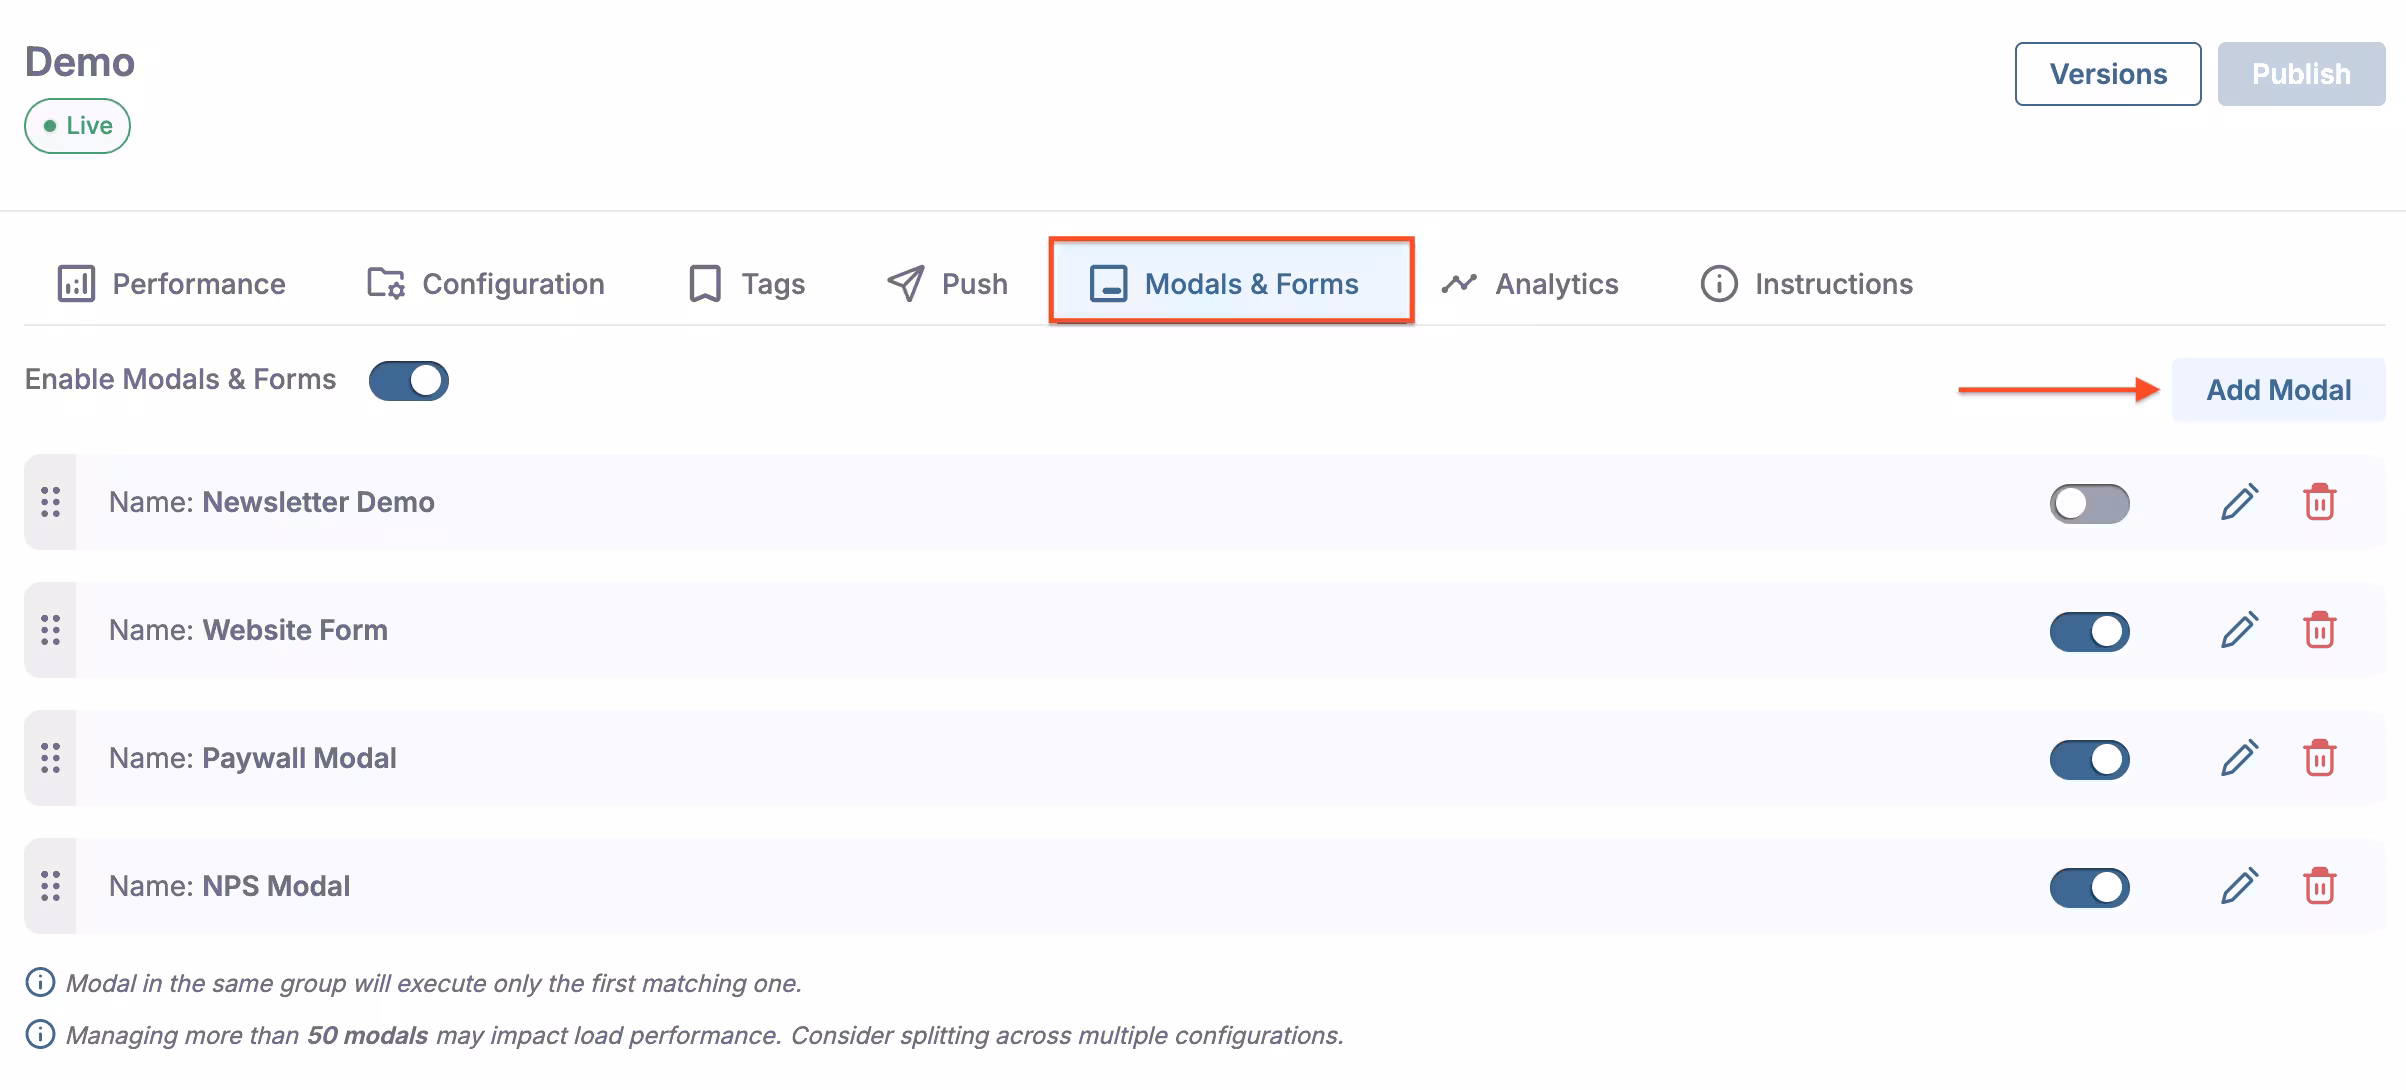
Modals & Forms tab
Analytics
In the Analytics tab you turn analytics-related features on or off for this configuration. Use the toggles to enable or disable Analytics, Consent, and Crashlytics. Here’s a quick overview of what each one does:
- Analytics - Collects basic statistics about what happens on the site where the container is installed. When enabled, the script records events such as pageviews, sessions, and similar. This data is then used in the platform to show statistics and reports, and for everything related to site or campaign analytics and performance. If this option is off, the container can still run other features (e.g. push or modals), but analytics events from the site are not sent and visit statistics are not recorded.
- Consent - Tied to privacy and regulations (mainly GDPR). It defines whether user consent is required before certain data is collected or certain features run on the site. In practice, the container checks whether the user has given consent for data collection or for specific functionalities (e.g. push). This option is especially relevant for push, since push requires the user to explicitly allow notifications. When Consent is on, the script respects the consent status and can run other modules only when consent has been given.
- Crashlytics - Tracks errors and issues that can occur when the script runs on the site. If a JavaScript error happens or something does not work as expected, Crashlytics can record where and when the problem occurred, which helps identify and fix bugs. This gives the platform visibility into technical issues on the site or in the script integration.
Variables
The Variables tab shows the variables available for this configuration (for example values you can use in prompts, modals, or custom code). This tab helps you review and manage data points that can be referenced across your implementation. For more details about variables and how to use them, see Variables.
Instructions
Integration steps and code (container, service worker). See also WordPress Push notifications, and Shopify Push notifications.
Publishing changes
Changes in Site setup take effect only after you publish them, or if automatic publishing is enabled in Settings. To publish manually: use the Publish button in the upper right corner and enter a version (e.g. a version number or short description).
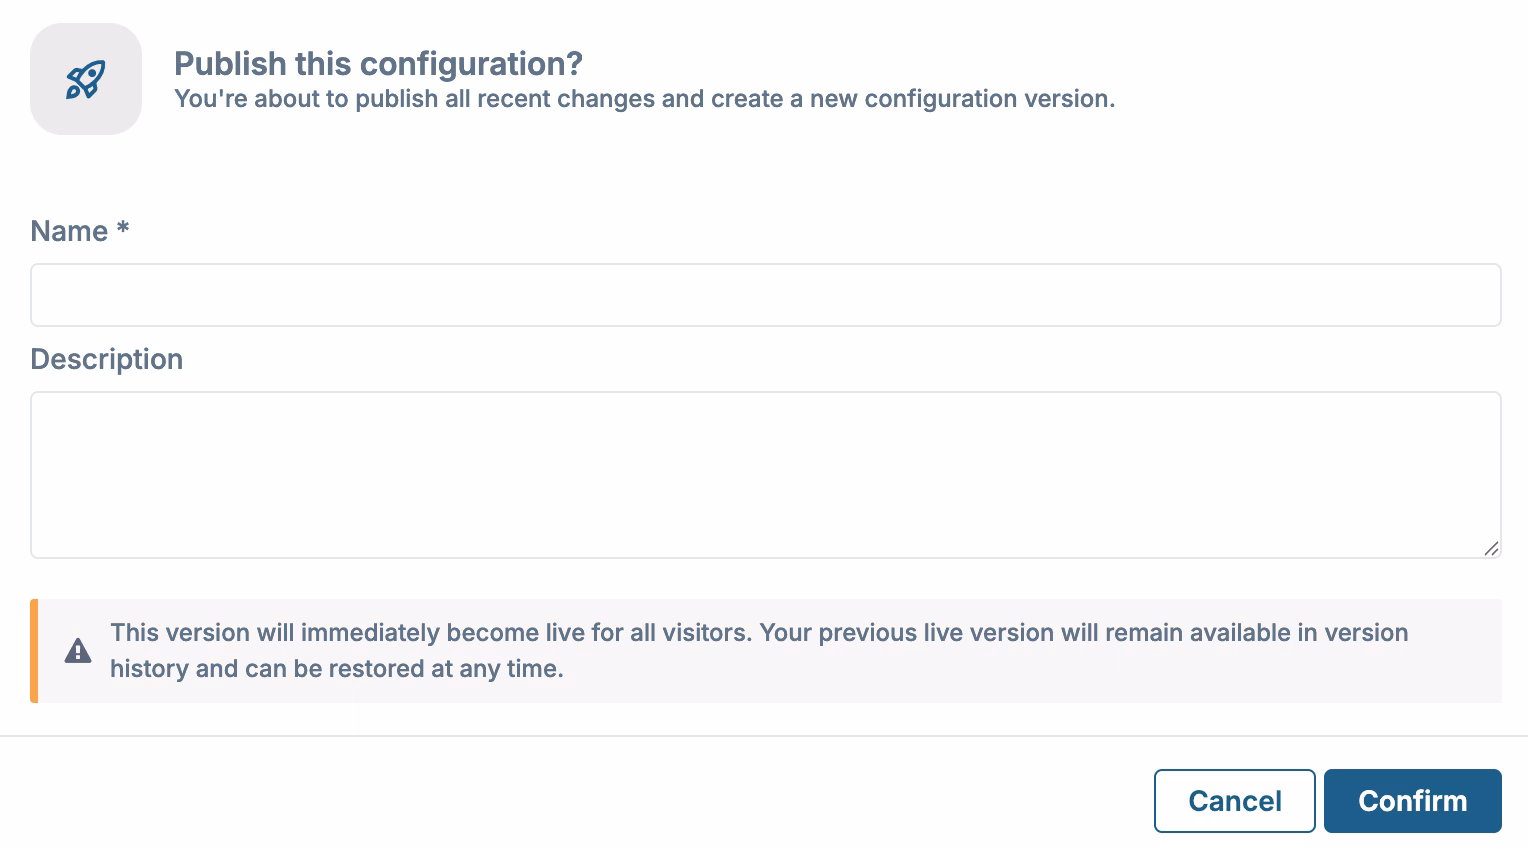
Publish button and version
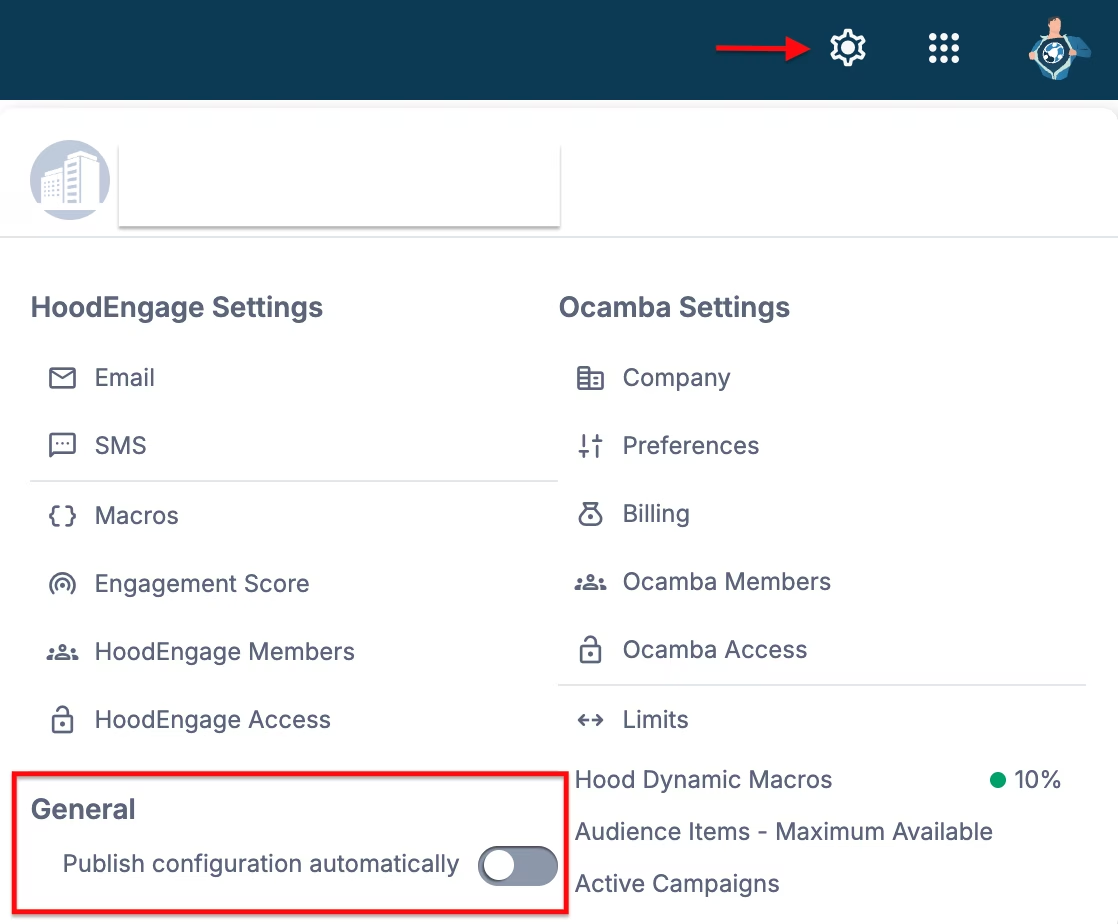
Publish configuration or set automatic publishing in Settings